How to Build a Hugelkultur Bed
Have you ever heard of hugelkultur gardening before? If not, you're right now wondering what is a hugelkultur? And why should I be interested in a hugel-something garden? Let me demystify this ancient method of gardening, show you how to build a hugelkultur bed and tell you why I love my hugekultur raised garden beds so much!
How to Pronounce Hugelkultur
Before we go any further, let me teach you how to say hugelkultur!
The word hugelkultur (hoogle-culture) is German and means "hill mound" or "hill culture." Many people struggle to remember this unusual name, but Erin from Yellow Birch Hobby Farm has a way of putting it. Hugelkultur "rhymes with “google culture”…which is rather appropriate for our day and age."
What is a Hugelkultur?
The hugelkultur garden bed is really just a heap of natural materials created with items found on your farm or acreage.
Once the layers of these traditional garden beds have been put down, they sit, decompose and form good micro-organism cultures as you grow food on top of the heap. And there are lots of benefits that come with it. But more on that later.

Layers in a Hugelkultur Bed
As you can see in the simple diagram above, there are 4 key layers in a hugelkultur. Each one serves a distinct and unique purpose, and understanding the why behind each will help you build hugekultur garden beds properly, if and when that day comes for you!
Layer 1: A Wood Base
The first layer in the hugelkultur raised garden bed is wood. I know! If you grew up with a mum or grandmother who loved gardening, you were probably told that wood was a bad idea and to keep it out of the garden. But in the hugelkultur garden bed, a wood base is important and actually offers the gardener several real benefits.
- Wood creates a solid base that acts as a natural and dense weed barrier for the garden beds above.
- By piling up a wood base, you'll create naturally raised garden beds that don't require lumber, a hammer or nails.
- For the first while, decaying wood will release heat into the soil above, making it possible to plant earlier in the spring. It also makes an excellent environment for heat-loving plants.

Layer 2: Hot or Green Matter
Directly on top of the wood comes the 2nd layer of what gardeners call "hot matter."
You might be wondering what qualifies as hot matter? Not-yet-composted animal manure (livestock or poultry), green leaves, fresh lawn clippings or some people even put their kitchen compost directly on top of the wood base.
Yes, there are 2 key reasons for this layer!
- Green matter gives wood the nitrogen it needs to start breaking down.
- Offers your plant more nutrients if and when roots reach this layer.
- Decomposition gives additional warmth to soil in the first year.

Layer 3: Good Growing Soil
Because the green matter is initially too hot for your plants, a hearty layer of growing soil is a must in hugelkultur raised garden beds! If you research how to build a hugelkultur online, you'll find varying ideas about how much growing soil is necessary.
Some gardeners say 6-8 inches are all you need. While others (like myself) find that 10-12 inches have been optimum for their beds.
And truth be told, I think this often depends on how tightly your wood base is stacked.
When it's all said and done and soil has filtered into all the cracks and crevices, you need about 8 inches of soil on top for optimum growing of herbs, berries and vegetables.
Layer 4: Mulch for the Soil
The last layer in the hugelkultur raised garden bed is mulch! Because hugelkulturs have a wood base, you don't want to till the soil.
Instead, a hearty layer of mulch is applied to help keep weeds under control. Old straw, rotting hay or even dried out lawn clippings are an excellent option!
I teach you how to dry grass clippings for your garden here.
Benefits of mulching your hugelkultur garden beds include:
- Less weeding because mulch keeps seeds from sprouting.
- Mulch helps hold moisture in and you won't have to water your garden as often.
- Over the summer, mulch will break down and add nutrients to your garden soil.
Watch the Tutorial! How to Make a Hugelkultur Garden
How to Build a Hugelkultur Garden Bed
Building a hugelkultur garden bed takes lots of work. But the beautiful thing about hugelkulturs is that they only improve with time and age. Unlike a lumber box that is going to start decaying and losing boards, the hugelkultur get better with time. So let me show you how to build a hugelkultur garden bed!
Step 1: Choose Your Garden Location
The first thing you need to think about when building a hugelkultur garden is this: hugelkultur beds are permanent! You can't move a hugelkultur without destroying the entire garden bed. So when you choose your garden location, make sure it's in a convenient place where it can stay indefinitely.
In my book on hugelkultur gardening, I walk you through more specifics you need to think about.
Step 2: Come Up with a Shape for Beds & Your Garden Layout
One of the things I love about hugelkulturs is the freedom they offer when shaping your garden beds and garden. Unlike raised beds build from lumber, it's easy to make round, hexagonal or triangular shaped beds. If you want to get creative with your garden design, hugelkulturs are the way to go!
Before you start building hugelkulturs, come up with design for garden beds and the entire garden layout. You can get very creative. Or keep it simple.
In my guide to building hugelkultur beds, I have several unique and beautiful designs I share with you.
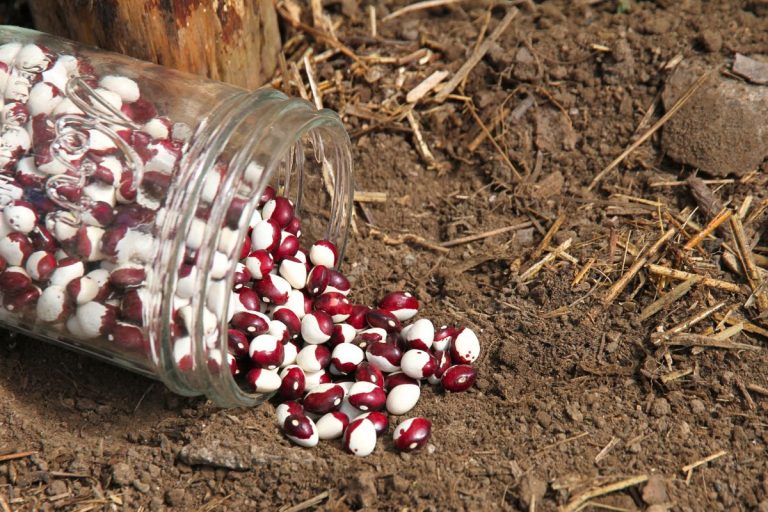
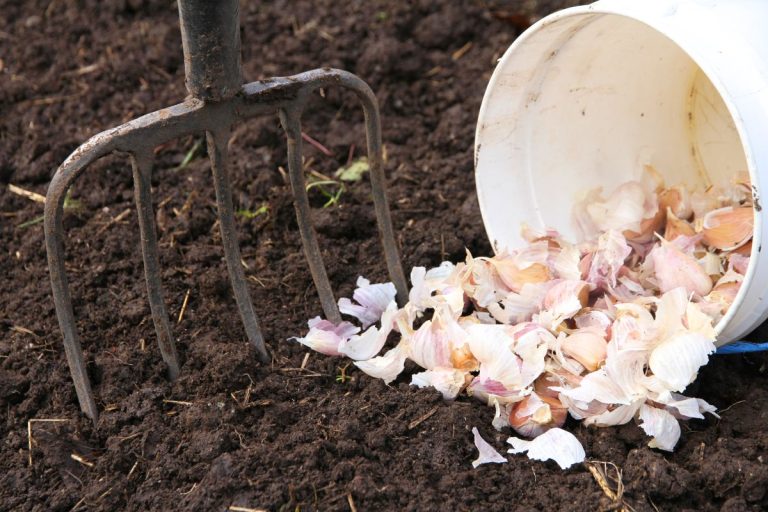
Step 3: Collect Raw Materials for Your Hugelkultur Raised Garden Beds
Once you've decided on a location and the layout of your garden, it's time to start collecting materials! We already covered what is necessary, but I'll quickly list them again for you here.
- 1. Wood for the base: you can use old logs, firewood or even go fall some trees for the wood base.
- 2. Hot matter: you can use poultry or livestock bedding, fresh clippings from your lawn or compost that has not yet broken down.
- 3. Growing soil: don't top your garden beds with "junk" soil; plants need nutrient-rich dirt to grow in!
- 4. Mulch for a cover: last but not least, you'll want to source old straw or well-rotted hay so you can apply a 2-3 inch layer of mulch to each garden bed.
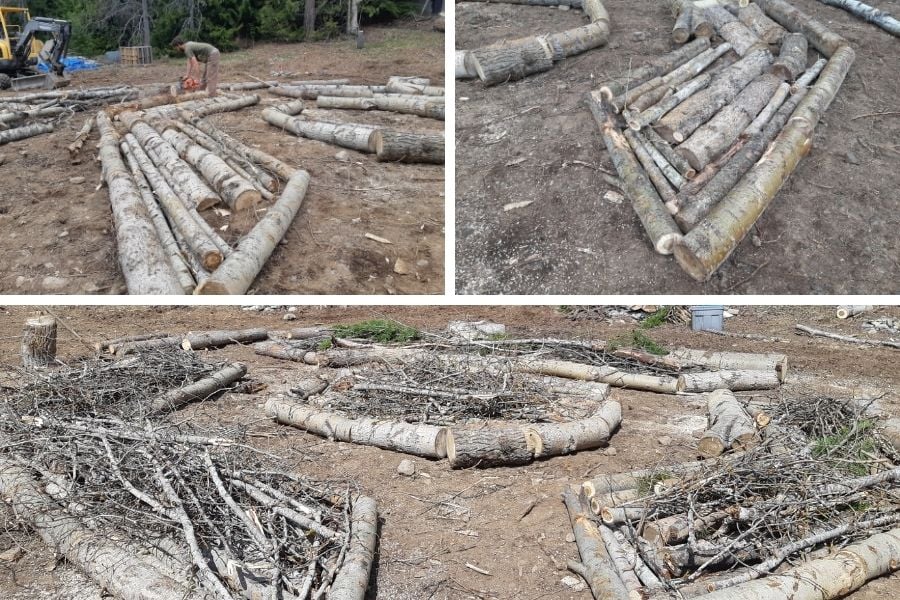
Step 4: Form the Outline of Each Hugelkultur Garden Bed
When your materials have been collected, it's time to start construction your garden beds.
By dragging logs around, you can form the outline of each individual garden bed and make sure you've got spacing right, etc. This is especially helpful if you are making uniquely designed garden beds.

Step 5: Put Down the Wood Layer
After each garden bed has been "framed" in, go ahead and fill in the centers with wood. You can use whole logs or you can split shorter lengths, firewood style, so that you can tightly stack the wood.
Small tree branches and twigs are excellent for filing in the cracks and make a good "top layer" that will break down faster than the logs below.
Step 6: Cover Wood with Hot Matter
Once you created a solid wood base on your garden beds and they have been built up to the height you want, it's time to cover the tops with hot matter.
You don't have to be careful with this part!
Shovel, dump and rake the good around on top of the wood. You can even walk on top, stomping the matter into cracks and making sure it gets into the crevices.
When you have about 2-3 inches of hot matter on top, rake it smooth and carry on to the next step.

Step 7: Add 10-12 Inches of Rich Growing Soil
This is where it gets exciting and your garden beds actually begin to look like real beds. It's time to start adding good soil!
Heap soil onto each garden bed. Add, spread, add and spread, until there's about 10 inches of soil sitting on top of the wood and hot matter.
Smooth out the surface with the back of a rake, just as you would want it look before planting.
Step 8: Mulch Your Hugelkultur Raised Garden Beds
The last step in the building process is to mulch your growing soil. I like to use old straw bales that have been rained on and are no longer of use to the farmers around us.
If you can find old hay that is decomposing, this is also a wonderful option. Just make sure it is well rotted, so that all grass seeds have been destroyed.
Black and molding is usually best! Just be sure wear a mask to protect your lungs from mold when spreading it.
You can also use dried out lawn clippings as well. It's a bit different than using straw or hay, but I teach you how to mulch with grass clippings here.

Step 9: Plant Your Hugelkultur Garden
After your hugelkultur garden beds have been mulched, I recommend giving it a thorough watering to settle the mulch.
You can plant immediately after. Part the straw and plant your seeds or set in seedlings.
And just like that, your hugelkultur garden beds will start growing herbs, berries and vegetables to feed you and your family!
Q & A on Hugelkultur Garden Bed
Hugelkulturs are a foreign idea to many gardeners, whether they're brand new to growing food or have been gardening for years. So let me take a moment to answer some commonly asked questions about hugelkulturs!
How tall should my hugelkulturs be?
The height of your hugelkultur raised garden beds is totally dependent on your personal preference! Some gardeners like creating 3-4 ft tall beds, while others (like myself) prefer 2 ft beds.
Just remember that the height comes from the wood base and the higher a bed is, the more wood it'll take to create. Also keep in mind that as the wood decays, your garden beds will settle and lose some of their height.
Hugelkulturs should be however tall you want them!
How long will my hugelkultur last?
If hugelkulturs are treated like a "normal" garden, you'll discover they last indefinitely.
Each year, composted matter and good growing soil should be added to maintain the nutrient levels in the soil (as with any garden).
And while the wood will fully decompose and settle after a while, your hugelkulturs will continue to produce healthy food, herbs and flowers if you tend to the garden soil on top.

Do hugelkultur beds rob nitrogen from the soil?
Gardeners often ask the question "does the wood in a hugelkultur rob nitrogen from the soil?" In fact, this was my chief concern when I first began entertaining the idea of hugelkulturs!
But here's the deal: because the wood is so deeply buried underneath your growing soil, it doesn't really affect the topmost layers.
What kind of wood should I use for a hugelkultur?
Another question that is often asked is...what kind of wood can I use for building a hugelkultur? And the answer is broad!
Birch, maple, alder, poplar, pine, fir, fruit trees and such are all excellent options. The only ones you would wish to avoid would be tree types that are quick to send up suckers (such as willow and black locust).
These tree varieties should never be used when green and only when you're quite certain they're thoroughly dead.
I would also caution you on using wood types that are slow to break down (such as cedar and even oak). Not that they can't be used, but I would recommend putting them down first as a base layer and piling faster-decomposing wood types on top.
But I go through all this in great detail in my digital Book: Guide to Creating Hugelkultur Garden Beds.
How do you maintain a hugelkultur garden bed?
As with any type of garden, there is some maintenance required with hugelkulturs. Here are some of the key things you should consider before diving in.
- 1. Because hugelkulturs are no-till garden beds, you should apply mulch every year (or perhaps even 2x year).
- 2. Over time, the soil in your hugelkulturs will settle and will likely require a 2-3 inch addition of soil every year for the first few years.
- 3. As the years go by, you may need to add an extra log or two to the perimeter of your garden beds, just to keep the soil in place.
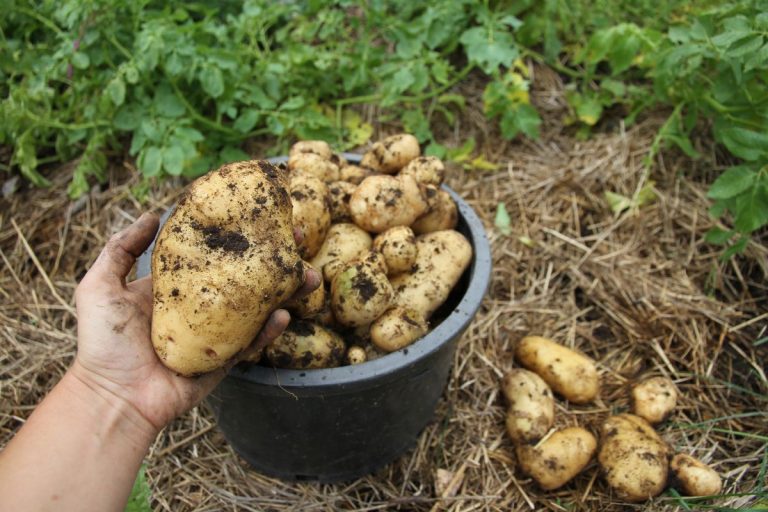
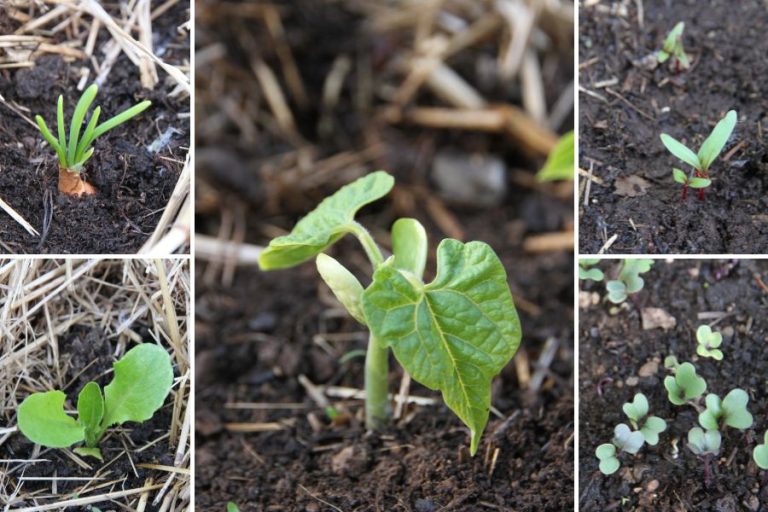
What can I plant in a new hugelkultur bed?
While you can certainly plant anything you like in a new hugelkultur garden bed, I usually advise that gardeners wait 2-3 years before planting deep rooting vegetable or tubers (parsnips, carrots, potatoes).
The soil is going to significantly settle in the first few years, and I would hate to have someone lose a crop because the soil settled too much and left vegetables exposed.
Initially, I recommend growing above-the-ground crops like herbs, peppers, tomatoes, squash, zucchini, cucumbers, lettuce, spinach, etc.
Shallowly root vegetables do just fine as well (turnips, beets, onions, etc).

What grows best in a hugelkultur bed?
Once your beds have settled, you can grow just about anything in a hugelkultur bed, provided there's enough growing soil on top!
But plants that really thrive in young hugelkulturs beds are your heat-loving plants. With the wood decomposing below, the soil warms from underneath, while the sun's rays warm the top. Here's a quick list of plants that seem to love hugelkulturs.
- 1. Basil (and any other heat-loving herb)
- 2. Eggplant
- 3. Peppers
- 4. Squash
- 5. Tomatoes
- 6. Zucchini
And while hugelkulturs seem to be especially suited to warm-weather crops, you'll find that you can grow anything in them.
Herbs thrive.
Flowers blossom.
Vegetables take hold and flourish. Because when it's all said and done, whether or not you can grow a crop is really dependent on the soil you use in that top layer.
That's it.

Cons of Hugelkultur Garden Beds
Yes, there are cons to hugelkultur gardening! And one gardener's con may be a pro for another. So I'm just going to give you the cons I discovered when hugelkultur gardening on my land.
- 1. Raised hugelkultur garden beds are quite labor intensive to build and can be hard on the back, especially when putting the wood base down.
- 2. Dirt does settle in the first few years and adding new soil every spring is usually necessary to maintain the proper soil depth for growing food.
- 3. If you have wet spring weather, slugs can be an issue between all the decaying wood and straw mulch (I give you some tips on how to deal with this in my book on building hugelkultur beds).
- 4. Mice, chipmunks or other rodents may move in underneath your garden beds and while I haven't personally had issues with them bothering plants, some gardeners may have issues with them.
- 5. Hugelkulturs are no-till beds, which means you should apply mulch at least 1x per year (if you live in a wet climate, you'll likely need to do it every fall and spring).
Pros of Hugelkultur Garden Beds
And now, let me give you a list of things that I love about hugelkultur raised garden beds!
- 1. If you want to create raised garden beds for next to thing in terms of dollars and cents, hugelkulturs are the way to go, particularly if you live on an acreage or farm where you can gather the supplies.
- 2. Raised hugelkultur garden beds are known for creating rich soil that contains lots of micro-nutrients and good soil bacteria colonies.
- 3. Because mulch is necessary, hugelkultur gardens require very little weeding which is always most welcome on a hot summer day!
- 4. You can create unique and beautiful garden designs with raised hugelkutur garden beds. I'm in love with my current kitchen garden layout (pictured above) and everyone who sees it is charmed by it too. That's a special freedom you get with hugelkulturs!
- 5. Unlike lumber boxes, hugelkulturs only improve with time and decay. If you want an indestructible garden bed, hugelkulturs are the way to go.
- 6. If you have poor soil, these beds are a wonderful way to put in large gardens above the ground.
Hugelkultur Results from Year 2
Still not convinced hugelkulturs really work and are the thing for you? Check out the follow up video I did the following spring, where I give you a tour of my kitchen garden!
What is the Point of a Hugelkultur and Is It for You?
At this point you might be wondering if hugelkulturs are worth it for you? We've already covered many of the key points on how to build a hugelkultur bed. And we've discussed some of the pros and cons. In the end, I would summarize the point of a hugelkultur with the following thoughts.
- 1. It's an excellent way to build affordable raised beds.
- 2. You get a garden that has a natural (aka wood) weed barrier.
- 3. Hugelkulturs only improve with age and time.
- 4. If you're the artistic type, these beds offer lots of freedom with design.
- 5. Because of the rotting wood under layer, hugelkulturs are known for fostering good soil bacteria and other micro-organisms.
In fact, did you know that hugelkulturs aren't just used for growing healthy vegetables and herbs? In his book The Holistic Orchard, Michale Phillips also recommends using hugelkulturs for growing fruit trees as well.
So are hugelkultur raised garden beds for you?
I hope you now have enough information to make that decision for your own garden!
Hi thank you for this! My bed is similar to yours, could you share how well your bed turned out? I would love to hear and see if there are any tweaks you recommend!
Thank you!
You can read about my 2nd year update here: https://atraditionallife.com/year-2-in-the-hugelkultar-kitchen-gardens/
Hopefully I can get around to doing a year 3 & 4 update sometime soon!
Thanks for the article. Very helpful! Would this work in a desert climate? Seems it would have trouble decomposing when it is so dry. Would watering be required? Also, is there any reason you could not do this within already raised bed structures for a city plot to make a look that's more tidy? Seems all that precious soil would fall off the top without borders to hold it in?
I've never tried it in a desert climate so I can't say for certain. If I tried, I think I would recommend putting them in the ground vs doing above-the-ground beds. Yes, you would definitely have to water it! I find the mulch tends to hold the soil in place, but you certainly can make higher edges, if desired.
Wow.... talk about a lot of work. You go, girl! Hopefully you'll be able to reap results for many years with your garden beds. Oh the energy of youth... the dreams and hopes and aspirations ! You are an inspiration. Loved seeing you run the chainsaw... a true logger's daughter. You are certainly a hard worker. Don't overdo it now.
It was loads of hard, hard work, but the return is supposed to be amazing. Let's hope it turns out to be a good thing! 🙂