Guide to Planting Asparagus Crowns in the Spring
Here's a simple guide to planting asparagus crowns in the spring, so you can establish this perennial vegetable in your garden for a returning harvest.
Asparagus is a long-lived perennial that is quite easy to plant and care for in your vegetable garden.
Roots love to be mulched in early spring, which makes it very easy to care for your asparagus patch the rest of the year. With fewer weeds and less watering, it's a crop that practically looks after itself!
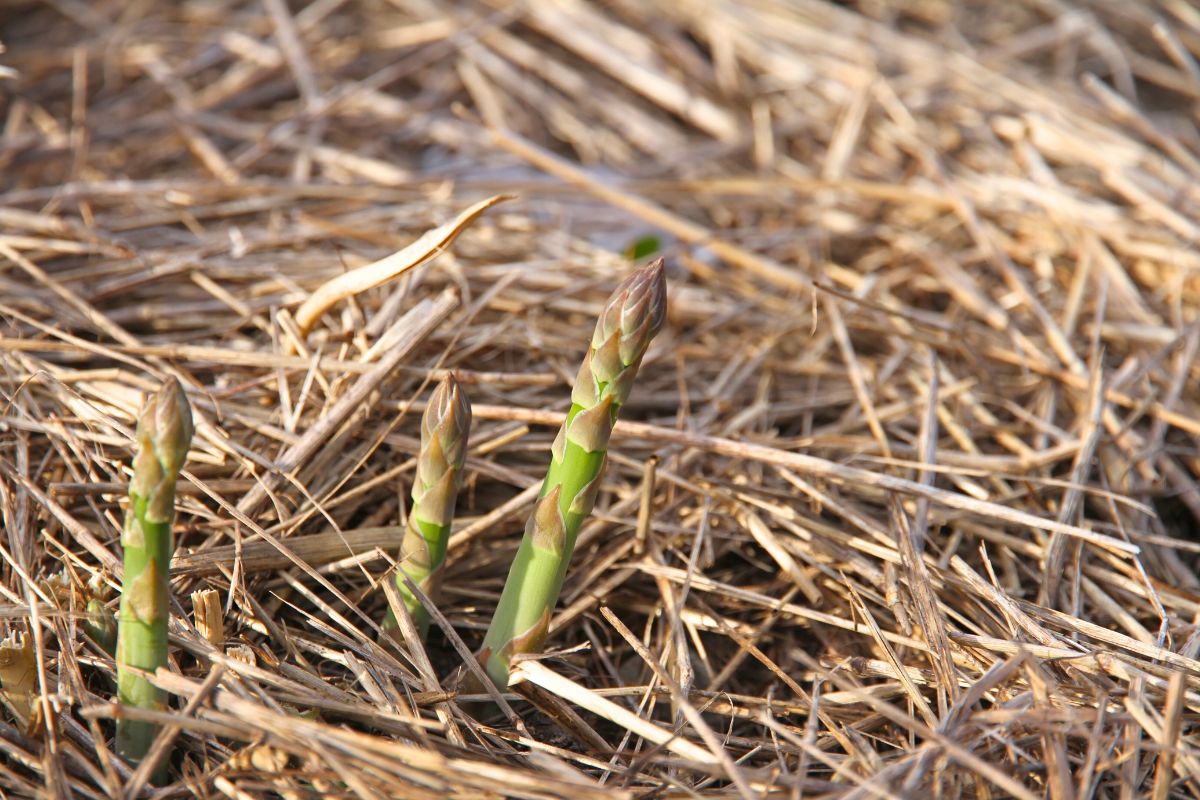
Around here, asparagus spears are very welcome when they appear! If you don't know the best harvesting practices, I show you how to harvest fresh asparagus here.
Helpful tip: because this vegetable is a perennial, asparagus beds need to be properly put to bed in the winter too! Don't worry. I teach all about cleaning up asparagus beds here.
We happily saute the spears in a cast iron skillet with butter, or add them to our morning omelettes.
The tender spears are easy to preserve too.
If I have time in the spring, I harvest asparagus over the course of several days. You can easily keep asparagus fresh in the fridge, until you have enough for preserving.
From there, I like canning pickled asparagus for a tangy winter treat, and I also freeze asparagus spears whole. To prepare them, I roast frozen asparagus in the oven and it's quite delicious!
We love growing and eating asparagus, but it does have a down side.
Asparagus takes a lot of space in the garden, and doesn't produce much in comparison to potatoes, corn or beans.
But if you have space, it redeems itself with an early harvest, and the fact that it returns again and again.
Asparagus Facts
Here are some things you might want to know before planting asparagus in your vegetable garden.
- There are many different asparagus varieties you can choose from, including green, purple and even white (provided you handle them properly).
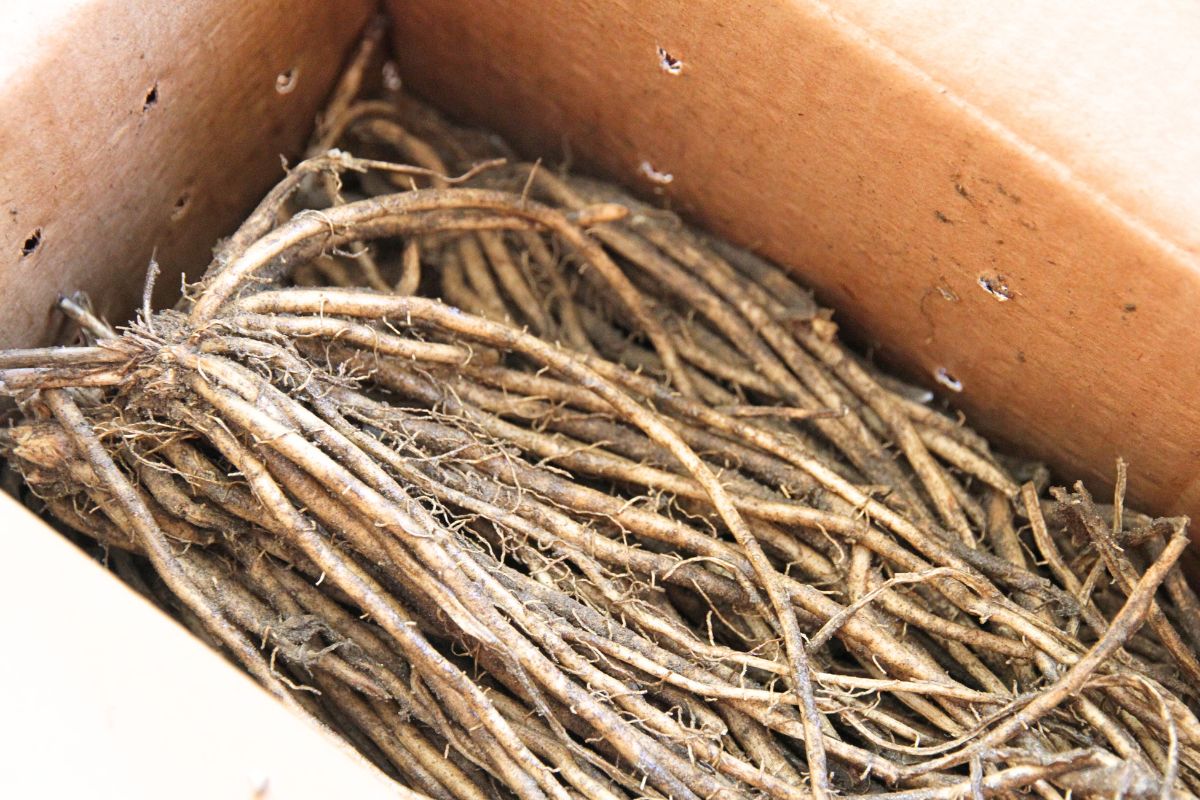
- Asparagus isn't usually sold as seed, but as 2 year old root stock (aka crowns) instead.
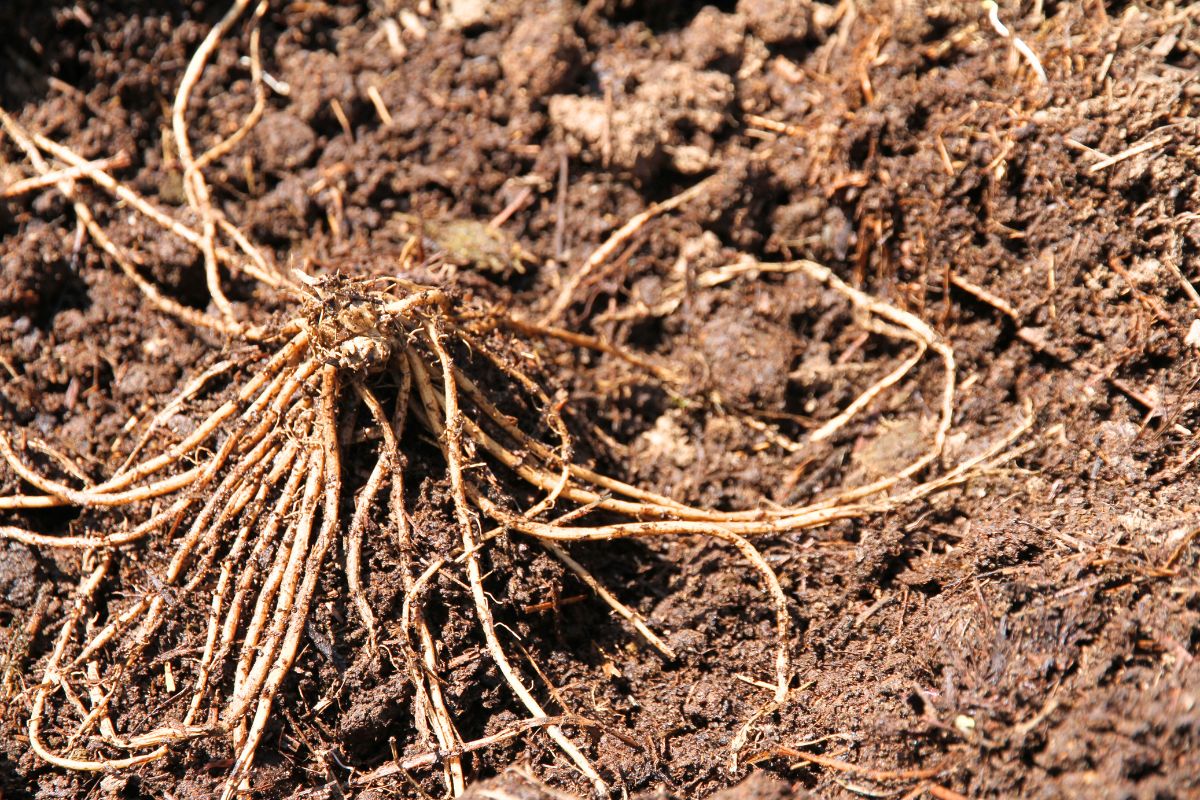
- Unlike some vegetables, a single asparagus crown will produce either a male or female plants (not both).
- With asparagus, female plants are fine and wispy, while male varieties are thick and chunky.
- Growers who sell asparagus starts only ship male asparagus crowns.
- When you plant asparagus crowns, there is a harvest pattern you need to follow until their third spring.
- Asparagus left at the end of harvest season will develop fern-like foliage that may reach 5-6 ft in height!
How to Tell If You Have Garden Space for Asparagus
At first glance, asparagus doesn't look like it would take much space in the garden. But actually, asparagus has a huge root system and you have to plan accordingly.
Crowns need to be 18 inches apart in a single row, and each row should have a minimum of 2 ft on either side.
If you were going to plant 20 crowns, you would need a garden bed that was 30 ft long x 4 ft wide. Be sure to look over your garden and realistically weight whether or not you actually have the space!
Number of Asparagus Plants per Person
If you want asparagus for fresh eating in the spring season, you'll want to plant about 10-12 crowns per person in your home.
But if you also want to preserve some of your asparagus, aim for 20 plants per person.
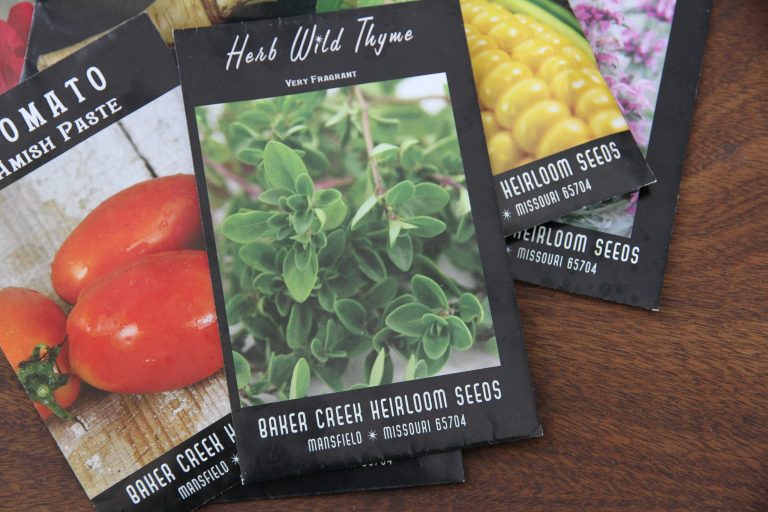
Where to Buy Bare Root Crowns
You may be able to buy bare root asparagus at your local garden center in early spring. But most folks have better luck buying from their favorite seed company.
Many of the big companies not only sell vegetable seeds, but also seed potatoes, seed garlic and asparagus crowns.
Best Way to Store Asparagus Crowns Before Planting
When you buy asparagus crowns online, they'll attempt to ship roots at the proper time for planting in your garden climate zone. But often, they aren't 100% accurate, which means you may have to store crowns until your garden is ready.
Here's how you can make sure your crowns don't die!
- Always check crowns when they arrive.
- If the roots are dusty and dry, give the crowns a light spritz with water to maintain humidity.
- Close the box flaps without sealing things up entirely, so there is airflow.
- Store the box in a dark, cool place (like the fridge, cold room or root cellar).
- Check the roots every few days for moisture, and to see if roots are still round and plump.
When to Plant Asparagus
Ideally, asparagus crowns would be planted within a few weeks of delivery, in early spring. If the ground can be worked and isn't waterlogged, prepare your garden bed and plant.
Where to Plant Asparagus
Asparagus roots likes full sun and well-drained soil. This is why many folks prefer to plant asparagus in a raised bed, especially if they have clay or heavy soil.
The native soil in my vegetable garden is very rocky and infertile, so we brought in soil to create our asparagus patch. Instead of building raised beds with wood, I mounded dirt until I had 3 garden beds that were 4 ft wide and 12 inches high.
A cover of mulch holds the freestanding soil in place, and my asparagus has done very well in this loamy soil!
Guide to Planting Asparagus
Step 1-Prepare Your Garden Beds
Asparagus crowns are heavy feeders, so it's a good idea to add organic matter or organic fertilizer to your garden beds before planting, if you possibly can.
I highly recommend using a broad fork or pitch fork to loosen the soil, working down until you have 12 inches of loam. If it's too difficult to dig down that far, you can also pile up soil (like we did), and easily create the 12 inches of loose earth.
Asparagus crowns are planted quite deep and they like good drainage. Loose soil drains better!
Step 2-Dig a Trench or Holes
You don't want to crowd asparagus. Even new crowns have a large root system, and will only continue to expand after planting. Asparagus can be planted in a trench, or you can dig individual holes.
Depth to dig for planting: make your holes or trench about 10 inches deep. The top of each crown should be 6-8 inches below the soil surface.
Spacing in a single row: new asparagus crowns need to be spaced 18 inches apart in a single row.
Spacing for multiple rows: if you want several rows of asparagus, space them a minimum of 36 inches apart.
You don't have to be overly particular about this. Just be sure to give new asparagus plants room to grow and expand, so they can create new spears throughout the garden bed.
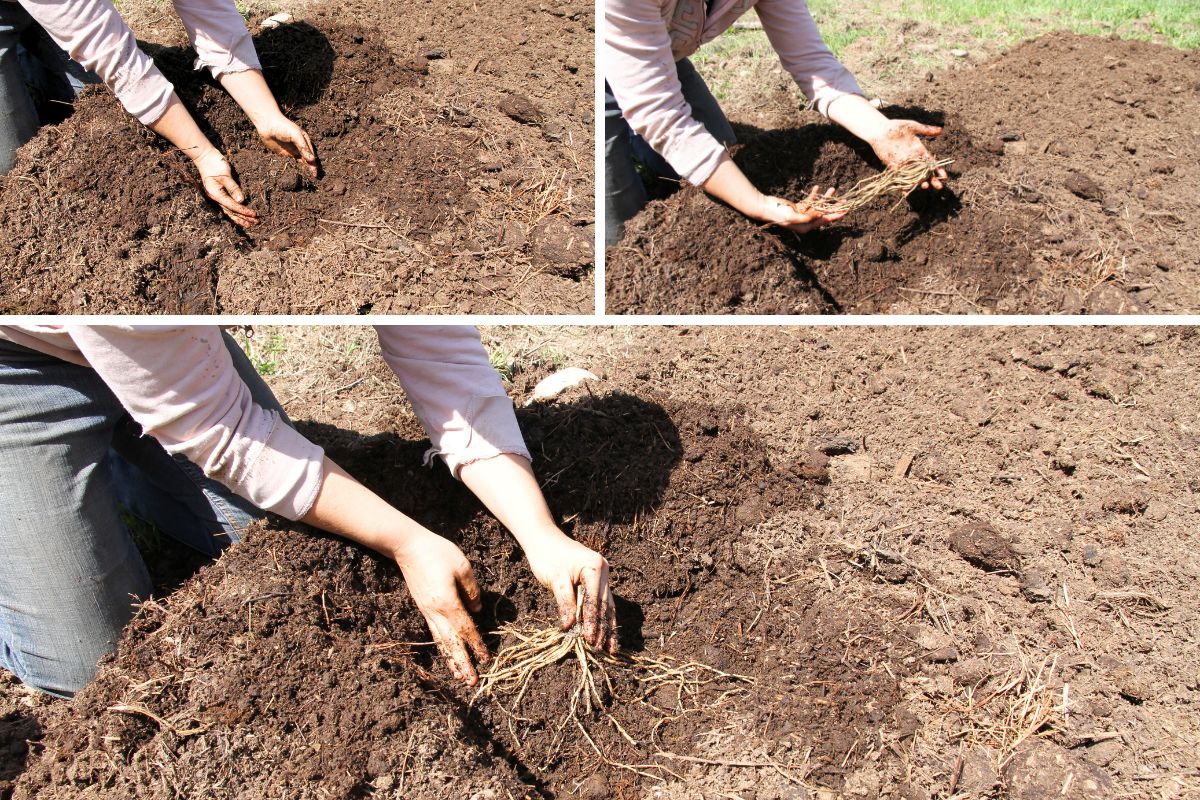
Step 3-Plant Your Asparagus Crowns
Don't drop asparagus crowns into your trench or hole, like you would with a potato. Here's the best way to plant them.
- In your row, take time to create raised 5-6 inch mounds every 18 inches.
- Drape a single asparagus crown over each hill.
- Spread the long roots out in all directions, so the plant will quickly develop a strong root system.
- Backfill the bare roots with soil, until they are covered by 6-8 inches.
- Don't pack the earth above your crowns; just let it rest and sit (asparagus doesn't like packed soil!).
Step 4-Mulch the Entire Garden Bed
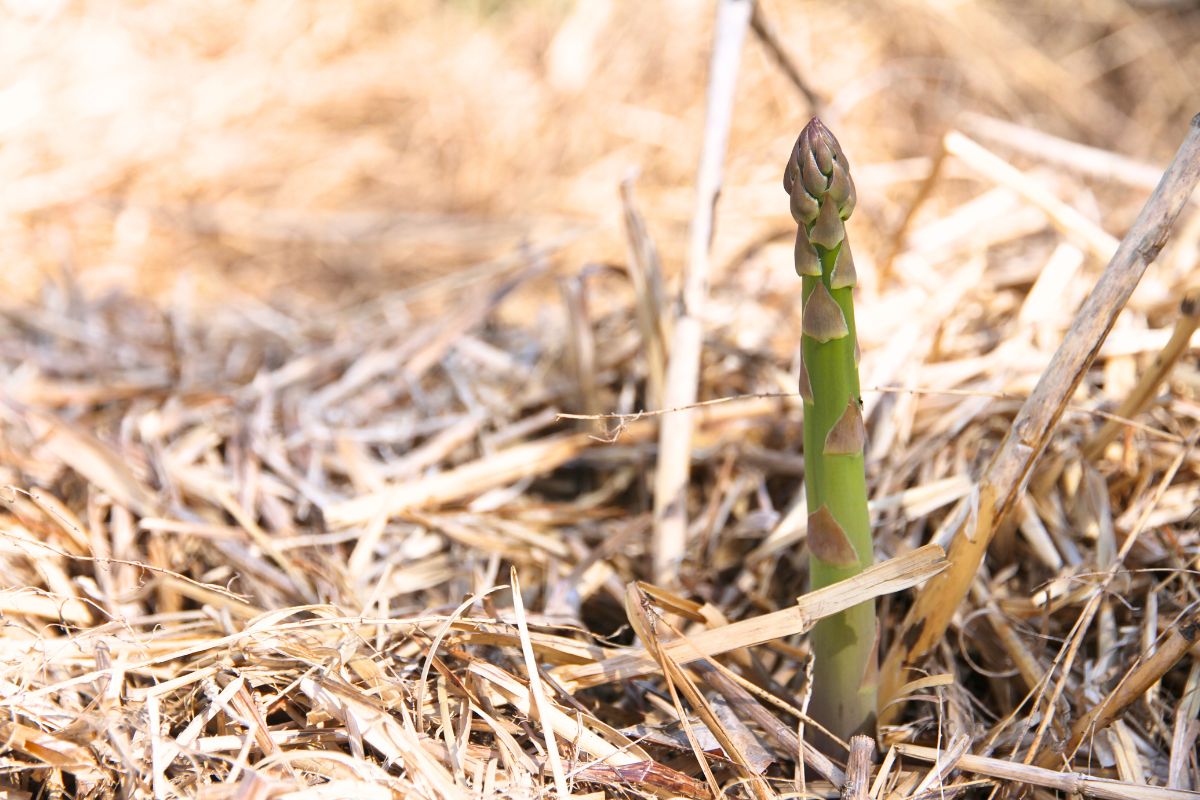
I spread 3-4 inches of straw mulch over my asparagus beds directly after planting.
Straw is light and regardless of spear size, asparagus stalks will be able to push up through it, while most weeds will be suppressed.
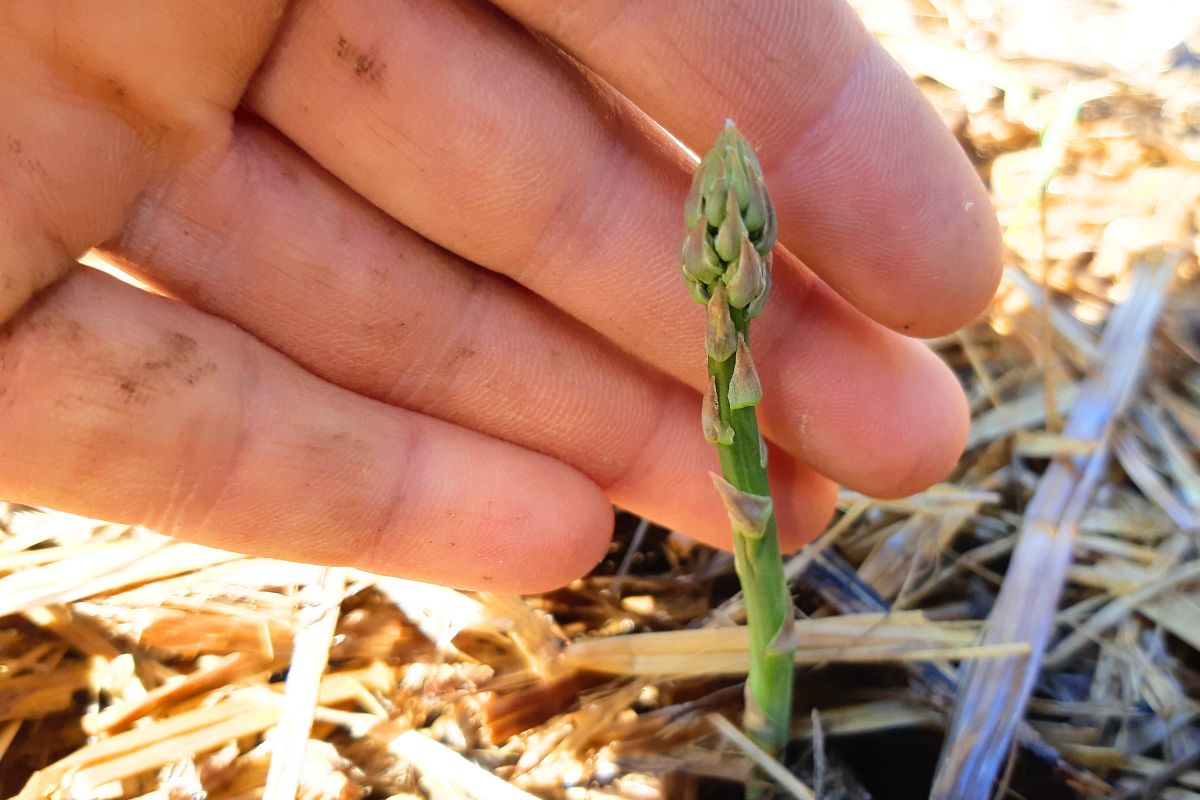
Step 5-Water & Harvest at Proper Times
After planting and mulch asparagus crowns, give the soil a good watering. And then, you have to be patient and wait. About the time you think everything died, tender asparagus shoots will start to appear.
Important note: to ensure you have healthy plants, be sure to follow the harvest schedule I outlined below.
Harvest Period According to Year
The First Spring
Don't harvest your asparagus the same year you plant. Please resist the temptation. Let each plant fully establish itself before you start taking, otherwise you may end up with weak plants that take longer to produce a full harvest.
Second Spring
The following spring, you can take your first harvest, for a maximum of 3 weeks.
To harvest, carefully cut the asparagus at ground level with a sharp knife. At this point, it's still important to avoid over-harvesting. The next spring, you can take a full harvest.
Third Spring
If your perennial plants seem healthy and are producing well, you can harvest young shoots from spring to early summer. Plan for about 6-8 weeks of harvest time, before you stop and let the asparagus "bolt" for the year.
Questions Folks Ask About
Can I start asparagus from seed?
Yes, you can buy asparagus seeds and start them yourself. But seed-grown asparagus takes 3-4 years to mature, and that's quite a while to wait for your harvest!
You can learn all about Growing Asparagus from Seed in this article by an acquaintance of mine, Ashley Adamant.
How long will my asparagus live?
It depends on the variety, how suited it is to your climate, and how well you care for your plants. Asparagus can produce anywhere from 20-40 years. If you have space, it's a great 1x investment for the home gardener!
Do I need to add organic matter or fertilizer to my patch?
To keep plants healthy and productive, add 1-2 inches of organic matter to your asparagus beds every spring before spears appear.
When should I mulch my asparagus beds?
For a new asparagus bed: mulch directly after planting, so weeds don't have access to sunlight.
For an established asparagus bed: mulch after fertilizing the soil in early spring.
Can I use something other than straw for mulching?
Maple leaves, dry grass clippings and even old rotten hay (do make sure it's rotten throughout!) also make good mulch.
Is it possible to divide older plants?
I've never tried this, but it's common knowledge that you can divide the different varieties of asparagus.
This should take place after the crowns are fully mature and have slowed in their production. You can divide old crowns in early spring, before asparagus spears appear.
More on Homegrown Asparagus
How to Keep Asparagus Fresh in the Fridge
Pickled Asparagus Canning Recipe
How to Roast Frozen Asparagus in the Oven
More on Vegetable Gardening:
[pt_view id="b55370cw6h"]