Guide to Planting and Growing Onions from Sets
Here's a simple way to plant onion sets, so you can grow a bountiful harvest with very little effort. My step-by-step guide will walk you through everything you need to know!

I love growing food for the table. While crops vary from year to year, I always plant staples like carrots, beets, potatoes, beans, tomatoes and of course, onions.
Homegrown onions aren't something we eat in bulk, but they do add a lot of flavor to my home cooked meals, and have traditionally been used in home remedies.
So I always grow an onion crop every year.
One of the reasons I love to grow them? They're very easy to plant and care for.
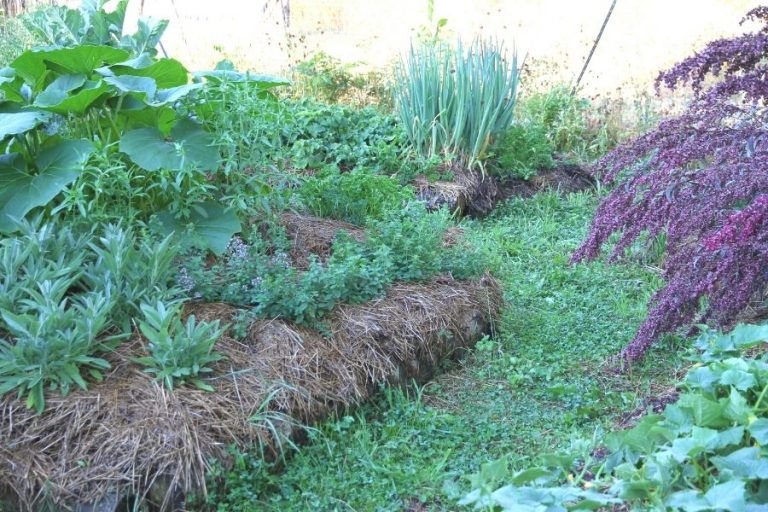
Onions flourish in a wide bed, which helps maximize space in the garden. They also grow well under a layer of mulch, which means they require minimal weeding.
Here's a simple guide to planting and growing onions from sets.
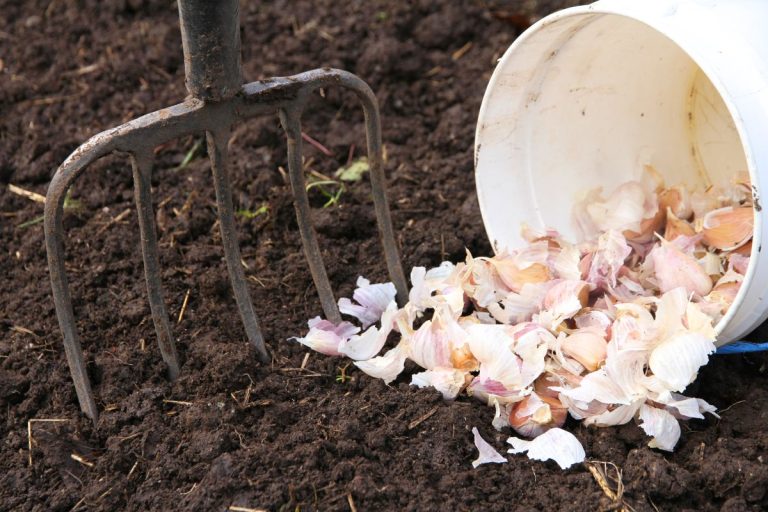
What Are Onion Sets?
Onion sets are just small, immature bulbs that were grown from seed. If you directly plant them in your garden in late spring, seeds don't have time to develop into the larger onions we typically use in the kitchen.
By fall, bulbs are thumb-size and growers harvest, cure and store them over winter.
The following garden year, these immature bulbs are sold to gardeners for spring planting. These small onions will turn into mature onions with a large globe or bulb.
Helpful tip: if you have a short growing season, plant onion sets instead of buying onion seedlings from a local garden center. You'll usually get larger onions by fall.
Sweet Onions vs Storage Onions
The onion family is very large and includes chives, shallots, leeks, bunching onions and more. But when it comes to bulb onions, there are two basic types: sweet and storage onions.
Sweet Onions
- Also known as spring/summer onions
- Great for summer eating
- Have mild flavor with higher water content
- Are often eaten raw in homemade salsa and on sandwiches
- Can be tasty when caramelized or roasted on the barbecue
- Are not good keepers and generally need to be used within 2-3 months of harvesting
Storage Onions
- Also known as fall/winter onions
- Generally used in the kitchen in fall-winter months
- Have strong, pungent flavors and lower water content
- Aren't usually consumed raw because of their powerful flavor
- Are tasty when added to meats, sauces and give a real kick to homemade salsa
- Storage/winter onions are excellent keepers and can last for 6 months+ if properly stored
In my gardens, I usually grow just one type of onion.
I'm very partial to storage or fall onions. You can harvest them in early summer for green onions, or harvest medium-size bulbs in late summer. These home-grown onions will last until spring in my cold room.
Anytime I can grow 1 vegetable and fill my needs, I'm happy!

How to Choose Onions Based on Your Growing Zone
You need to know your zone and day length when choosing from the different onion varieties, because the number of daylight hours will affect the development of your onion plants.
Every gardener I know wants fully developed onion bulbs, and it's quite disappointing when all you get are green onion tops! So choose onions that are suited to your daylight hours.
Long-Day Onions
Long day onions are best suited to growers who live in northern climates. These varieties need about 14 hours of daylight for the plant to produce large, mature bulbs. If long day onions are grow in the south, they'll produce green tops...and not much else.
Intermediate Onions
If you live in the central USA, you'll want to grow intermediate varieties. They need approx 12 hours of daylight for plants to form bulbs. You can (usually) grow long day onions in the intermediate zone as well.
Short-Day Onions
Short day onions do well in warm, balmy southern climates and can be grown during the cool season. These varieties only need 10 hours of daylight for the plant to form bulbs.
Try growing short day onions in a northern climate and they'll create bulbs very early in the year (and have a distinct dislike of cold spring weather).
If you live in the USA, you can get Johnny's Seed Chart HERE that outlines your zone based on latitude.
My fellow Canadians should just go for long-day onions!
Where to Buy Onion Sets
- Local garden center
- Favorite seed supply company
- Small scale farmers
- A gardening friend who grows their own from seed
How to Grow Your Own Onion Sets
You can grow your own sets by directly sowing onion seeds mid-late spring in the garden. Your onion seeds will slowly grow all year, until they form tiny bulbs in the fall.
To overwinter them, thumb-size bulbs need to be cured like winter storage onions. After this, they will keep well in a dry, cool place (just like full size storage onions).
The following year, you can replant them in your garden and get mature, full size onions! It's a great way to go if you like planting onion sets, and want a particular onion variety.
Where to Plant Onion Sets
If you want large onion bulbs, try to make sure your onion bed meets the criteria that most root vegetables need!
- Full sun (at least when gardening in a northern climate like I do).
- Well-drained soil
- Loose soil
- Organic matter
When to Plant Onion Sets
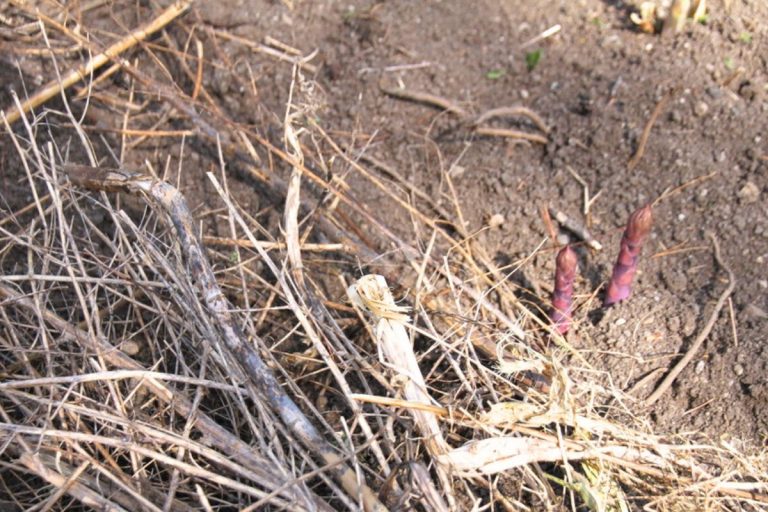
In milder climates, you can plant onion sets in the fall, provided you apply a heavy layer of mulch afterward (it's very similar to garlic in that respect).
But most gardeners plant onion set in early spring, 2-3 weeks before their last average frost of the year. These little bulbs are cold hardy and even their green shoots can withstand a bit of chill!
How to Plant and Grow Onion Sets
Onion sets are one of the easiest thing to plant in the vegetable garden! Even little hands can help with this task.
Step 1: Weed the Soil Surface
Onions don't like competitors. Even if you plan to mulch the soil surface, go ahead and pull up any weeds that are present. If you have some tough ones (like dandelion), use a pitchfork or broadfork to loosen the soil. That's your next step anyway!
Step 2: Loosen the Soil
I have a no-till garden, so I always loosen up the soil in my garden beds before planting anything. For onions, go ahead and loosen the top 6-8 inches of soil with a pitchfork or broadfork.
Step 3: Work in Organic Compost or Animal Manure
Onions are heavy feeders. If you want assurance of beautiful bulbs, feel free to work in some extra nourishment for your onions! Organic compost, mushroom compost or composted animal manure are all good options!
Step 4: Plant Your Onion Sets
Onion sets are fun to sow! There are two rules of thumb to follow!
- Plant your bulb sets 1.5-2 inches deep
- Space sets 6-8 inches apart.

As you'll see, I grow onions in wide beds and my rows are also 6-8 inches apart. Wide beds are a great way to grow a lot of onions in a small space.
Helpful tip: when planting onion sets, I like to make a hole and immediately drop an onion bulb into it, so the soil doesn't backfill.
Here are step-by-step direction for planting onion sets.
- Use your fingers to create 1.5-2 inch deep hole.
- Drop an onion set in the hole, pointed side up.
- Space sets 6-8 inches apart in each row, unless directed to do otherwise.

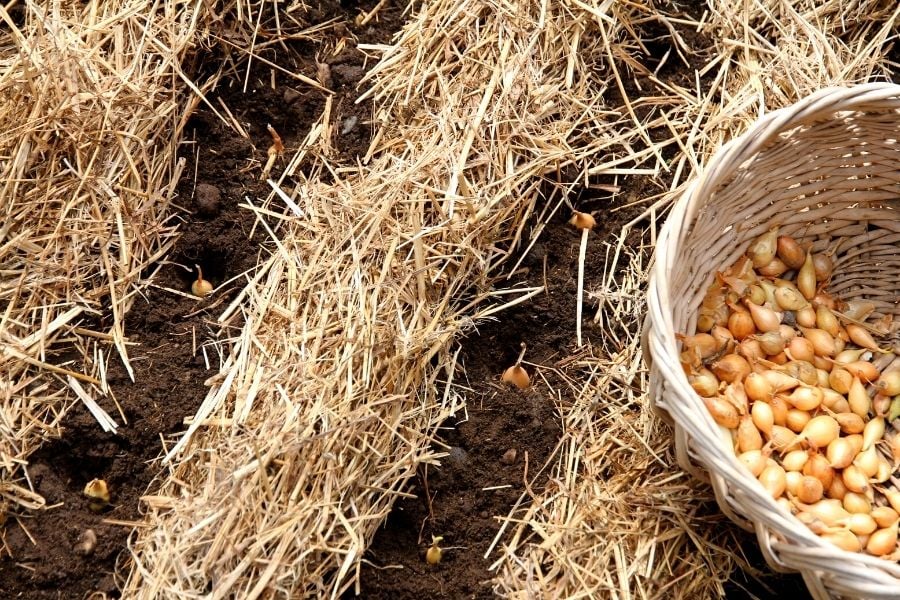
- Level the garden bed and backfill over your onions.
- Open a bale of straw and shake sections (aka flakes) of straw above the bed, so loose straw covers bare soil.
- Water like the rest of your garden and wait.
Helpful tip: onions shouldn't be planted too deep, or you'll restrict the growth of the bulb itself.

How to Care for Onion Sets
If you mulched your onion bed, it will take very little maintenance to grow beautiful onion bulbs!
You can check the bed/s for moisture by feeling under the mulch. And depending on the condition of your garden soil, you may need to spot weed 1-2x per year. Other than that, just wait, watch and observe!
Want to learn how to mulch with grass clippings? I teach how to turn your lawn clippings into garden mulch here.
Watch the Tutorial!
When to Harvest Onions
You can harvest onions anytime throughout the summer months. Around here, we have a "pull as needed" policy. Tiny onions still taste amazing!
If you want onions for winter storage, it's best to harvest after your onion tops naturally fall over. This is a sure sign that the plant has finished growing.
But if you have an unexpected early frost on the way (or onions just aren't giving up), you can pull them at anytime without doing damage.
How to Cure & Store Onions
It's important to cure onions before storing them over winter. I teach you how to do that in my tutorial below!
How to Harvest, Cure and Store Onions for Winter
More on Homegrown Onions
5 Heirloom Sweet Onions You Can Grow from Seed
6 Heirloom Onions You Can Grow for Winter Storage
More on Growing Your Own Food:
[pt_view id="b55370cw6h"]
Hi! Love your tips and instructions! I am in zone 10, do you have advice/tips, etc for my zone?
Thank you for any help.
Hi Lisa!
If you live in the south, you'll want to grow SHORT DAY onions only. And of course, you'll want to plant them once the heat of summer is over, around the same time you would plant lettuce or other cool-weather greens. Your local garden or greenhouse center would carry varieties suitable for your growing climate. If you purchase seeds online, be sure to buy short day varieties only. Hope that helps!
Autumn