Growing and Drying Mint Leaves for Tea
Mint has always been one of my favorite perennial herbs. When I was a kid, my mum had a patch of it growing just off the kitchen porch and sometimes, I'd stop just to smell it or chew on a leaf.
Mint tea was always my first choice during the winter months. And even at such a young age, I knew that when I grew up, I was going to have lots of mint at my house!

How to Grow and Dry Mint Leaves
True to my childhood ideal, mint was one of the very first perennials I planted up against the Mountain Cottage. Four tiny starts were dug from a friend's garden and 2 years later, I have an entire 2x10 ft garden bed filled with nothing but mint (and a few lilies).
My childlike heart is quite happy!
Because good things are meant to be shared, I'm going to walk you through the process of growing and drying mint leaves for tea!
Tips for Growing Your Own Mint
There are many different varieties of mint you can grow. I recommend getting a few starts from a friend or nursery, instead of starting it from seed.
Just a few starts will fill out an entire flower bed in a year or two. And actually, because mint so invasive and fast-spreading, I recommend growing it in a contained garden bed or planter.
Mint likes full sun, but it'll grow just about anywhere. And don't worry too much about the quality of your soil. Many herbs actually prefer drier, sandier soils and thrive in them!
That's right! You shouldn't have to water mint very much either. Living in a cooler climate, my mint gets moisture a few times a month (at best).
Best Harvesting Practices for Mint
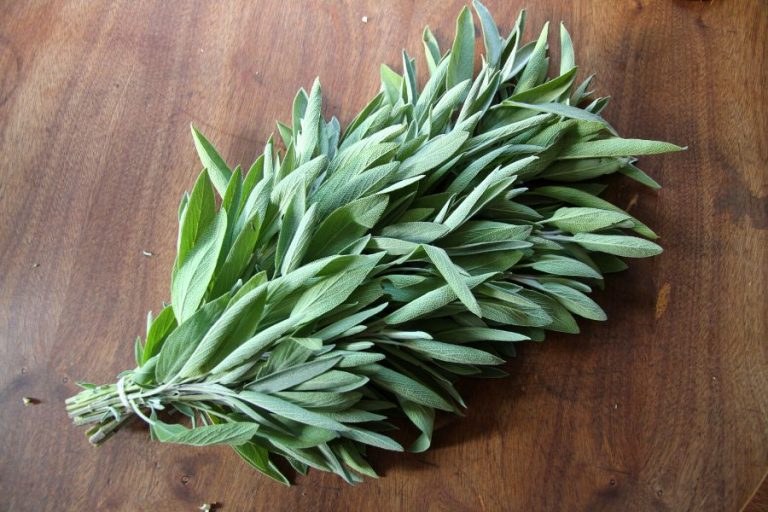
Mint is so resilient, you really can't go wrong with your harvesting technique! But for the sake of aesthetics, you'll probably want to let the plants grow until they're about 12 inches tall.
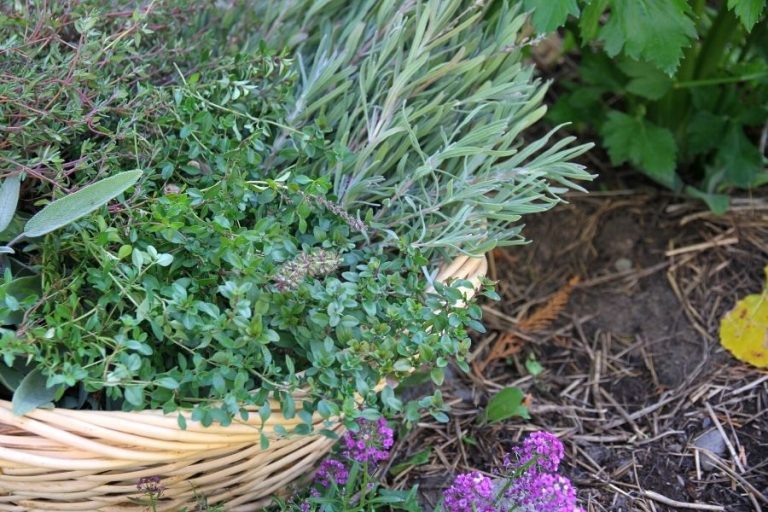
In order to maximize the flavor and natural oils within your mint leaves, take cuttings just after the morning dew has evaporated. I like to arm myself with scissors and an old fashioned basket...because a basket makes me feel like a legit, traditional house wife! 😉

You're probably wondering how much you should take and how much you should leave behind? It really doesn't matter! If you have time to be precise, go ahead and make the cut just after the leaves begin to grow sparse on the main stem.
And if you're in a hurry? Just do like I do: grab a handful make the scissors go snippety-snip-snip!
Wherever you make your cut, two or even three new shoots will sprout up and your mint will be bushier than ever! Neat, huh? Harvesting and pruning all in one!
Preparing Your Mint for Dehydration
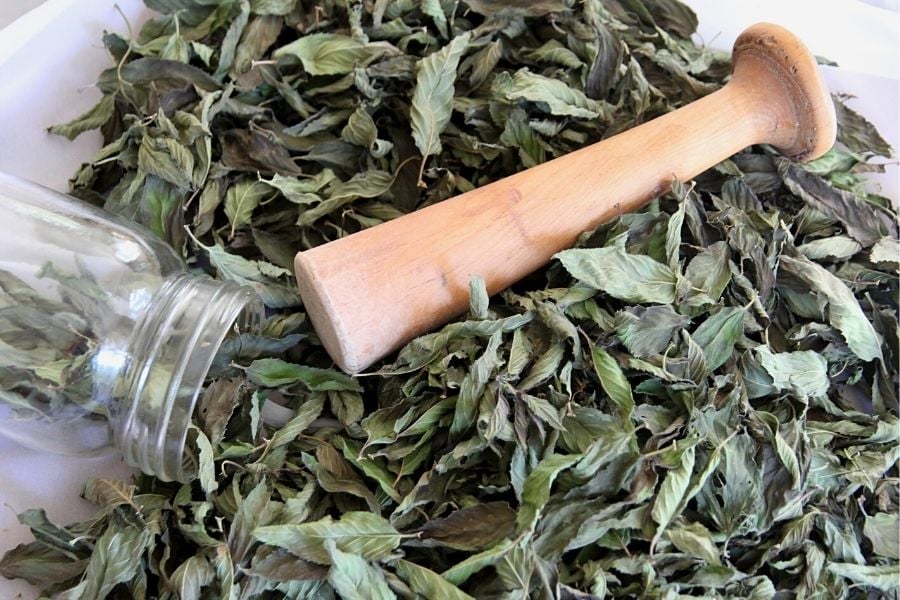
Once you've collected all your mint, it's time to strip the leaves from the main stem (note: if you're hang drying mint, you'll skip this step)! I like to pinch off the tender tip, then (started from the tip), pull the stalk through a pinched forefinger and thumb.
This neatly removes the leaves and is much faster than picking each one off individually! And when all the leaves have been removed, it's time to dry them.
3 Methods for Dehydrating Your Mint Leaves
You don't need special equipment to dry mint leaves. There are several different ways you can do. I'm just going to give you a brief overview of all the different options!
Method 1: Air Drying Options
In order to air dry mint, you need airflow and a semi-warm, dry environment (like your home). You can tie stalks in small bundles and hang dry them on the wall, in a pantry or near a wood stove.
If you're working with just the leaves, you can spread them out on a cloth or baking rack and let them sit in a humid-free place. Be patient, because it could take up to 2 weeks!
Method 2: Use Solar Energy
There are many different ways you can use solar energy to dehydrate your mint leaves! Of course, always be sure to dehydrate on a hot, sunny day.
The first method uses direct sunlight. Spread a clean sheet out on your deck, roof, driveway or even the lawn. Thinly spread your leaves on the clean sheet, then place another sheet on top to keep wind and flies off. Check after few hours have passed and when the leaves past the test, they're finished!
You can also spread the mint out on a cloth and put in the backseat of your car on a hot day. It'll do the trick in no time and also leave your car smelling amazing.
Of course, if you have a solar dehydrator, mint will dry in a hurry. No, I haven't really told you yet, but my man built me a solar dehydrator this summer and I've been using it dry my herbs and greens. It works wonderfully!
Method 3: Electric Heat
We all know this one, right? You can dry mint leaves using an electric dehydrator or of course, your oven.
The dehydrator should come with a manual that tells you which settings to use for herbs or greens and also, the length of time it will take.
When it comes to the oven? Set it on the lowest heat point possible. And then, spread your mint leaves out over parchment paper or a baking pan. Check every 20-25 minutes until the leaves are dry throughout. Be sure to take note of how long it took so you know for next time!
Test Your Leaves for Dryness
Before you tuck your dried mint leaves away in storage, you need to make sure they're fully dry. If not, they may mold in storage, particularly if they're sealed up in a plastic bag or glass jar.
The test is simple: your leaves should be crispy. If you scrunch a handful, they should sound crunchy. Rub them between your fingers and they should break up into little chunks.
If they don't, they're probably not dry enough for sealed storage and need more time.
How to Store Your Mint Leaves
Once your leaves pass the dry test you can store them away in canisters, in glass jars or anything else you have on hand! Personally, I like to use antique glass jars with beautiful glass lids.
Dried herbs should either be stored in a dark place, or in a container that doesn't allow light to seep in.
If you won't using up your mint supply in 1 year's time, I recommend freezing the excess. Dried, frozen herbs will hold onto their flavor profile for much, much longer than when sitting on a shelf! Just be sure to keep your leaves in a container that doesn't allow moisture to seep in.
Using Mint Leaves for Tea
Mint tea makes a wonderful, hot tea! It's particularly useful if you're struggling with a chest cold, because mint can act as a decongestant. Just pour 3-4 C hot water over 2 tablespoons of dried mint. Let it sit for 2-3 minutes. Strain. Sweeten with honey.
And presto! That's how you go about growing and drying mint leaves for tea!


After you pick the mint leaves, do they need to be rinsed off?
If they don't have dirt spatters from watering, and if you aren't having issues with bugs, they should be fine to dry directly.
First time growing mint and drying for tea.
Wish me luck
This is my first year planting spearmint and peppermint. I’m gathering the drying process is the same?
Yes, it should be. Hope it goes well for you.
I will try this since I have mint coming up from last year. Thanks
Good luck! 🙂 Mint tea is one of my favorites. Chilled in the summer and hot in the winter! 🙂
I have spearmint and peppermint! Do I use the same process?
Sure do! Good luck!
I love fresh mint in water. Do we have to dry.
Definitely not! Tea made with fresh mint leaves is delicious!