DIY Computer Cabinet with Doors
Want to hide your computer behind doors? In this tutorial, you'll discover how to make a DIY computer cabinet with doors. When closed up, this sleek computer cupboard looks like a storage cabinet.
Open it up and presto! There's the computer tucked away behind beautiful wood doors.

I've been blogging on an old Toshiba laptop for years. Got it in 2013 actually, as a gift from parents who thought I needed to email them more often. 😉
And since that time, I've made good use of that laptop, particularly after I began blogging in 2016! And over time, things have been breaking down. My laptop keys started dying. The plastic around the screen and hinges cracked beyond repair. The top would fall over unless I propped it up from behind with a can of rocks.
You get the picture.
I was constantly worried the programming was going to crash.
So it was time for a new computer. And this time, I wanted a desktop.
You folks are familiar with my desire to keep internet time under control in my home. That is to say...I've tried to make sure I control it, instead of letting it control me. While laptops are nice to have, I really wanted a stationary work space where I could go, do my work, then close the computer up for the day and BE DONE!
Our home isn't very large. The only place a desktop computer could go was in the living room. But I didn't want to have the desktop computer, cords, paper, pens, pencils and binders sitting out in the open, where they would make our small space feel cluttered and unorganized.
And that's when I began looking into the idea of creating a DIY computer cabinet with doors, so I could hide all the clutter.

How to Create a DIY Computer Cabinet with Doors
Having a carpenter for a husband is a wonderful thing! Not only did we build our own home together from start to finish, but he can create just about anything with his well used table saw and chop saw! From our French Green kitchen cabinets, to the tongue and groove flooring we converted into hardwood kitchen countertops...he enjoys detailed finishing work.
All that to say, this isn't a project for an amateur!
Here are the steps in the process.
Step 1: Choose Your Computer Cabinet Design
You can find so many computer cabinet designs online. Actually, the idea for our computer cabinet was partially inspired by this one here, from another blogger I follow. If you need some inspiration, just look through google images or even Pinterest. You'll find 1,001 different designs to choose from!
For us, it was important that the computer cabinet fit the limited wall space in our home. So after browsing through ideas, we settled for a traditional cabinet shape and design.
Step 2: Draw Out Your Plans
If you aren't buying a prepared computer cabinet design, you'll have to take time to create your own, regardless of whether you're DIYing it or hiring it out.
Here are a few questions you should ask yourself when designing a DIY computer cabinet with doors.
- Where is it going to sit? This will dictate your outside dimensions.
- What do you want to store in it? Make sure it's deep enough to hold your computer, printer, binders, etc
- What type of wood do I want to use? To keep the cost low, we chose softwood.
- How am I going to finish it? Wood stain, paint or even whitewash are excellent options.
- What type of hardware am I going to use? You may need to order it online.
And just one tip? The higher you go with your shelf, the more storage space you'll have!

Step 3: Map Out All Your Pieces
Once your design has been finalized, it's time to map out all the "pieces" you'll need. This will help you buy the right amount of plywood and lumber for the frame, shelves, cabinet doors, etc.
Step 4: Buy Your Supplies
While lumber and plywood isn't difficult to come by, your hardware may be another issue. Depending on the style you choose, you may have to order the goods online. Just a heads up!
Step 5: Rip Building Material to Size
As I said before, this project isn't for an amateur! But to rip your plywood to width, you'll set your table saw to the right dimensions and cut the plywood for both the shelf's frame and shelving.

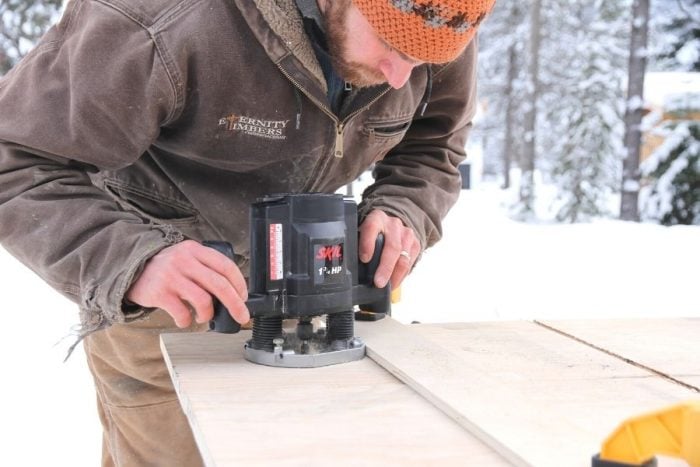
Step 6: Do Your Joinery to Create a Stronger Cabinet
While you don't have to use joinery to assemble the cabinet frame and shelves, it will make for a stronger shelf. You can use a router to cut slots in the cabinet's walls. And you can use the table saw to cut edges on each horizonal shelf down to size, so they join together nicely with the walls and create a stable shelf.
Step 7: Assemble the Shelf
Once you've done the joinery, go ahead and assemble the shelf's frame and shelves. Be sure to use a hearty layer of wood glue in the joints. You can use ratchet straps to hold it together and set it to square!
Step 8: Brad Nail Strips of Wood Into Place to Cover Rough Faces
Once the glue in your shelf has set up, you can remove the straps and stand it upright. If you want to cover the rough-cut edges of the shelf, cut some thin strips of lumber to the width of the plywood. After applying glue, you can brad nail these "cover" strips into place.
Step 9: Build Your Cabinet Doors
Cabinet doors are perhaps the most difficult part in the shelf-building process. But here are the steps.
- Cut plywood door centers to size.
- Cut 1x4 lumber boards to the proper dimensions for the frames.
- Cut joinery in both plywood and lumber frame.
- Glue and assemble the pieces, holding them in place with clamps and cross pieces to ensure they're sitting flat.
- Once they've set, remove clamps and carry on.
Watch the Step by Step Tutorial!
Step 10: Sand and Paint (or Stain) Wood
If you haven't already finished your wood with stain, paint or whitewash, be sure to do it before you add hardware and hang doors. Ideally, you would finish all the pieces before assembling them!
Now my man and I didn't do this, simply because we built our DIY computer cabinet with doors in winter and don't have a shop or garage where we can work.
Sigh. So we just have to wait for summer to finish our computer cabinet.
Let me assure you it's not ideal!
Step 11: Install hardware
The last step in the process is to install the hardware. Take careful measurements of both the doors and shelf. Screw hinges into place on the doors and attach to the shelf.
Install the door handles and presto! That's how you make a DIY computer cabinet with doors!