How We Made Kitchen Countertops from Hardwood Flooring
If there's one question I get asked about my kitchen, it's this: readers want to know exactly how we made kitchen countertops from hardwood flooring. And the second question they ask is whether or not we're happy with the results today?
I promised several of you that I would get this post out. So here it is, with a video to accompany!
How We Made Hardwood Kitchen Countertops
When my man and I decided to use tongue-and-groove hardwood flooring to create kitchen countertops, we didn't know what we were doing!
At the time we were living without internet, which meant very little research could be done on the subject (internet is overrated, right?!). So we decided to tackle the project and learn along the way.
And learn, we did!
Here are the steps we went through (mishaps included) to create the beautiful, hickory countertops we have in the Mountain Cottage kitchen today.

Step 1: Source Hardwood Flooring Without Beveled Edges
When my man and I decided to try and use wood flooring, we knew it was important to avoid anything that had an exaggerated beveled edge.
Because here's the deal: manufacturers usually add bevels to tongue-and-groove flooring so that any imperfections (like variance in height or width) are less noticeable when installed.
These beveled edges are an issue when you want to create a perfectly smooth surface...like a countertop! You really only have two choices. You can sand the wood surface down until you get past the beveled edges or, you can find a way to fill in the cracks.
We were lucky enough to get our hands on some hickory wood flooring that had just the slightest bevel on the running edge.
And my carpenter husband felt confident he could work with it. See?

Step 2: Put Down A Subsurface of Plywood
My man built and installed our cabinet boxes himself (you can watch that video here) and before putting down hardwood flooring, he needed a subsurface of plywood, something he could staple the tongue-and-groove flooring to.
After measuring, cutting and screwing plywood into place, we were ready for the next step!
Step 3: Choose Your Pieces of Hardwood
Before we put anything down, I took time to sort through the boxes of flooring. Never having loved light-colored wood, I was specifically after pieces that had the dark, rich hickory tones and color!
The pile grew and when there was enough, it was time to start our experiment!
Step 4: Staple Hardwood to the Plywood Under Layer
Starting at the front edge of the counter, the wood went down, row after row.
At first my man used a braid nailer to fasten the boards into place. But he soon discovered that he actually preferred a staple gun.
Every piece of flooring received a hearty dose of wood glue before it was stapled down. Sometimes the width of a piece didn't match the end of one that was already in place. And these lengths of wood had to be put aside.

Because everything had to be tight and snug, it took a while to piece the counter's surface together. Much longer, in fact, than it would have taken to do 35 sq ft of flooring!
Step 5: Join Counter Corners Together
Here in the Mountain Cottage, we have counters running along both the south and west facing walls of the kitchen, forming an L-shape. Which meant we needed to join the intersecting wood in a neat and tidy way.
My man decided to try “stair stepping” the flooring, instead of cutting everything at a 45 angle. With some careful handiwork, he managed to do just that!
And I love it!

Step 6: Give the Counter Edge a Finished Look
To give the counter a finished front edge, my man had cut the front pieces of the counter's surface at an angle.
He then took another piece of flooring and cut an adjoining angle on the top edge, trimming the bottom side of the board to bring it down to size.
These “counter edges” then received a hearty layer of glue and were brad nailed into place, which gave the countertops a thick chunky look.

Step 7: Sand the Original Finish Off
Our kitchen counters were beautiful at this point! But we still needed to deal with the cracks. And so began the long, tedious task of trying to remove the manufactured finish of shiny polyurethane (pictured below).

Initially we rented a floor sander in hopes of sanding the wood clean. But whatever the finish was made of, it was tough. And it wouldn't come off. I even sat top of the floor sander for a while, hoping that the extra weight would help. But finally, we had to admit defeat.
In the end, we worked over the entire counter surface with a hand held belt sander! It took lots of elbow grease and more than a few sanding belts! But finally, the tough finish came off.
Step 8: Fill the Seams for an Even Surface
Once the finish was removed, a decision had to be made: would we try to sand the bevels away for an even surface? Or would we just try to fill in the small cracks they created?
When asking for advice at our local hardware center, we were told that 2 coats of varathane would probably give us an even surface, without divots.
We tried. But it didn't fill in the cracks!
My man was quite certain a food grade epoxy would do the trick. But here's the thing: I had numerous reasons as to why I didn't want glossy countertops in my kitchen.
So we decided to try filling the cracks with waterproof glue.

It was a painstaking task, applying a bead of glue, then carefully wiping it off the surface of the wood. And you know what? After 2 applications (and a 3rd touch up in a few places), we finally had an even surface!
A quick run-over with the sander and presto! It was time to seal up the wood.
Step 9: Apply a Coat of Varathane
With the glue dry and everything sanded down, my man applied a coat of varathane. Once that was fully dry, he lightly buffed the surface with sandpaper and applied a 2nd coat.
The low-gloss surface left the wood with a natural feel. And the glue blended nicely with the wood color. It was perfect.
Step 10: Create Your Backsplash
In choosing a backsplash, we tossed around a few ideas. Tile? Tin? Nothing?
But finally, we decided to make it from the same hickory wood flooring. One and a half pieces did the trick, and my man cut the top piece so it smoothly angled back into the whitewashed wood paneling we had in the kitchen.
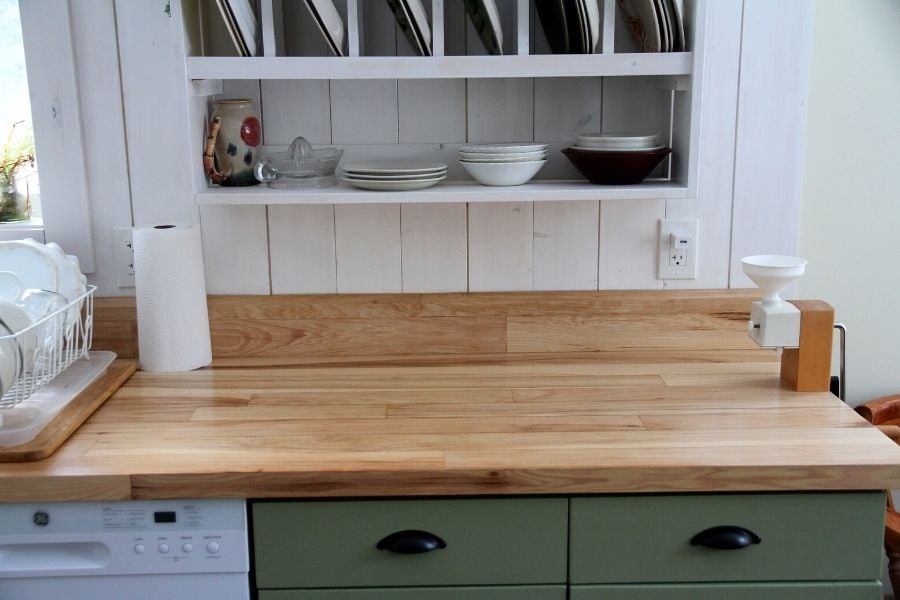
The sink went in and just like that, we had beautiful hardwood kitchen countertops!

How Have Our Countertops Held Up?
But wait. You guys wanted to know how well these counters have held up! At the time I'm writing this blog post, our hickory hardwood counters have been in for 2 winter seasons (aka almost 2 years).
They still look amazing, but the varathane hasn't held up quite as well as I'd hoped. If you look very closely at the wood in the glare of a kitchen window, you can see that there are short scratches and scuffs in the finish.

But what can I say? As a from-scratch cook, gardener and avid food preserver, my counters have jars, crocks, pots, mixing bowls and goodness-knows-what-else pushed and pulled across their surfaces 3 seasons out of the year!
What can you expect?
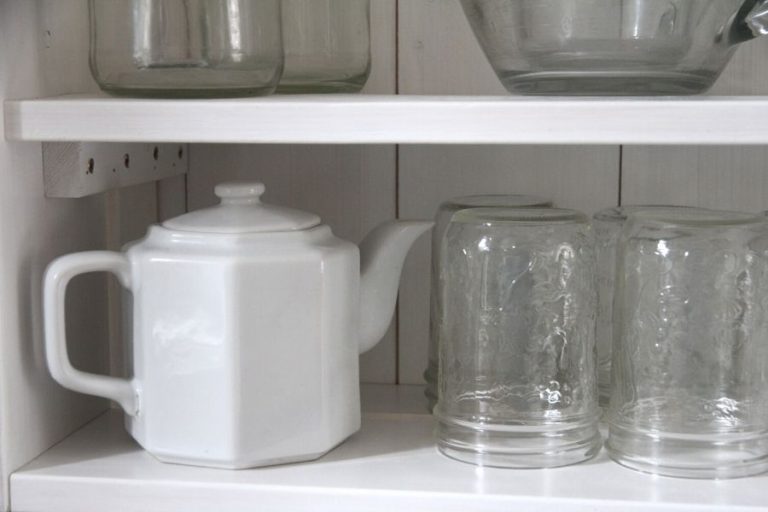
We also discovered that varathane only mildly protects wood from water stain. One time I left water behind the kitchen sink for a while (overnight at least) and it definitely left discoloration behind (see pic below). The same thing happened when water got under our dish drying rack.
My bad!

Varathane definitely isn't as tough or water resistant as an epoxy coating would have been! But so far, I've been happy with it.
The Primary Issue We've Had With These Countertops
There is one issue you'll come up against if you make these countertops.
About a year in, we noticed that the glue in the seams had cracked in a few places (due to the wood shrinking).
None of the cracks were very big and all of them were under 2 ft in length. So my man refilled them with glue, then lightly buffed the entire counter section before apply a new coat of varathane.
Just this past winter, those exact (3?) cracks re-developed, along with a tiny, 1 incher by the kitchen sink. This time we're going to refill them with glue and skip the new coat of varathane. We'll see how it holds up!
We do run wood heat in our home all winter long, so it may be something we'll have to deal with on a yearly basis. Only time will tell!
Should You Make Kitchen Countertops from Hardwood Flooring?
Tongue and groove hardwood countertops do take time to create. And if you have time and the skills, they can be a fun and rewarding project.
Just know that if you create these countertops like we did, they will take a bit of maintenance to maintain.
But you're willing to do the work, I think tongue-and-groove flooring is a wonderful way to to create an affordable, beautiful hardwood counter top!
In Conclusion
With projects like this, I sometimes wish I could see into the future. I can't help but wonder if our counters will stop expanding and contracting after they've had time to sit? Will we ever try giving them an epoxy coating? How long will the current varathane last before it needs a new coat?
Regardless of the fact that we only have 2 years of experience with these hardwood kitchen countertops, I hope this information was helpful and that you'll leave any questions you might have below!
And we'll get back to you on them!


I didn't see how the counter edges were formed. Planks glued to plywood would still show laying from the side. My my eyes aren't great and maybe I'm just missing something in the pictures. ( Which is very likely). Lol
I show you on step 6. 🙂
Why not treat it as a cutting board with good quality oil. We have oak.. which is used as a cutting. Board… and why wouldn’t you treat the counter three same as butcher block counters.. Just curious
The cracks had to be filled and sealed with something. So it was easier to seal the whole counter. And also, I didn't want to hassle with steady oiling, sanding out stains (like beet or berry juice) and just needed something functional that wouldn't have the risk of mold around the kitchen sink. 🙂
Did you use water based varathane, or oil based? Also all oil based varathane requires 3 coats. Water based requires 5-6. Curious what you used?
Also, my husband just built a bathroom vanity countertop and glued the pieces together as well as to the plywood base. He thinks this why you have cracking. They should have also been glued together so that they don't split apart. He made sure that the glue oozed out of the top of the wood and then sanded it off at the end before we stained and oil varathaned. It looks amaze balls. If it holds up to our Canadian winter, we are. Going to do the kitchen in the same way.
We used water based Varathane and did multiple coats. Each piece was glued together and also glued down to plywood. If we could do it again, we would have used wood clamps and glued everything together before putting it down on the counter, so it would expand and contract as one solid piece of wood. We also wouldn't have glued and nailed each board down to the plywood, so they could expand and contract as wood naturally does. Especially in a kitchen where humidity varies so much. We learned a lot and I do love these counter tops! I think we're going to put a heavier finish on them next time. 🙂
You can make a Grout of sorts with two parts sawdust to one part poly. That might negate the yearly redo of the cracks.
We laid 2000 sq ft of tongue and groove oak flooring. We have leftover and are using it as baseboard and trim. How did you deal with the pieces' connections on the top of your backsplash?
If you had to do it over, would you have kept sanding to get an even surface instead of doing the glue technique?
The cracks in the flooring were too large with the tongue and groove, we couldn't sand them away. In hindsight, we would have used a heavier wood sealer, not just Varathane. I didn't want a high gloss surface, but now I wish we had gone that route! 🙂
I just made a counter top for my guest cottage, basically the same way. I tried to sand with an orbital sander with 40 grit, it was slow going but it was doable if I had to. I got tired of the time it took, so I put a 7 inch 50 grit sanding pad on a grinder. It took it down quickly. Then I went back over it with the 40 grit and plan on going over it with 150 and then maybe 220.. Even at this point you can barely see a line between pieces. All that being said, this is only a 9 foot section. If anyone is interested let me know and I'll send pics. Might have sealer on by then. If you decide to use a orbital sander be aware that it's hard to flatten down the high spots. The grinder made it easy to flatten everything out. By the way. I did mine on top of a sheet of 1/2 inch plywood and sewed every piece from below. I over do everything.
Just stumbled across this post, but you might have your husband look into Waterlox Marine finish, next time you need to refinish the countertops.
Is that food safe? I’ve used marine varnish a little, it definitely requires proper lung protection and ventilation
Hi Autumn,
I'm late finding this post! I'm looking to re-do our laminate countertop in our kitchen and I love the butcher block look but I'm wondering what your man has tonsay about using wood tile? I also can a ton and I am constantly in my kitchen. Seems like it could potentially stand up to abuse better? I'm love some input! Thanks!
I actually have wood counters but about 6 inches wide and 4 pieces in width. I have cracks to and I used caulk in the cracks. I recently wanted them just a little darker with no sheen at all. I used Dark Half from the Milk Paint Company. So if I need to fill in cracks again I'm going to use black caulk instead of beige. Look up milk paint on the internet. Your counters are BEAUTIFUL 😍
I love my counters. 🙂 When they need a refinish, I'll try to remember to look into the Dark Half you used.
Will wood filler work on the cracks?
My husband says no. 🙂 With the wood expanding and contracting, you would have to strip the finished, refill cracks and reseal every year. Lots of work there!
Try gym seal. I think you can get it in a variety of sheens. Love this idea when I do my butcher block island top.
Love the countertops and the base cabinet color. Cross your fingers giving this a try this summer. Thanks for sharing
Dana
What did your husband use to bevel the edges for the finish look? Can he give some detail on how he did that?
He went over the sharp edges with a small hand sander to round them off. 🙂
Can I put the flooring over Butcher block countertops
Hi Dawn,
We put our hardwood down over plywood surfaces, so I dont have actual experience to share on a butcherblock underlayer. I do know that butcherblock would expand and contract with heat and moisture, just like the upper layer. My man says he wouldn't be afraid to try it, if we had butcherblock we wanted to cover. 🙂
Autumn Tell your man to use a fine tooth saw and cut some of the scrape wood, in a clean area so he could collect the saw dust. Then try to clean out the glue in the cracks, vacumn out clean tops. Then put the saw dust in the cracks,then go back with your sealer, couple coats fine sanding in-between drying times. The idea is the saw dust will expand with the heating & cooling ? Not sure how it will work on what ya'll got going on with all the glue prior in the cracks. Lots of luck looks really nice to me. I'm about to do the same but using hardwood tongue & glue flooting floors that I am taking up. But will be sanding them all before putting them on counter. Thus mine will be all whole sheets. Praying this will work. Reclaiming the wood. Will see. God Bless you guys thanks for your video.
My husband & Thank I are VERY interested in the hardwood flooring for the countertops. Excellent tips , by the way. But we also wondered about the vinyl flooring. It acts like hardwood flooring but has a rubber backing & no cracks when you put it together. We were wondering how that would work? Anyone have experience with this type of flooring? Its about 6 inches wide & clicks together but leaves no crack. What do you think? Could it be used? Thank you Gary & Susan
Hi Gary and Susan,
My man says his initial response is "don't do it." 🙂 Vinyl is actually a very soft product and the finish would scratch quite easily. Because it contracts when it cools and expands under heat (esp direct sunlight), Vinyl shouldn't be fastened down. While the surface of your counter might be ok, the expansion/contraction issue would make it very difficult to neatly finish the edge and especially the end of your counters where you'd really notice the expanding/contracting.
Hope that helps!
Autumn
How did you cut out the spot for your sink? I've been looking into these tires of countertops and no one ever talks about how they did the sink.... Help?
Hey there! Complete & finish your countertop, order your sink and it will likely come with a template you should use to cut out the hole in your counter. We used a combo of skill saw and a jig saw to cut through our hickory counter with it's plywood underlay. Our sink is just glued down with silicone, but most sinks have clamps that hold them in place. Hope that helps! Good luck!
Autumn
Your kitchen is beautiful. Could you give us a photo heavy kitchen tour some day? I particularly love how your husband did the corner of the counter top with the staggered boards. So pretty.
Absolutely! It's been on my list and I have most of the photos for a kitchen post. I just have to get 'round to writing the post!