How to String Garlic Bulbs
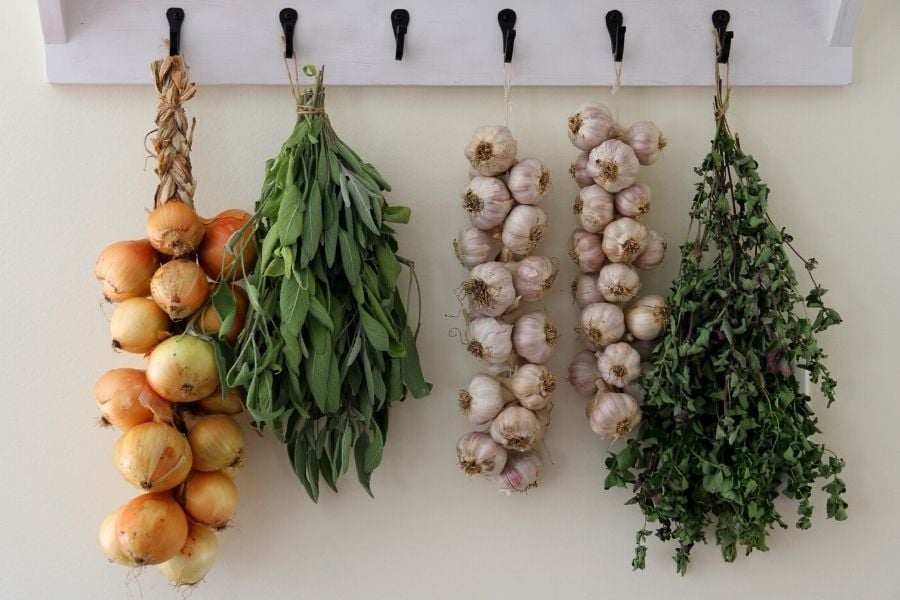
Nothing gives your kitchen the "farm feel" better than a display of garlic bulbs hanging from a hook on the wall! When you're dealing with softneck garlic, it's not difficult to create a lovely strand using the french braid technique.
But what's a girl to do when she only grows hardneck garlic? How does one go about braiding hardneck garlic for a pretty kitchen display?
In this tutorial, I'm going to show you how to string garlic bulbs using a hardneck variety. No braiding necessary! Here's how it works.

How to String Garlic Bulbs
If you grow your own garlic, you may not want to approach this task until your bulbs have been fully cured for winter storage. Once cured, you can brush bulbs free of dirt and peel off a layer of paper, so your garlic looks pretty and doesn't leave dusty smudges behind!
And if you buy your garlic from a local grower or farmer's market, it'll likely come cured, trimmed and ready to go! Here's how you can string garlic bulbs using hardneck garlic.
Step 1: Gather Up Your Supplies
For this particular method of stringing garlic, you'll need the following items.
- Whole bulbs of garlic
- Scissors
- Cotton cooking string
- A large needle
I can't give you exact links to the tools above, because I didn't get them via Amazon. If you are creating short strings of garlic (no more than 8 inches long), you may be able to get away with using sewing thread, provided it's doubled in length.
Or you can try purchasing this package with a Meat Trussing Needle and Cotton Cooking Thread.
Step 2: Cut Your String to Length
The length of your garlic display will be determined by the length of your string or thread. Here are a few things to think about when you are choosing the length of your garlic display.
- How much garlic do you have?
- Where do you wish to hang your string of garlic?
- What length would look best in that particular place?
Once decided, double the length of your string for extra strength and then cut it off.
Step 3: Thread Your Needle & Knot Your String
The next step will be to thread your needle! You may need to wet the end of your cotton string to get it through the eye of your needle.

This accomplished, even up the ends of your string and knot them together...several times! Because your string of garlic is going to be heavy, you want to make sure the knot is large. You wouldn't want it to slip through the first bulb of garlic and enable the others to do the same, like beads on a thread.
Knot it well and then, you're ready to start learning how to string garlic bulbs. It's time to make a beautiful kitchen display with your hardneck garlic!
Step 4. Create a String of Garlic Bulbs
To string your garlic, simply punch the needle through the tough stalk that appears above the garlic cloves themselves.
If your garlic has been properly cured, the stalk won't be as tough as you'd think! And by avoiding the cloves, you leave them undisturbed in their protective papers, resulting in longer storage life.
Thread the garlic bulbs on, one at a time until you run out of garlic or until your string is full.

Watch my Video Tutorial!
Step 5: Knot and Adjust Your Garlic String
Once you are happy with the length, knot your string off just above the garlic to create a tight loop.
Hurrah! You've learned how to string garlic bulbs for a beautiful, country kitchen display!
But wait. We've all tried following online tutorials, only to discover that we are unable to make our project look like the one that so inspired us!
So here's the deal. If you want your garlic string to have the full, clustered look shown in my photos, you have to play with it. In the above video tutorial, I show you how to push the ends of your garlic stalks down along the string, so you can create the clustered look you see in my photos.
Play with it. Slide things up and down on the string. Twist your garlic around until you achieve the look you want.
And then? Enjoy!
Q & A on Stringing Garlic
Q: What's the Difference Between Softneck and Hardneck Garlic?
Softneck garlic varieties have tops that are similar to those found on onions. Once harvested, softneck garlic tops wither, dry out and turn brown. These tops are pliable and can be braided together, just like the onion.
Hardneck garlic, on the other hand, has a tough center stalk that individual garlic cloves grow around. When harvested and left to cure, the stalk will turn white and dry out. But it remains very tough and stiff, making it almost impossible to braid quickly and easily.
And that's why I showed you how to string hardneck garlic instead!

Q: How Long Will My Hardneck Garlic String Last?
It depends on your variety and also, where you choose to display it! Most hardneck garlic doesn't last as long as softneck types. On average, you can expect your string to last for 5-6 months.
If you are going for long-term storage, I wouldn't keep all of your garlic strings in the kitchen.
Q: Where Should I Store My Garlic for Keeping?
Garlic keeps best in a dry and cool place. Here in my home, I store the majority of my harvest in the cold room just off my kitchen. Garlic will keep until spring in that space.
When you do bring strings of garlic into the kitchen, keep them away from places where they are exposed to moisture. Like above the kitchen sink or above the stove (unless you have a good hood range vent, of course).
Q: How Do I Remove Garlic from the String?
This one is easy! You can pop out individual cloves and peel them before using. Or you can remove an entire bulb by clipping the hardneck stalk just below your string.
Once you start using it, your string of garlic will eventually look shabby and unkempt. And that's when I recommend you take it down and place it in a basket instead!
Yes, garlic strings are a seasonal thing.
And now that you know how to string garlic bulbs, you can do it all over again the next year.
In Conclusion
Learning to how to string garlic bulbs is a simple project that anyone can do. It's very difficult to braid hardneck garlic and this is a simple solution that not only looks amazing, but is also very secure as it hangs there.
So go ahead and give it a try! Whether you buy garlic from a local farmer or grow it yourself, the charm it brings to your kitchen is lovely, simple and rustic.


Thank you for all the info! Love your site. I actually tied a knot at each head so I could snip off the bottom head and the rest would stay put. Just thought I’d share my take on it. 💕