How to Make Grape Vinegar
When I first stepped into the world of making my own vinegar, information and tutorials were scarce. It's an old skill, one that very few practice in the kitchen today.
Truth be told, if it wasn't for several vintage cookbooks I sourced at my local library, I myself wouldn't be making or teaching other people how to ferment fruit (or in this case, grapes) into vinegar!
That's what I'm here for today. In this tutorial, I'm going to teach you exactly what grape vinegar is and also, how to make it in your kitchen!
What Is Grape Vinegar?
Many people feel confused when it comes to grapes and the vinegar-making process. They often assume that wine vinegar and grape vinegar are one and the same. However, this just isn't true. The creation process is different for each. And the flavor profile differs greatly!
Now I'm not a wine maker, but I did do my research and this is what I discovered.
Wine Vinegar
Wine vinegar is made from finished, red or white wine. To transform wine into vinegar, all you have to do is expose it to airflow. That's right! The air in your home carries a group of natural, airborne bacteria called acetobactors. Once they are caught on the surface of the wine, they go to work, transforming the alcohol content to acetic acid.
It can take months, but eventually (thanks to airborne bacteria), wine will be converted to a very acidic, tangy, wine vinegar!
Grape Vinegar
Grape vinegar is made from the juice of fresh pressed grapes. To make your own grape vinegar, all you need is juice, a food grade container for fermenting and a breathable, cloth cover that allows airflow to carry airborne organisms to the surface of your grape juice.
From there, the fermenting magic just happens! I dive deeper into the particulars below. All the home brewer needs to do is wait, check on the juice and troubleshoot if any issues arise. If all goes well, a fresh tasting, tangy grape vinegar is created in just a few month's time!
How to Make Grape Vinegar
Now that you understand the difference between a wine vinegar and a fresh grape vinegar, let's get into the particulars of making the latter!
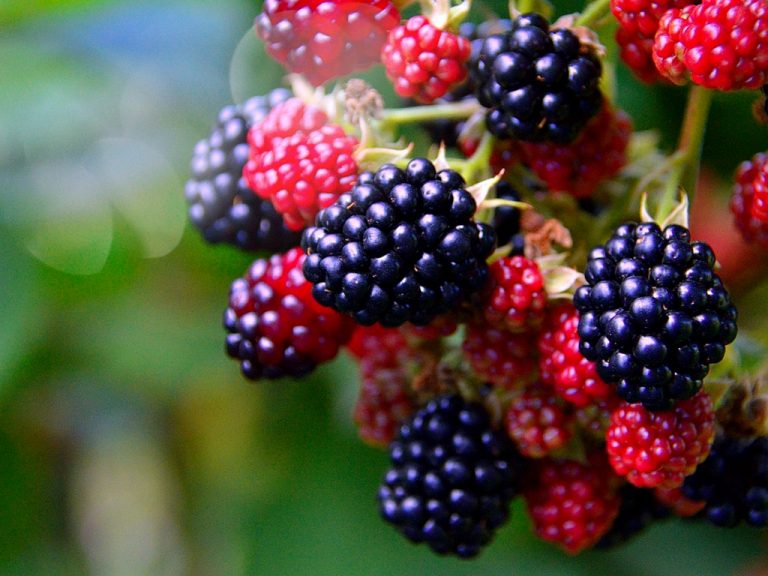
Step 1: Harvest Your Grapes
When harvesting grapes for your vinegar making attempt, choose clusters that are fully ripe! These grapes will have the highest sugar content and make the most flavorful vinegar.
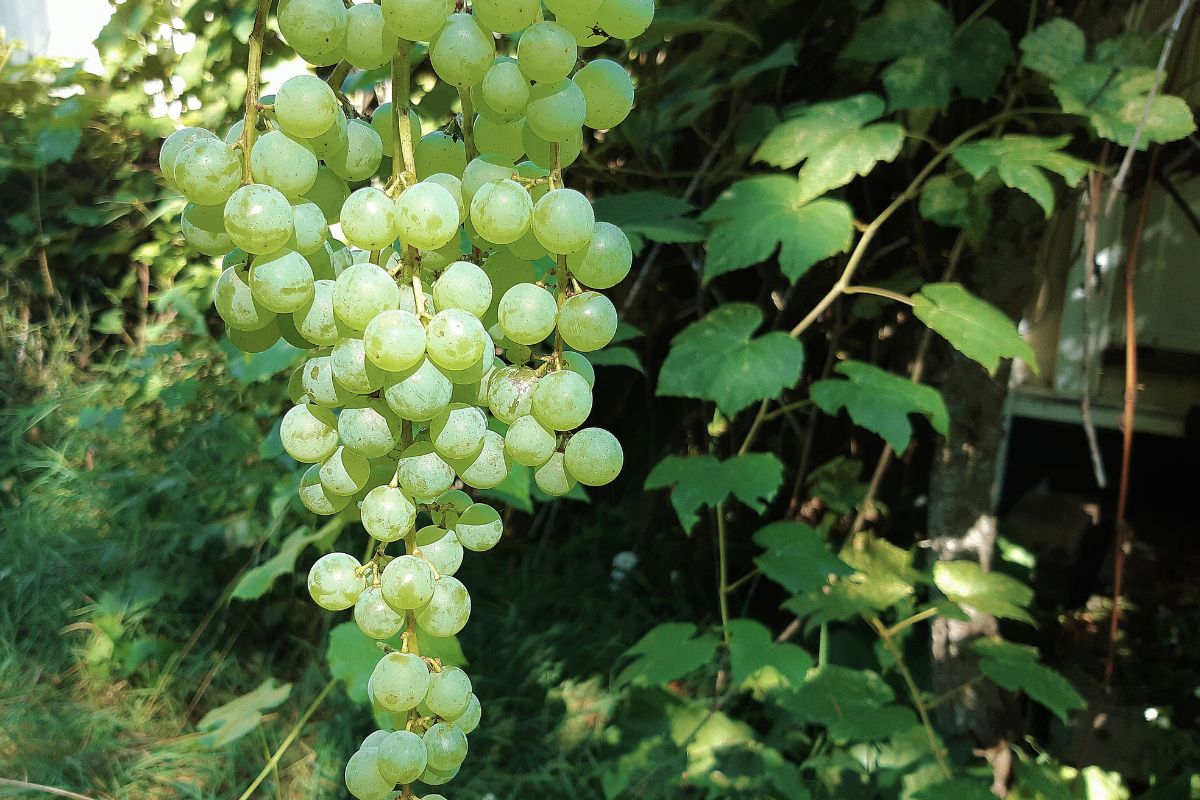
To the best of my knowledge, grape varieties don't matter. As long as they have natural sugar, you shouldn't have any problem fermenting their juice into vinegar.
Step 2: Extract Juice from Your Grapes
There are several ways you can extract juice from your grapes.
If you have a steam juicer, it does an excellent job.
You can use an electric juicer if you're dealing with seedless grapes (don't do it with seedy types; they'll make crazy amounts of foam).
But I actually recommend a simpler method.
Line a large kitchen bowl with a flour sack tea towel. After rinsing your grapes under running water, remove them from their stems.
Don't worry if you crush the fruit as you handle it, or if you get some small stems in the mix. It really won't affect anything!
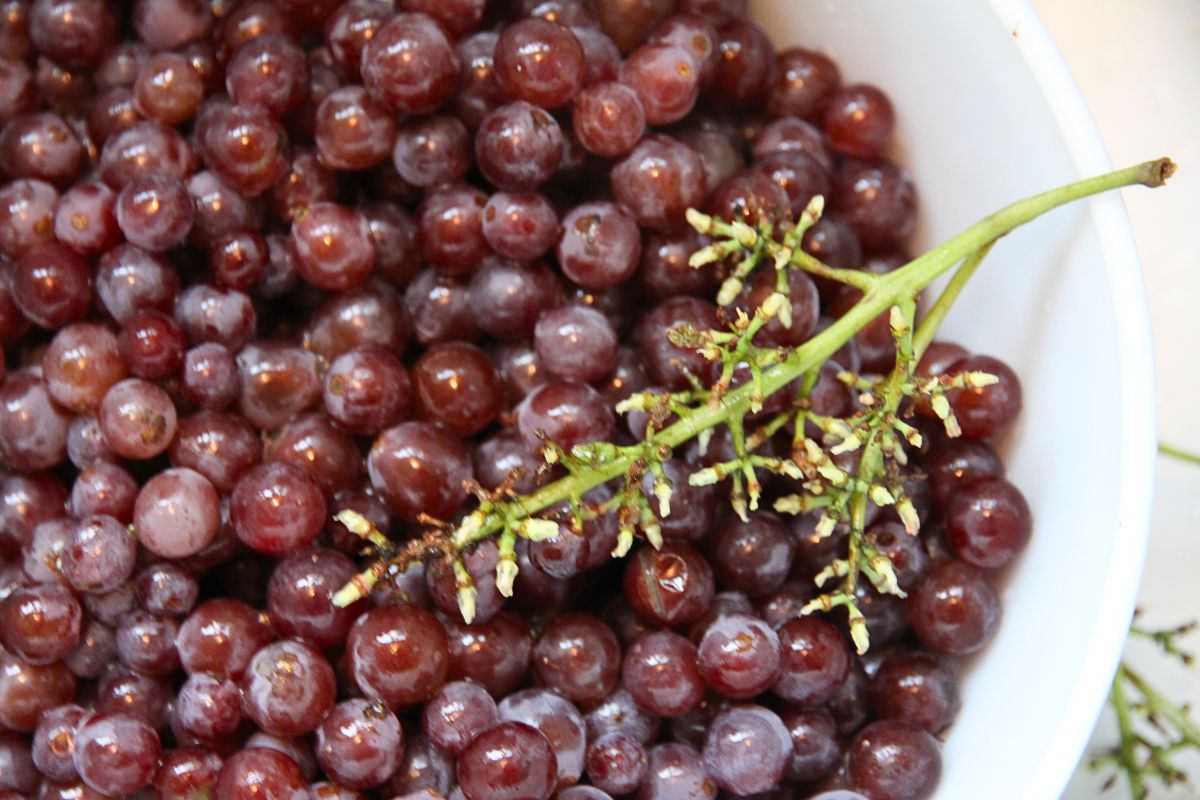
Once you've run out of grapes or filled the bowl 2/3 of the way, it's time to break up your fruit. You can use clean hands or use an old school potato masher.
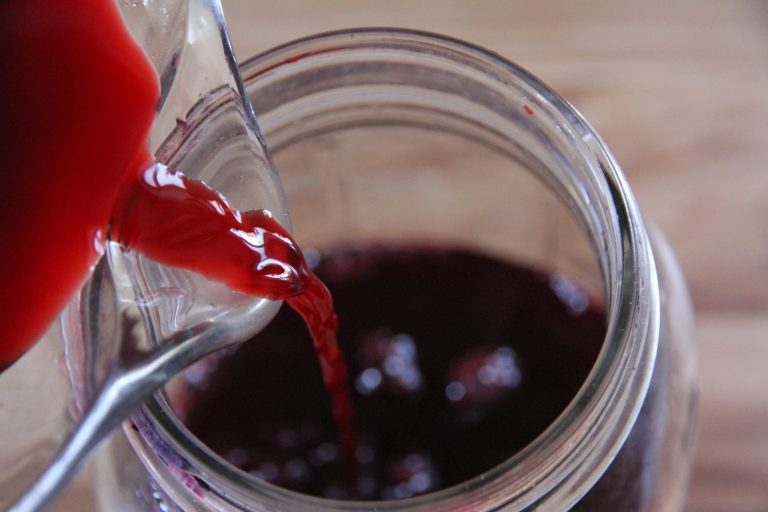
It can be a sloppy task, but once you've turned all the grapes into a juicy, pulpy mess, it's time to collect the juice! Do this by knotting the 4 corners of your cloth together.
Hang the bundle where grape juice can drip into the bowl below. And when the dripping stops? You'll have a raw grape juice, ready for fermenting!
Step 3: Place Your Juice In a Fermenting Container
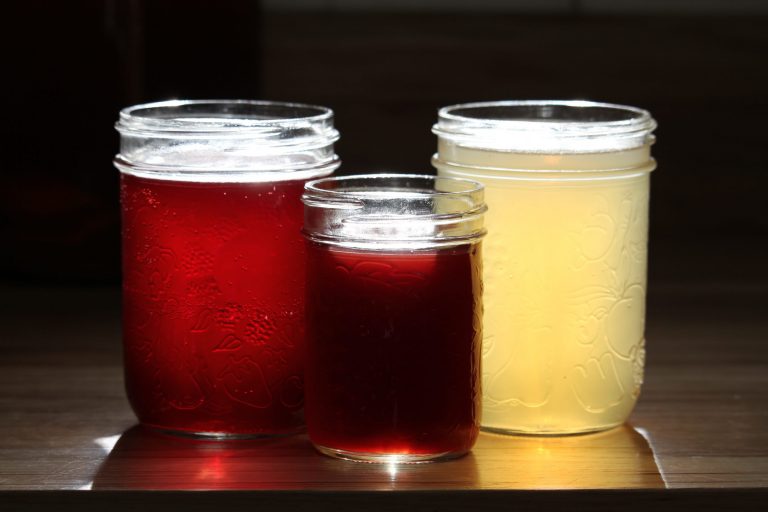
Because your grape juice will eventually turn into an acidic product, it's important that you use a food grade container for the fermenting process. I like to use wide mouth glass jars and also, small Ohio stoneware crocks.
Pour your grape juice into a food safe container. And instead of putting a lid in place, cover the mouth with a cloth, paper towel or coffee filter.
Be sure to fasten it down with a rubber band or tightly tied string. This will allow airborne organism to reach the surface of the juice, all the while keeping dirt and pesky fruit flies away from your juice!
It will also allow your ferment to release carbon dioxide in the first phase of fermentation (see step 4).
Step 4: Leave It to Work In Proper Temperatures
Leave your juice to sit in a room that is no cooler than 60F (16C) and no hotter than 80F (26C). The airborne organisms responsible for converting your juice to vinegar are sensitive to temperatures.
If they are too cold, they won't go into action. And if they are too hot? The wrong organisms will take over and spoil the batch. Should your home be too warm for fermenting during the hot summer months, extract the juice, freeze it and ferment at a later date, after outdoor temperatures have cooled down.
Step 5: Let Juice Go Through 2 Fermenting Phases
As your grape juice sits, it will go through two phases of fermentation. The first is a result of natural, airborne yeasts, while the second phase takes place due to airborne bacteria. Let me give you a breakdown of how it works!
Phase 1: The Alcohol Phase
In the first stage of fermentation, the air carries natural yeasts to the surface of your ferment. Once captured, they go into action and begin consuming the natural sugars found within your grape juice.
As they feed, they convert the sugar to alcohol (the alcohol content is very low). While the yeasts do their work, they will also create and release carbon dioxide, which is another reason you want a breathable cover on your container!
The first phase of fermentation is evidenced by the tiny bubbles that appear on the walls of your fermenting container.
They may even show on the surface of your liquid, and a layer of bubbly foam may appear. If it does, you'll want to skim it off.
Oh, don't worry! It's not harmful, but it may give mold opportunity to grow and that's something you want to avoid!
After a few weeks, your fruit juice will omit a light, alcohol-like aroma. Natural yeasts will feed and thrive until they have consumed all the natural sugars in your grape juice. After this, they die off.
Phase 2: Acetic Acid Phase
Several weeks after the bubbles disappear, you'll notice a slightly sour aroma when you check your fruit juice. This is an indicator that airborne acetobactors (acetic acid bacteria) have arrived on the scene!
This group of bacteria transforms the alcohol content to acetic acid, the thing that makes vinegar what it is!
Most of the time, this stage takes 3-5x longer than the first phase. Be patient!
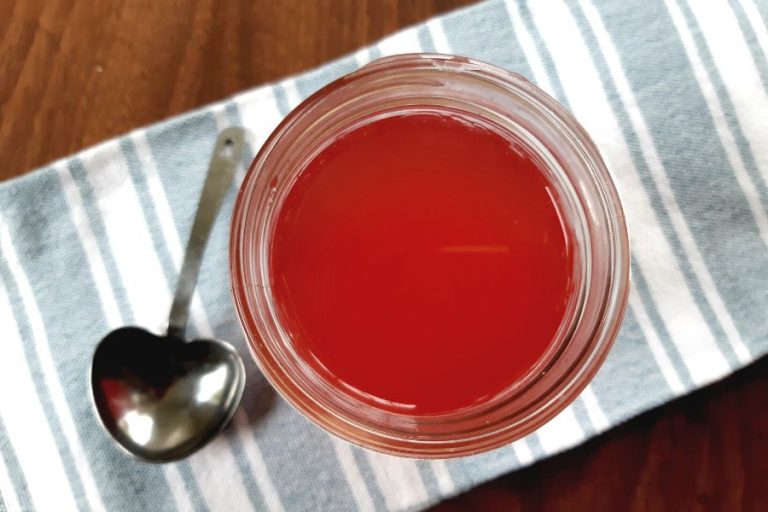
Step 6: How to Tell When Your Grape Vinegar is Ready
There is no sure way to tell when your grape juice has been fully converted to vinegar. You can taste it. Smell it. Guess at whether or not it's finished! But here's the best test I've found.
When your vinegar smells and tastes sour, seal 1-2 C of the liquid in a glass jar or bottle. Make sure you have a tight fitting lid (or cork) and then let it sit at the back of your kitchen counter for 2-3 days.
Break the seal. Was there a release of carbon dioxide? If so, your vinegar is still working and isn't ready to be sealed. Leave it for another 2 weeks, then test again.
No release? It's ready to be bottle (or jarred) and used!
Step 7: How to Bottle Grape Vinegar
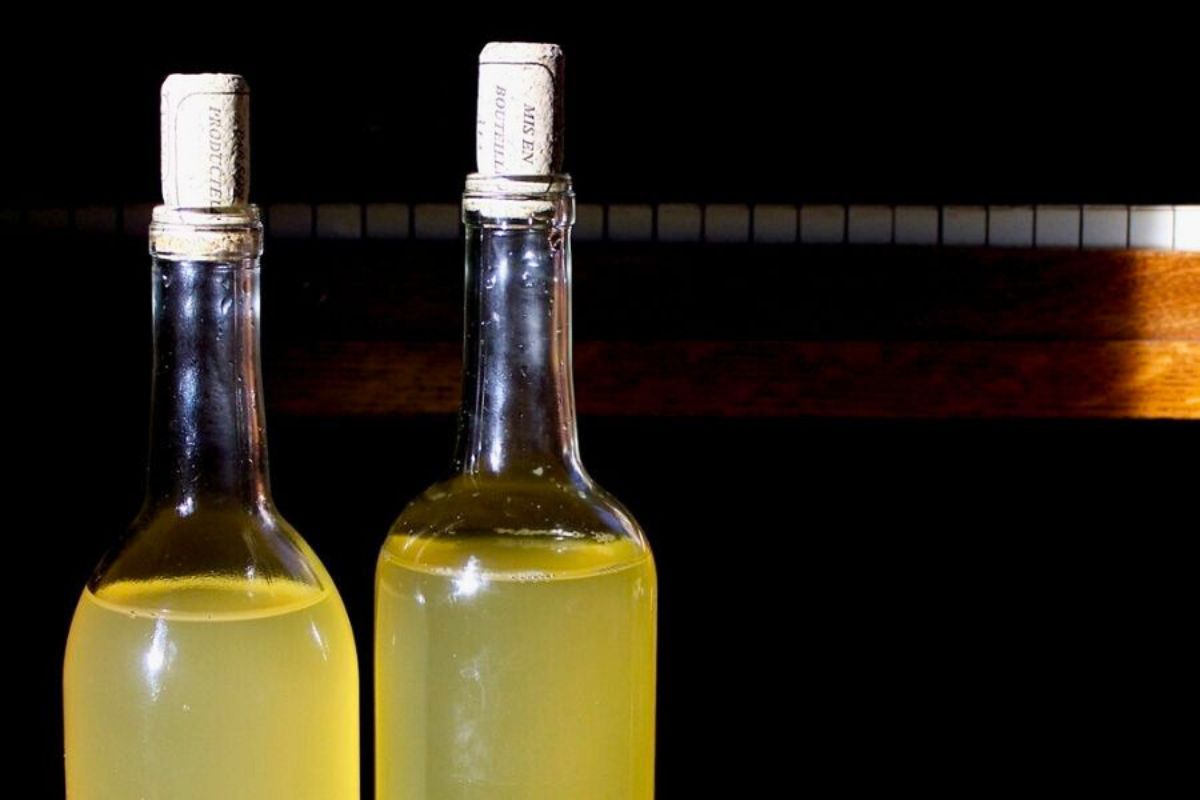
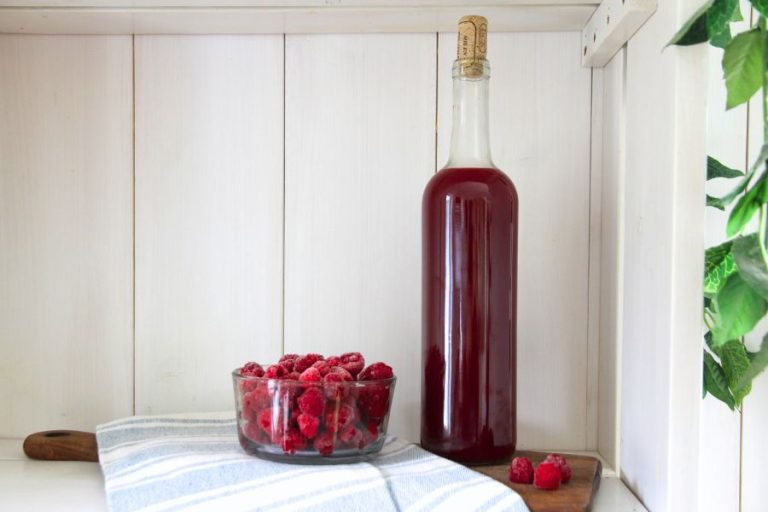
Because vinegar is an acidic substance, it is corrosive. Be sure to store it in a food grade container! Glass is ideal. I use canning jars, old whiskey jugs and wine bottles I got at a garage sale.
Also be aware that vinegar will slowly eat away at tin or metal lids. If used, you may end up with unwanted substances in your vinegar.
When using glass canning jars for vinegar storage, I recommend buying a set of wide mouth, white canning lids. They also come in standard mouth size.
And the jugs and bottles? Well, corks will do just fine!
Step 8: Tips for Storing Grape Vinegar in Your Home
Due to it's acetic acid content, grape vinegar is a shelf stable product and needs no refrigeration. You can keep it in a kitchen cupboard. On the pantry shelf. In a cold room or root cellar.
If stored at room temperature, the flavor will start mellowing out after about 1 year. You'll lose some of the snap and zing that comes with freshly made vinegar. But that doesn't mean you still can't use it in the home!
It should keep for up to 2 years. But trust me. If you like tangy flavors, you won't be able to keep it around that long!
Where to Go For Further Help
Now I know there was a lot of information packed into this blog post! If you want a comprehensive guide on making fruit vinegars and also using them in the home, I have something for you.
I wrote an entire book on How to Make Fruit Vinegar for Beginners.
It will give you best juicing techniques for the different fruits, fermenting guidance, troubleshooting tips and recipes for using fruit vinegar in your home.
Of course, you can always leave me your questions and comments below. I'll get back to you with the best answer I have on how to make grape vinegar!

I have your recipe for Grape vinegar. However we've inherited dark, hardskinned, seeded grapevines and I'd love to try and turn them into Balsamic vinegar. Can you help me, please. Tx so much
Balsamic vinegar is very different from fresh fruit vinegar. You make a thicker juice and have to store it for years in wooden barrels. I have no experience making it. Sorry I can't help!
Autumn,
Looking for grape vinegar since we moved to the UK without any success.
Found your article.
Am looking forward to try this recipe comming summer.
Just one question: will shop bought grapes work or is it not worth a try.
Thank you.
Rita
Hi Rita,
Shop bought grapes should work for making fruit vinegar. Good luck!
This was exactly the information I was looking for thank you so much for your readable article!
Everywhere I've been looking it's telling me to smell it taste it. The idea of laying it sit on the counter for a few days in a sealed glass jar and testing for the release of gas is just so much easier than taking it to a wine lab or find testing equipment. At least for the scale of my operation which is just one batch of wild grape vinegar. And also I appreciate the reminder about storing because I was temporarily storing the mother with white vinegar in a Ziploc bag which is I know really bad! Hello, corrosion, so yeah thanks for the reminder! All the best to you!
Thank you so much for sharing.
This is a long longed for information - highly appreciated.
Please can you give an estimate of time it takes for grape vinegar to mature?
AND, can I use store bought wine to make grape wine vinegar?
It depends on how much grape vinegar you have and the sugar content of the variety. I've been told you can use white wine to make white wine vinegar (just give it exposure to air over the course of several months) and you'll end up with vinegar. But just be aware that it is very different from a fresh grape vinegar.
I am horrible a making my own things. Do you have grape vinegar brand that you can recommend?
I'm sorry, but I don't know of any brand that makes grape vinegar. It's one of the reasons I make it! 🙂
Hi there
I see you answer all comments so i decided to take a chance and see if you will reply.
I contacted a cellar now and asked if i could buy grape juice from them and the winemaker asked if its OK if it has sulfur in?
Is that OK?
Thanks for the info
Hi there! I haven't worked with grape juice that has sulfur added in. I believe sulfur inhibits the activity of certain yeast types, but whether or not it would prevent the wild yeasts responsible for fermenting grape juice into vinegar, I dont know! Sorry I cant be more helpful. I would maybe purchase a small amount and try? Let me know how it goes if you do! 🙂
Hello . I’ve been fermenting our grapes . 2 jars are a nice straw color they have some white mould round the jar but very little . The 3 rd jar has changed to an orange colour . It dosnt smell bad just different . Gas it gone off do you think ?
Thank you
With fermenting, things usually smell bad if they're off. Try tasting some and see...if the flavor isnt yucky, the color change might be because of oxidization.
Hello! Thank you for the instructions! Mine bubbled a lot and moulded...a few times. It is also very hard to remove all of the bubbles!
Isnit still ok to continue once it's been scrapped off, or once it moulds it's no good?
I would recommend cleaning the surface really well and then changing fermenting containers. See if that helps with the mold. If not, I would probably throw it out!
Thank you very much for the reply! I followed your advice which helped. I have another problem now that it is evaporating very quickly - there's maybe a 10th of what I started with. Any suggestions please for what I could do - and why this happened? Thank you!
In my e-book and digital course, I give you several tips that help avoid evaporation. In your case, try placing a lid on top of your cloth cover, but don't fasten it down. It will help until your vinegar is ready to be bottled.
Not sure if this a redundant question , but I filtered my juice through a sieve and noticed this morning (I put the liquid in the jar last night) that the liquid has separated into two layers. One seems to be flint that was left over from the skins. Will this cause any problems for the fermentation?
Thank you!
Emilie,
I highly recommend filtering the juice through a cloth to strain out any solids that are present! The surface of your juice should be clear of any grape skins or solid bits. Otherwise, they most certainly will mold and can quickly spoil a batch.
Hi
I tried to make grape vinegar this autumn - I didn’t have a recipe so I went the same way I always do apple cider vinegar: fruit, water and a bit of sugar. But otherwise the method is the same.
However, there is layer of a bit foamy white-ish thing on the top and I’m not sure it’s OK. It’s def not the mother (I know what that looks like from making ACV enough), so I don’t know…. What do you think it is? Am I able to attach photos? Thank you…
Hi Anita!
Skim the white layer off and wipe the sides of your container down to remove any residue. It sounds like you have a build up of white yeast. Clear the surface and it shouldn't return. If it begins to, just keep skimming the surface until you can bottle up your vinegar.
Will do that, thank you. It’s been two months and still smells more like alcohol, rather than vinegar. It seems, perhaps it takes longer than making ACV…. Shall I cover it with a proper lid or shall I go back to the cheesecloth?
I would stick with the cheesecloth. And if after 3 months it still smells like alcohol, you can add about 2 Tablespoons of sugar per 4 cups of juice and see if that doesn't kick it into higher gear!
Thanks for the post, I am trying this out. I have been looking for good books on vinegar and haven’t came across much either. What vintage cookbooks did you come across that were useful?
I wish I'd written the names down, because I can't remember them now! I know they were from the late 1800's and touched on "proper etiquette" for the housewife as well. Sorry I can't be of more help! If you want to learn more about vinegar, you can grab my digital books under the SHOP tab on my site. I walk you through making (and using) all kinds of fruit vinegar.
All the best,
Autumn
Hello,
I asked many people in my country whose make grapes vinegar. I searching in YouTube too. Two main ideas leave the grapes as it is or by make the juice (fresh pressed grapes). I went with the second method, but my question is some told me (they are making vinegar for long years) that to cover the juice completely with a tight cover like nylon and the barrel cover or tight jars by its metallic cover. In the internet they put two methods one with this and the other is as you told us (the most) to cover the container by a breathable cover linen or thick cloth to let air and bacteria to enter this for 40 to 60 days. I tried the last year to make a vinegar by cover it well, with the barrel cover and maybe it is my mistake, I mixed the content 3 times when the bubble appeared without removing the mold (I think I didn’t find some). After 40 or 50 days the vinegar smell like light smell of vinegar and the main is fermented as to be alcohol or wine or something non vinegar. Does the covering way is the mistake or / and the mixing? I notice from your page an important information that the temperature should remain between 16 and 26 degrees Celsius. Maybe the last year it reached 28 or few days of 30.
If I cover the container with a breathable cover (double layer) leave it for 40 to 60 days breathing? (Sure, I make a wire ring to fix the cloth)
Thanks in advance
If you seal up grape juice with a tight cover and leave it to ferment, the sugars will convert to alcohol. If you leave it tightly covered, it usually stays in wine form. If you want your grape wine to turn into vinegar, it needs exposure to airflow and a group of airborne bacteria called acetobactors. This bacteria is responsible for turning alcohol content into acid which creates a vinegar.
This is why I only recommend covering your juice with a cloth or breathable cover. If you tightly seal up your grape juice, you'll porbably get a naturally fermented grape wine.
Does that help?
Thanks so much for this informative post! I have Noah grapes which I want to find a use for. I’ve heard that they are not recommended for wine because they can have neurotoxic effects? So I was thinking to make vinegar instead. I’m assuming for the same reasons the vinegar should not be for food grade use...
does this recipe work for making vinegar for the purpose of cleaning and household use? And are there any steps or considerations I could skip if the resulting product is not intended for consumption (eg containers)?
Thank you so much!
Hi Tara!
Fruit vinegars are not often used for household cleaning, primarily because there's no simple way to test the acetic acid in the finished product. If you are going to try and use grape juice to create a cleaning vinegar, I recommend adding sugar to the ferment (1-2 tablespoons per 4 C juice) to increase the alcohol content in the first phase of fermentation. This will give you higher levels of acetic acid in the finished product and make it "more" suitable for cleaning.
If you just want a white vinegar for cleaning, you could try and do what housewives of old did: combine sugar and water, throw in a handful of grapes or raisins to introduce natural yeasts and let that fermented into a white vinegar.
Let me know if you have more questions!
Hi Autumn - I used a food mill on my concord grapes to separate the seeds and skins (for another recipe) and have a few cups of "juice" left that I would like to make vinegar from. Trouble is it is quite thick. I tried to run it through a sieve but it wont go through it is just too thick but really nothing to filter out. It's kind of like as thick as a fruit syrup. Should I water it down before I start the vinegar? If so, with tap or dechlorinated water or maybe some vinegar or store bought fruit juice?
Hi there!
When making vinegar, you want juice that is free from solids. It sounds like your food mill pulverizes the grape solids so they slip through with the juice. You can try fermenting it, but often thick juices result in mold growth on top of your ferment. You could try watering it down and then stir in some sugar or honey (1-2 Tbs per 8 C of juice) and that should help kick start the fermenting process. And in the future, I'd avoid using the food mill for grapes and use the method I outline in this post here! It'll hold back the solids and leave you with a pure juice for fermenting.
Best of luck,
Autumn