How to Make Homemade Crab Apple Cider Vinegar
Learn how to make crab apple vinegar from scratch in a mason jar or crock. This homemade apple cider vinegar can be used in the kitchen just like the "regular" stuff!

When it comes to the apple family, the crab apple is often overlooked as a "junk" fruit. Some folks today grow crab trees in their backyard orchards as a cross pollinator and occasionally use them in a crabapple jelly recipe. But in the average home orchard, it seems like crab apples don't really hold value.
And yet if you observe the number of crab apple trees on old farms and homesteads, we know they played an important role in the traditional orchard at one time! Here's why the crab apple was valued in times of old.
- Crab apples are high in natural pectin and before the time of pre-made, packaged pectins, folks relied on these little apples to get a set in their homemade jams and jellies.
- In times past, crab apples were valued in homemade hard cider for their sour and almost bitter qualities. Traditionally, fermenting apple juice was the only way to preserve it for winter (as written in Farmer Boy by Laura Ingalls Wilder).
- Apples from the crab tree where preserved in pickled form (to pair with meats), put up in a sweet syrup and were used in a homemade jams, jellies and preserves.
But you can also use these mini fruits to make homemade crab apple cider vinegar. Let me show you how!
Ingredients
- 1 gallon of fresh crab apples
- 10-12 cups of filtered water
- 2 tablespoons sugar or honey (optional)
Items You'll Need
- 1 gallon plastic bucket for harvesting
- fermenting containers
- very large bowl
- cotton cloth (I use these ones here for vinegar making)
- coffee filter, paper towel or another cotton cloth
- string or rubber band
- food grade container for storing vinegar
Tips on Fermenting Equipment
When it comes to making apple cider vinegar, I like to use a fermenting crock. I use a lot of apple cider vinegar in my kitchen, so it makes sense to make it in large batches.

Glass canning jars are nice because they're light and easy to handle, but I really like the fact that you can fit a lot of apples in a 2, 3 or even 5 gallon stoneware crock.
If you choose to use a crock, here's the list of items you'll need to ferment apple juice into homemade apple cider vinegar.
- 2-gallon fermented crock (here's the one I use in my cottage kitchen)
- fermentation weights (get them for 2 gallon size crock here)
- a cloth cover (I like these cloths for straining apple and for covering crocks)
- string to hold the cloth down
If you want a smaller batch of apple cider vinegar, I recommend using a mason jar or two. Half gallons or even 1 gallon food storage jars are my preferred size. Here's what you need when you make homemade vinegar in glass jars.
- 2 half gallon jars (get Ball jars I use here)
- glass weights (get Pickle Pebbles here)
- a breathable cover (coffee filter or paper towel will do nicely)
- rubber band
The procedures for using both are similar. The only real difference is that you can pop a canning jar into the fridge during the infusion process, whereas a crock is too heavy for this and would likely crack the glass shelving in most refrigerators.
Also as I previously mentioned, glass jars are much lighter and easier to handle. So if lifting heavy items is an issue for you...go with glass jars!
Watch the Tutorial
How to Make Crab Apple Vinegar
To make homemade crab apple vinegar, you'll want to start with ripe, organic apples. Whether you harvest wild crab apples or gather some from a friend's orchard, I recommend using a plastic bucket with a strong handle. It's easier to get up and down the tree that way!
Be sure to use fully ripe apples when making raw apple cider vinegar. Some crab apple varieties fall when they're ready, so you may want to pick slightly green fruit from the tree and let it sit out at room temperature until fully ripened.
Take your ripe crab apples and cut them in half. You don't need to remove stems or blossom ends. There's no need to remove apple cores or peels either.

In fact, when you're making vinegar, you want to leave apple peels on because they carry natural yeasts that are responsible for the fermentation process!
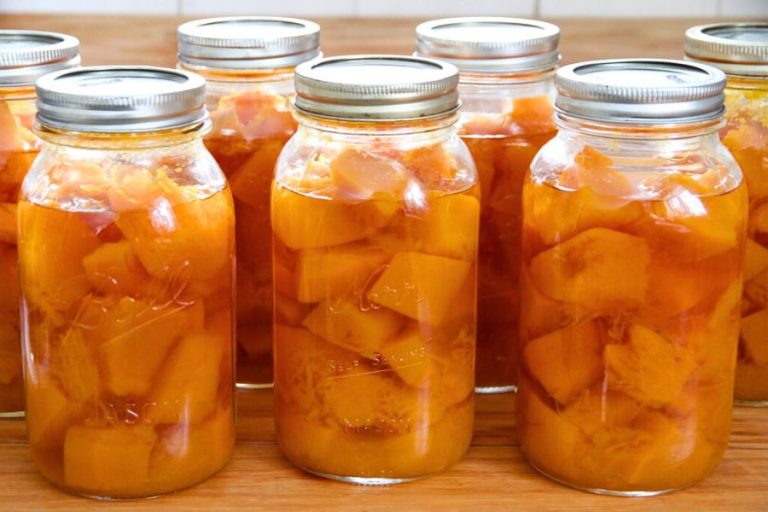
Chop crab apples in half any which way and toss them into your stoneware crock (or fermenting jar, if using). Fill your canning jars or crock with halved apples, leave a few inches of open space at the top.

Slip a weight on top of the apple pieces and cover the apples with cold water that is chlorine free. Be sure all the apple pieces are submerged, so nothing molds.

If you're using a crock, cover the mouth with a breathable cloth and fasten down with a string to keep fruit flies out.
Using glass jars? You can also cover the top of each jar with a cloth and fasten it down with a rubber band. Or you can pop a lid on each one and store them in the fridge while apples and water infuse. In fact, if you have mold issues in your home, I'd recommend this option!
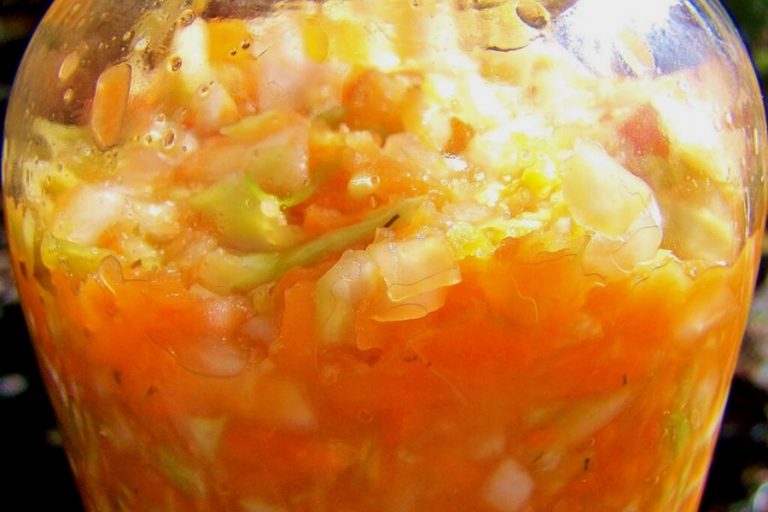
Either way, let the fruit sit and infuse with the water for 7-10 days, until the apples release their liquid and you have an apple juice that is sweet to the taste.

Line a large bowl with a cotton cloth and pour everything into it. Tie the 4 corners of the cloth together and lift the bundle of apples, letting the liquid drip through into the bowl below.

Pour the liquid back into your fermenting crock or jar. If you want an extra vigorous ferment, go ahead and add a bit of sugar or honey at this point.

Cover the fermenting container with a breathable cloth once again. Be sure to fasten it down so fruit flies can't get in!
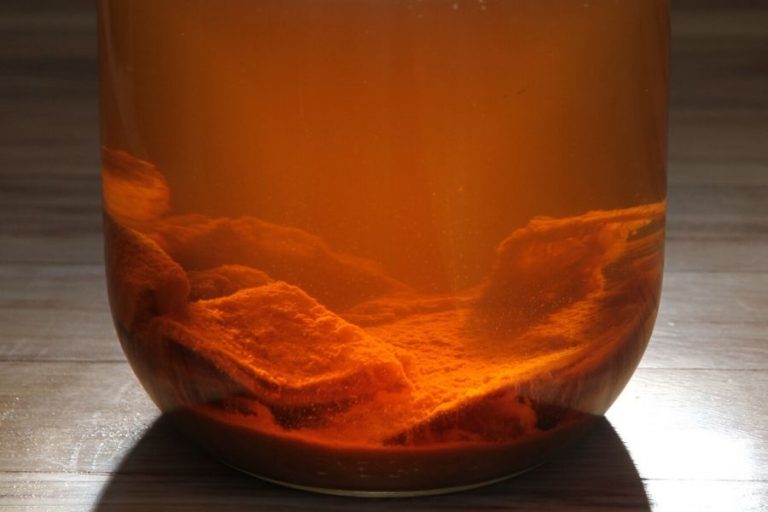
From there, you just want to let it sit at room temperature for 4-6 weeks. I usually find the back of my kitchen counter is the best place for this!
Taste test your homemade vinegar when it starts smell sharp and acidic (like vinegar).
If you think it's done, bottle some up in a smaller jar and seal it with a canning lid and band. Push it to the back of your kitchen counter and let it sit for 2-3 days.
Break the seal and if no pressure is released, the finished product is ready to be transferred to a food grade container and should be stored in a dark place, like a kitchen shelf, in a pantry or cold room.

Common Question 1: What Should I Store My Vinegar In?
Because homemade apple cider vinegar is acidic, you need to be sure to store it in a food grade container!
My favorite way to keep vinegar is in glass. I have a collection of glass jugs and bottles that I transfer homemade vinegar to. There are several reasons for this!
- Glass is food safe and won't corrode or leach unwanted materials into your vinegar.
- Bottles and jugs use corks (or plastic stoppers) and won't corrode like a metal lid or tin canning lid.
- Jugs and bottles are designed to neatly and tidily pour liquid, so they aren't sloppy.
- I love jugs and bottles because they're charming to look at, especially if you keep some out on the kitchen counter, on open shelving or at the dining room table.

If you decide to store your homemade vinegar in glass canning jars, don't use tin canning lids to cover them! The acidity of the vinegar will eat at the lid and eventually, rust it out completely. Who knows what's falling back into your vinegar during this time!
Instead, I recommend using white plastic lids instead. Just to sure the buy ones that matches the mouth size of your jar.
- You can get a set of standard (or small) mouth lids RIGHT HERE.
- And here is a set of wide mouth lids for storing vinegar.
These lids are very useful for many different things, and I feel sure you won't regret having them in your kitchen!
Common Question 2: How Does the Fermenting Process Work?
Whether you use wild apples or buy some inexpensive apples in season, fruits carry wild yeast on their skins. These are responsible for the first ferment, also known as the alcohol phase.
Natural yeasts will take the sugar in your apple juice and convert them to alcohol. They produce carbon dioxide while doing this and you might see tiny bubbles on the sides of your container in the first ferment.
The second ferment is the result of natural, airborne bacteria in your kitchen. Because your juice is only covered with a cloth (or another breathable material), air flow can carry acetic acid bacteria to the surface of your juice.
This group of good bacteria will convert the alcohol content to acetic acid. And when they've finished their job, you'll have a tangy, acidic homemade apple cider vinegar!

Common Uses for Homemade Crab Apple Vinegar
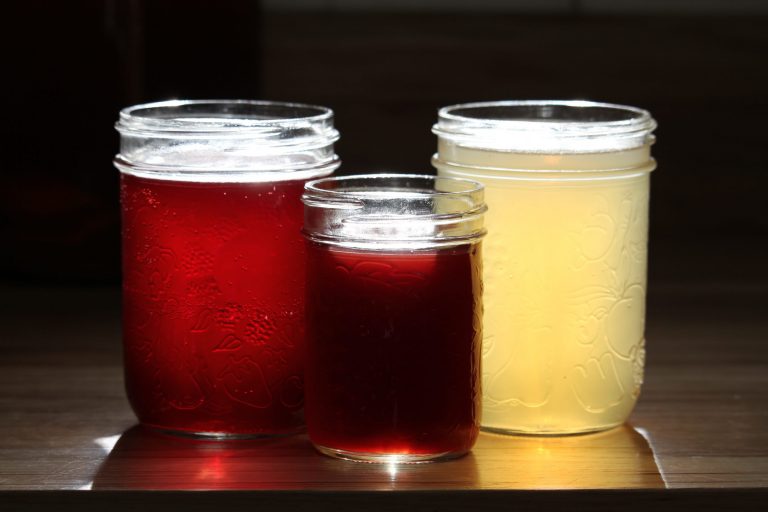
Crab apple vinegar tends to have a lighter flavor than vinegar made from traditional apples. But it's still delicious and can be used in many different ways in the kitchen! Here are some of my favorite ways to use it in my cottage kitchen!
- Use it to make a delicious, invigorating drink called haymaker's punch or a shrub.
- Make delicious homemade salad dressings for green salads.
- Add it to my healthy homemade mayonnaise recipe.
- Tenderize red meats by adding it to your marinades.
- Combine apple cider vinegar with milk to get extra rise in biscuits and quick bread (1 tablespoon vinegar per 1 cup milk).
- You can preserve whole cloves of garlic in vinegar and store it in your fridge.
- Use it to make a batch of refrigerator vinegar pickles when you have an overabundance of cucumbers.

Apple Cider Vinegar from Crabapples
Equipment
- 1 gallon plastic pail
- wood Cutting board
- large kitchen knife
- fermenting crock or jar with weights and cloth cover
- large bowl
- 1 cotton cloth for filtering
- coffee filter or paper towel
- string or rubber bands
Instructions
- Harvest your crab apples into a plastic bucket until you have enough for the amount of vinegar you want to make.
- Using the cutting board, roughly chop crabapples in half to release juices faster.
- Dump apples into your fermenting container, leaving 2-4 inches of open space at the top.
- Place weights on the apples and cover with chlorine-free water until apples are submerged by an inch or two.
- Cover apples with a cloth cover and fasten down with a string or rubber band to keep fruit flies out. Using a jar? You can pop an actual lid into place and keep it in the refrigerator during the infusion process!
- After apples have infused in the water for 7-10 days, test to see if the liquid is sweet. If so, move on to the next step.
- Line a large bowl with a cotton cloth and place it in your kitchen sink.
- Pour the apples and water into the bowl.
- Knot the 4 corners of your cloth together and lift the apples, letting juices drip through into the bowl below.
- Discard the apples and pour the liquid back into your crock, jar or fermenting container of choice.
- Cover the mouth with a breathable cloth cover and fast it down with string or a rubber band to keep fruit flies out.
- Let the juice ferment at the back of your kitchen counter for 4-6 weeks.
- When it starts to smell sharp and vinegar-like, taste test it.
- If it taste sharp like vinegar, pour some into a small jar and fasten a canning lid and band down on the jar.
- Let it sit at the back of your kitchen counter for 2-3 days.
- Break the seal on your little jar and if there is no release of carbon dioxide (meaning there's no puff of air escaping), your vinegar is finished and ready to be bottled.
- Store vinegar in a food-grade container with a non corrosive lid (I recommend using corks, glass or plastic lids).
- Keep it in a dark place on a kitchen or pantry shelf and use within a years time.

When I tasted mine, it tasted very watery and looked cloudy. Is it supposed to be like that? And should I strain it?
Has it gone through both of the fermenting phases? If it isn't sour enough, try adding about 1 tablespoon of sugar or honey per 4 C (1 litre) of water, and let it ferment for longer. If it smells moldy or rotten (bad in any way), it may have spoiled on account of crab apples not having enough sugars to feed the right bacteria group.
Yes. It’s been through all the fermentation steps. Will try fermenting for longer.
Following your instructions. I have jars sitting that have about two more weeks of fermenting before I can test it as you mentioned in step 15. I am seeing some mold on top and have spooned it out and wiped the inside of the jar down . Is this still safe to use?
Yes, it should be safe to use unless the mold returns again.
Tip. Stir the jar once a day with a wooden spoon. This will help detour any unwanted growth on top. No need to use a weight. .
For some people, daily stirring works. Other folks (probably due to mold spores in their home) need to submerge apples to avoid mold growth.