How to Make a Wreath Out of Branches
One of the things I love about being a full time homemaker is that I have time to be creative with my hands. Instead of grabbing what I need on my way home from work, I get to savor the process of making the desired items for my home.
There's something so unique and beautiful about handcrafted homes, furniture and décor. And right now, I want to walk you through an easy, DIY project that anyone can do! I'm going to show you how to make a wreath out of branches!
5 Steps for Making Your Own Wreath Frame
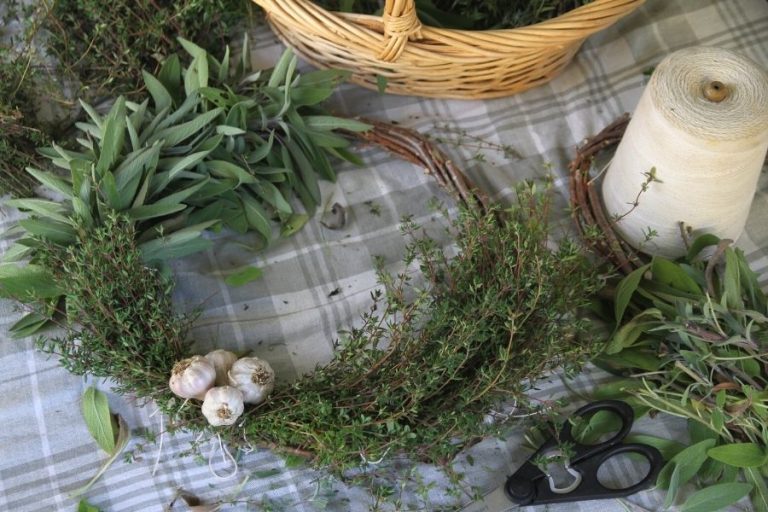
Making your own wreath frame is simple. All you need is a number of tree boughs, floral wire and a pair of pruning shears. And this tutorial, of course! Let me walk you through the process!

Step 1: Choose Wood Types Suitable for Wreath Frames
If you have trees growing on your land, you can go out and collect your boughs (or saplings) for wreath making, so long as they're the right type!
Cedar, willow, dogwood, poplar and birch are all excellent options. But stay away from tree types that release resin (pine, spruce, fir) or have sticky buds (like cottonwood). Why? Because if your wreath is hanging against a wall, window or door, these boughs will likely leave resin or sap behind. And it's very difficult to get off!
Step 2: How to Harvest Your Material
Grab a pair of pruning shears (you can get some here), your winter coat and head outdoors. Using your shears, begin cutting and collecting limbs (or saplings). Try to take as much as you can from each bough! Longer branches are easier to work with and you'll need less of them to complete a wreath.
That being said, you don't want the base of your bough to be more than ½ inch (1.5 cm) in diameter. Go bigger than this and you won't be able to shape or bend the wood fibers without breaking the branch.

Once you've collected enough boughs to fill both hands, trim off all greenery and branches, so you're left with a smooth, bare “stem.”
And then, it's time to head indoors!
Step 3: Create the Size and Shape You Want
If you live in a very cold climate, give your branches time to warm up before attempting to work with them. They'll be more pliable! But once you're ready, it's time to begin creating your frame!
This is where you'll want floral wire (grab some here). Take two branches and overlap them by about 1/3 of their length. Twist the ends around one another, then wire each end into place.
Do the same with the other ends, adjusting them to create the circle size you desire for your wreath.

Congratulations! You just made the base of your wreath frame! And from here on, it's easy.
Step 4: Add to Your Wreath
Continue weaving wood boughs around your frame, as best you can. Stagger the placement of the branches large ends, so you don't have extra outward force in one area.
If you do it right, you shouldn't need to use very much floral wire in the process. Play with your frame and use the natural force of the bent boughs to hold things in place. Small twiggy ends can sometimes be pushed into the wreath's frame.
Don't worry if branch ends are sticking out all over, making your wreath frame unsightly. You'll trim them up later! In this stage, you just want to keep adding boughs, until you're happy with the thickness of your wreath.
Step 5: Trim Ends and Tidy Up
Once you're happy with how your wreath looks, go ahead and use your pruning shears one last time. Trim off all the ends that are poking out from the frame.

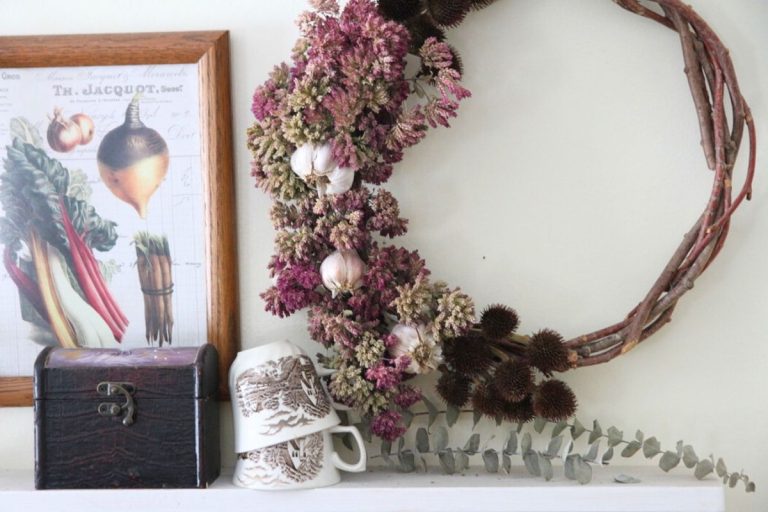
Once your wreath is trimmed up, all you have to do is add a bit of ribbon or jute twine to the top for a hanger. And just like that, you've made your own wreath frame!
Wrapping Up...
Because these wreath frames have a vintage, classic feel, they can be used year-round in your home décor! They aren't just for Christmas. You can redress your beautiful frame with each season's change, use it as a centerpiece or even display it bare (I think they're beautiful enough for that!).
What do you think? Where would a wreath fit in your home?

Excellent. I love making my own wreaths, including the frame. This is a great tutorial.
This video is really great... thank you for showing how it’s done!
I’m so happy to see someone pursuing this. I figured out how to create all natural wreaths about 2 years ago when caring for an elderly client. They have 2 huge Willow trees, grapevine’s and I’ve used dogwood I believe. I was lucky and did not need any floral wire - the end of the willow was still damp and was viable for supporting the rest of itself.
Good luck with your future endeavors girl!
This is great to know. We have new land with lots of trees.
Good tutorial. A good tip I found is to cut the fat ends at an angle instead of 90 degrees - it makes the circle outline look much tidier.
And it helps the stem slip into the wreath frame more easily. I sometimes use a knife instead of pruners to get a long angle.
Great idea, thanks!
I do the same thing.
😉
This is so cool! Thanks for the tutorial. Do you think manzanita branches would work well?
Hi Lindsy!
I'm not familiar with manzanita trees, but if the branches are pliable they should work.
Thank you so much for posting how to make a wreath frame, I can't wait to go out and find some limbs! 😊
It's a lot of fun! Hope it goes well for you.
I was looking for something simple organic looking but still lovely. Your blog was perfect thanks for the inspo
This wreath frame certainly is both of those things! Good luck and let me know if you have any questions!
All the best,
Autumn
Thanks for this video. I've been making my own wreaths for years. I use vines that grow naturally in the forest. I have cultivated a way of forming the vines into a circular wreath tucking the ends into themselves. This method requires no need for anything to secure the vines in place. Kudzu vines actually make the best wreaths. I also leave the leaves on the kudzu vines which dry nicely and become part of the design of the finished wreath. Actually any bush with pliable branches can be fashioned into a wreath. I always leave all foliage to dry naturally.
Thanks so much for this post. We have manzanita, pine, oak, and buckeye. I know I cannot use pine. I can’t wait to go out on our land tomorrow and look for branches for my Thanksgiving wreath.
So glad you found my tutorial! Hope it goes well for you and be sure to ask if you have any questions!
-Autumn
This looks fun! What a great way to make use of what our environment offers. Our crafts, our wreaths, can reflect where we are and give our homes a real sense of place. Thank you!
You're welcome! Yes, I love how natural these wreaths/wreath frames are. 🙂