5 Ways to Create a Low Maintenance Vegetable Garden
There are many things to love about growing your own vegetables! The first thing that everyone thinks about? Home grown veggies taste amazing. It's fun to grow varieties you can't find at the grocery store. Then there's the vine-to-table aspect, freshly harvested food that hasn't had time to lose vitamins our bodies need.
Gardening is a highly rewarding endeavor with many perks! But there's one thing about growing food that all gardeners all know in a real, practical way: it does take time, dedication and effort!
How to Create a Low Maintenance Garden
Those of us who have developed the callouses, wiped rivulets of sweat from our faces and felt the painful aftermath that comes from bending over all morning, we understand that it doesn't come easy. Gardening is loads of work!
And for a gal who struggles with low energy...well...let's just say I've had to find ways to work smarter in the gardens! Because I think we could all use a bit of 'smarter not harder' in our gardening lives, I thought I'd share some of my favorite, time-saving tips with you today!
Tip 1: Take Time to Create a Good Foundation
Everyone I know likes shortcuts, to find faster and easier ways of doing things. However, when it comes to preparing your vegetable garden for the growing season, it's important that you take time to do the proper ground work (no pun intended!).
If your soil hasn't had organic composted matter added to it for several years, take time to add some to your planting rows. Weeds thrive in depleted soil, and you can't fool poor soil into producing rich, healthy food for you!

Maybe you have pesky weeds that like to take over your garden? Be sure to clean out the garden beds before you plant and also, I'd recommend making time to put down a hearty layer of mulch (see tip 3)!
Perhaps rodents or deer ate your garden last year? Set traps, create raised beds, fix the fencing and do whatever you need to do to limit the issue before you start planting!
Always take time to create a solid foundation the beginning of the year and the rest of the season will go much, much smoother!
Tip 2: Create Permanent Beds
I'm a big fan of permanent garden beds. While they initially take more work, they're worth it in the long run! Here's why.
After they've been created, permanent beds are easier to care for. There's no questioning which areas of your garden are dedicated to pathways (which need little attention) and which parts need tending to (growing rows). When it comes to seeding, weeding, watering, mulching or adding compost to your garden, the ability to distinguish between growing soil and walkways will save you time, labor and money!
Want a simple way to create permanent garden beds? Grab a shovel and head out to your garden! Shovel out walking pathways at the width you prefer and use the excess dirt to create long, slightly raised growing beds that are 6-12 inches tall and 16-24 inches wide.

This works well in an already established garden space, but it also works well when putting in gardens for the first time!
That's what we did here on the Mountain Farmstead. Our soil is poor, primarily composed of rock, gravel and sand. Instead of battling our rough bit of earth, we dug down in the soil and removed grass/weed roots in our “to be” garden space.
Then we hauled in composted animal manure and good soil, piling it in long growing rows that were anywhere from 18-24 inches wide and 12-16 inches deep. And just like that, we had permanent growing beds!
For the kitchen garden, we made permanent, above-the-ground hugelkultar beds. You can learn how to make a hugelkultur raised bed here.
We don't rototill our permanent beds, simply because there's no need. Instead, we rely on mulch and hand weeding to keep things under control.
Tip 3: Use Mulch Throughout the Garden
By avoiding the rototilling process, you create healthier soil, leaving the microbes (and worm life) undisturbed. And as I've already mentioned, healthy soil actually grows less weeds!
If you rototill weeds under after they've developed seed heads, you're simply distributing the seed throughout your soil. When you till up plants that propagate through the root system, all those chopped up bits will simply grow more plants, as in the case of quack grass (ak couch grass).
Want to save time in the garden?
USE MULCH!
Permanent garden beds should always have a soil cover to keep the weeds at bay! You can use dried grass clippings from your lawn, provided your grass hasn't had time to develop seed heads.
I teach you how to mulch with grass clippings here.
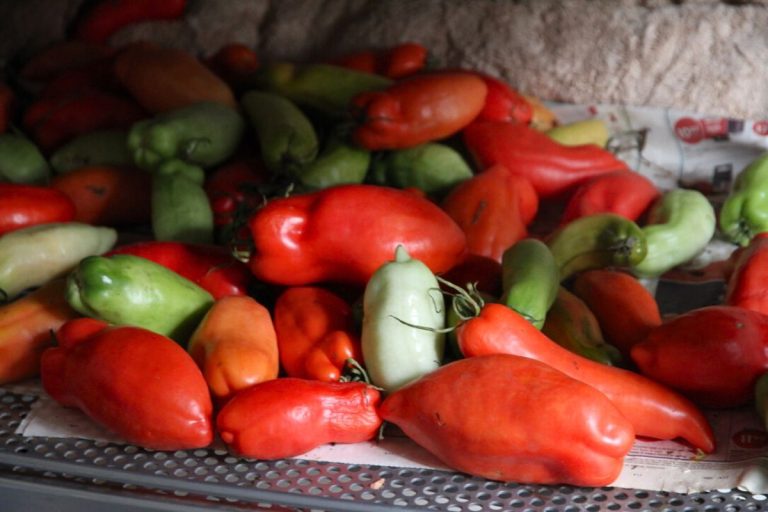
You can also use old, rotting straw bales. On a few occasions, we've even stretched out black plastic over our tomato, pepper and okra planting rows!

Don't stop with mulching your planting rows!
Walkways also develop weeds. You can put down a layer of cardboard or weed tarp, then mulch it with 1-2 inches of straw. Bark mulch or wood shavings will also do.
As long as you don't till your garden, add enough mulch and keep your beds in the permanent place, mulch will significantly cut back on the amount of time you spend weeding!
Tip 4: Plant in Wide Rows
There's still another way to suppress the weeds! How you grow your veggies also makes a difference.
When growing carrots, beets, turnips, beans, peas, cabbages and the like, always use wide-row planting techniques. Yes, permanent 16-24 inch wide growing beds are perfect for this!
Instead of planting a single line of carrot seeds, then having a walkway, another single line of carrots and so on, plant several lines of carrot seed in a 16 inch wide bed!
Not only can you grow 3-4x more food per square foot of space, but the foliage of the plants themselves will block sunlight and weed growth as they mature.
Instead of weeding the edges of 3-4 rows of carrots, you'll be weeding the edge of one single row while still producing the same amount of food.
Work smarter, not harder!
Tip 5: Use Automatic Sprinklers
I've been in situations where I've had to water large gardens entirely by hand. It can take anywhere from 2-3 hours per day. However, after I starting using a stationary sprinkler, I discovered the sprinkler timer and my gardening life was forever changed!
Most plants do well being watered in the middle of the night. Because it's cooler out, the water doesn't evaporate off as quickly and your vegetables will have the chance to get a good, long drink! Trouble was, I didn't want to get up in the middle of the night to turn my sprinkler off. Know what I mean?
When we started using a sprinkler timer, all that changed! I can water things in the cool of the night and sleep through it all. Smarter, no?
We've used this model here for several years now and have been very happy with it. It has attachments for two hoses, is easy to program and fastens directly to your outdoor water faucet. It's also a wonderful tool to have when you go on vacation!
It'll save you and hassle!
What Do You Think?
There you have it! Those are my top 5 ways to create a low maintenance garden! Does it still take work to grow your own food? Of course! But over time, your beds will grow less and less weeds, the soil will become richer and you'll have better harvests. And hopefully, things will get easier as time goes by.
What are your favorite ways to save time in the garden?


I fully agree with you that homegrown veggies taste really good, but I've never had fun growing it. It was a tough process as the soil in my garden does not support vegetation. The tips given here are helpful. I am planning to develop raised beds in my backyard to grow berries.
Good food and easier growing is all wrapped up in the health of your soil! Good luck with the raised beds!