How to Build a Root Cellar (with concrete)

Learn how to build a root cellar with concrete, so you can store fruit and vegetables all winter long. Get tips to find the best location for a root cellar, decide on a style and interior design. Also discover the cost of building a concrete root cellar on your land!
My introduction to root cellaring began with a home my man and I rented in town, 10+ years ago. Tucked in the corner of the unheated basement was a 10x10 space for cold room storage.
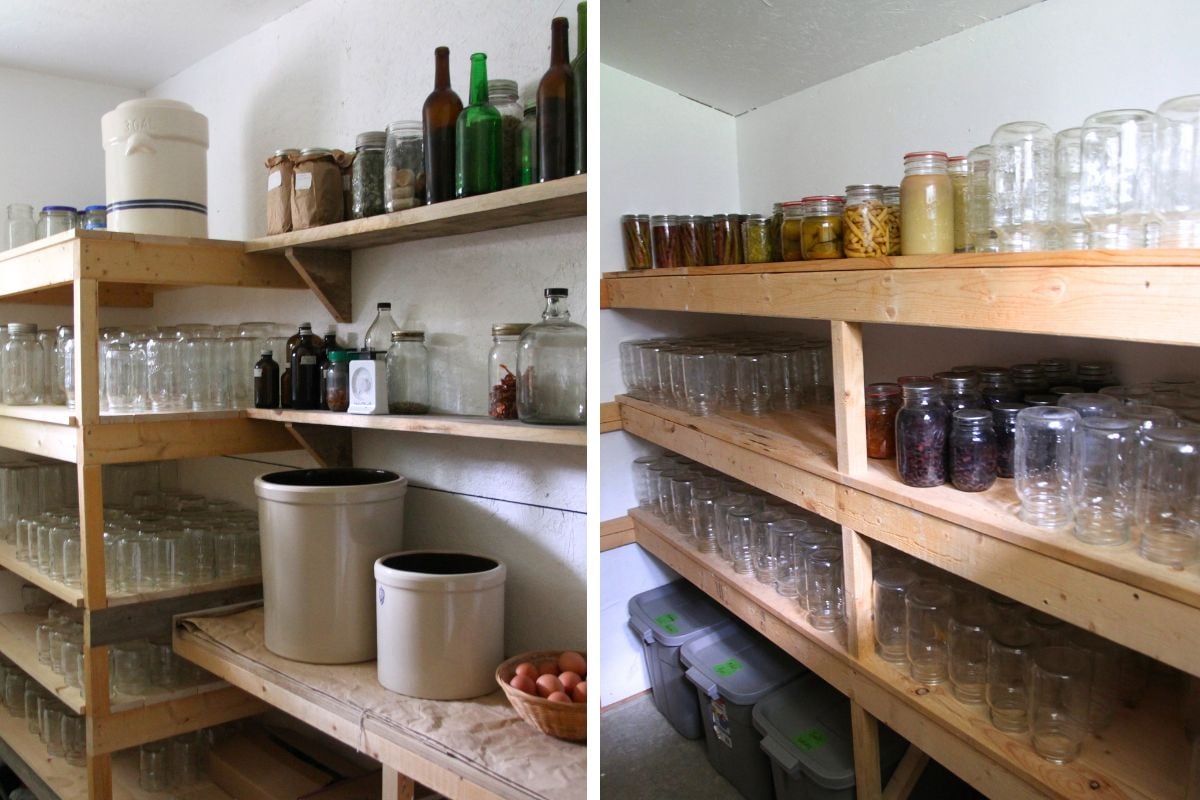
At first, I only used the room to store my canning and fermented food.
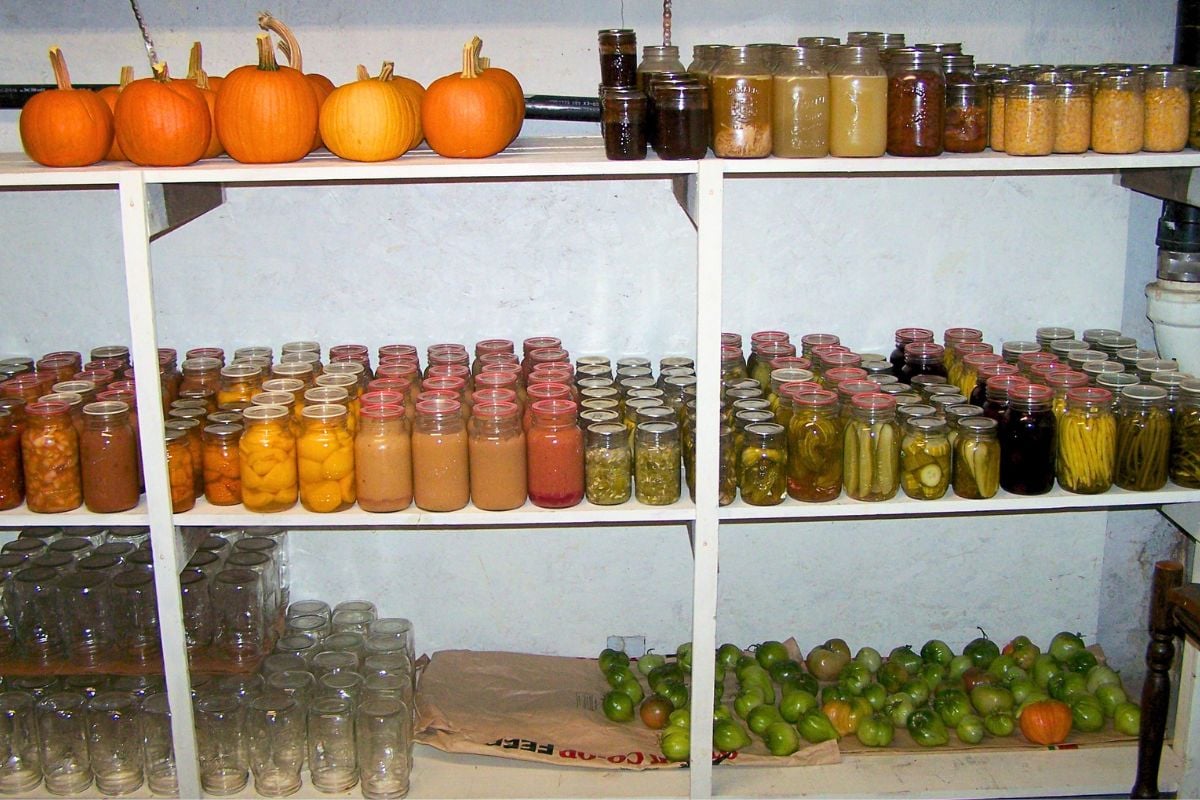
But after that first winter, I realized it could be used as a basement root cellar as well. That's where I learned about storing root vegetables and storing winter squash long term. I also learned how to store pumpkin over winter, plus how to cure and store potatoes.
The basement root cellar was also great for storing pears and apples, short term.
When we moved to the countryside 4 years later, we took the principles I'd learned and built a cold room in house.
The cold room was a lean-to on ground level, built off the north side of our cottage. Cold air was let in through a small, high window.
It worked great after nighttime temperatures dropped to freezing (or thereabout). My garden vegetables kept well, until things began to warm up in the spring.
When the spring warmth hit, I'd start pining for a real root cellar, so I could extend food storage by 2-3 months' time.
I was grateful for my cold room but I really, really wanted a real root cellar. My husband is a journeyman carpenter, plumber and gas fitter. I knew he was very capable of building a great root cellar!
So I spent hours pouring over the book Root Cellaring by Mike and Nancy Bubel, and relayed the information to my man. Together, we came up with an excellent design, and decided on a location for our concrete root cellar.
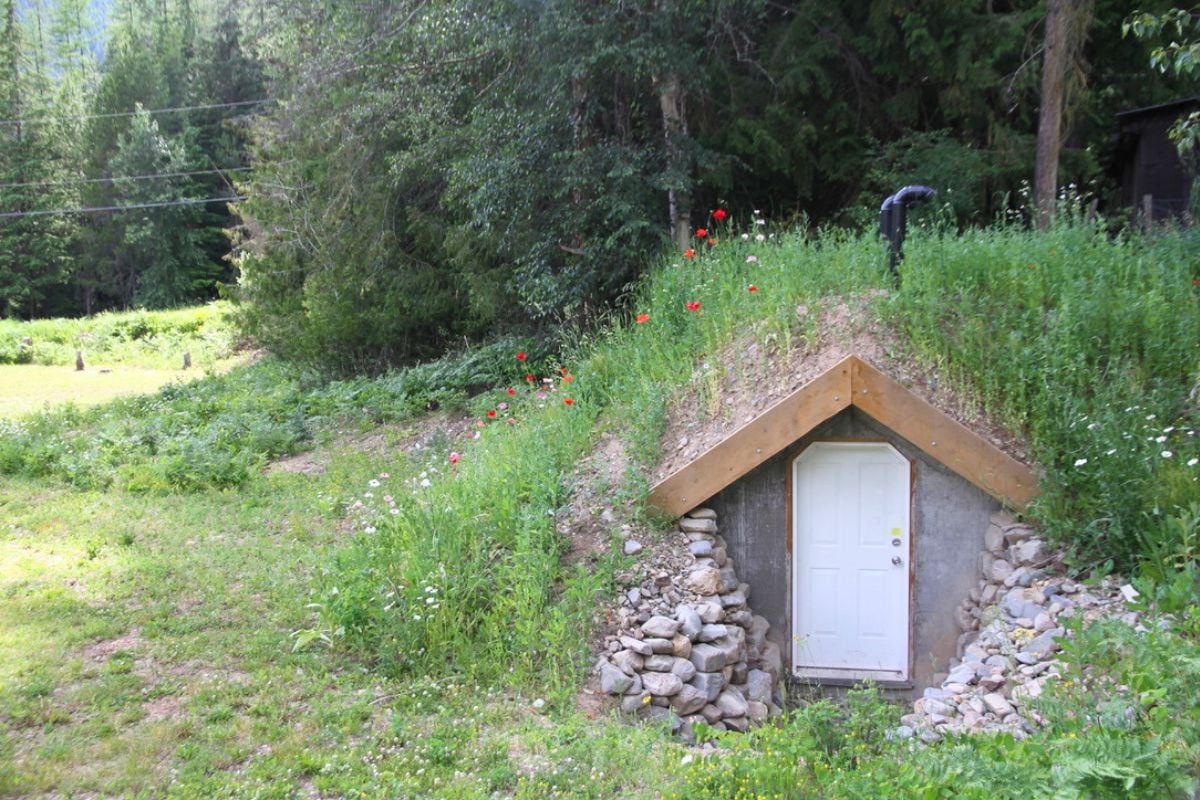
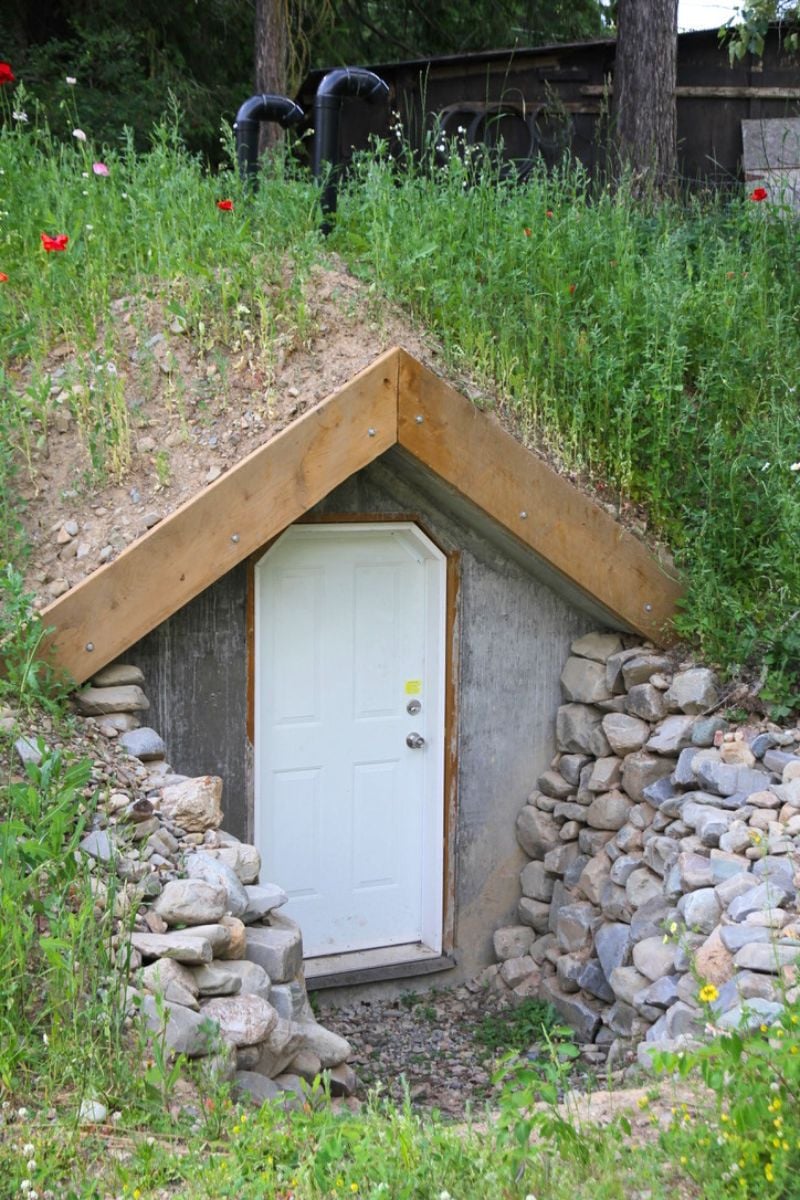
After saving money for the build, we were finally about to build a little root cellar in a hillside just off our kitchen.
We budgeted for $3,000 CAD. And that's almost exactly what it took!
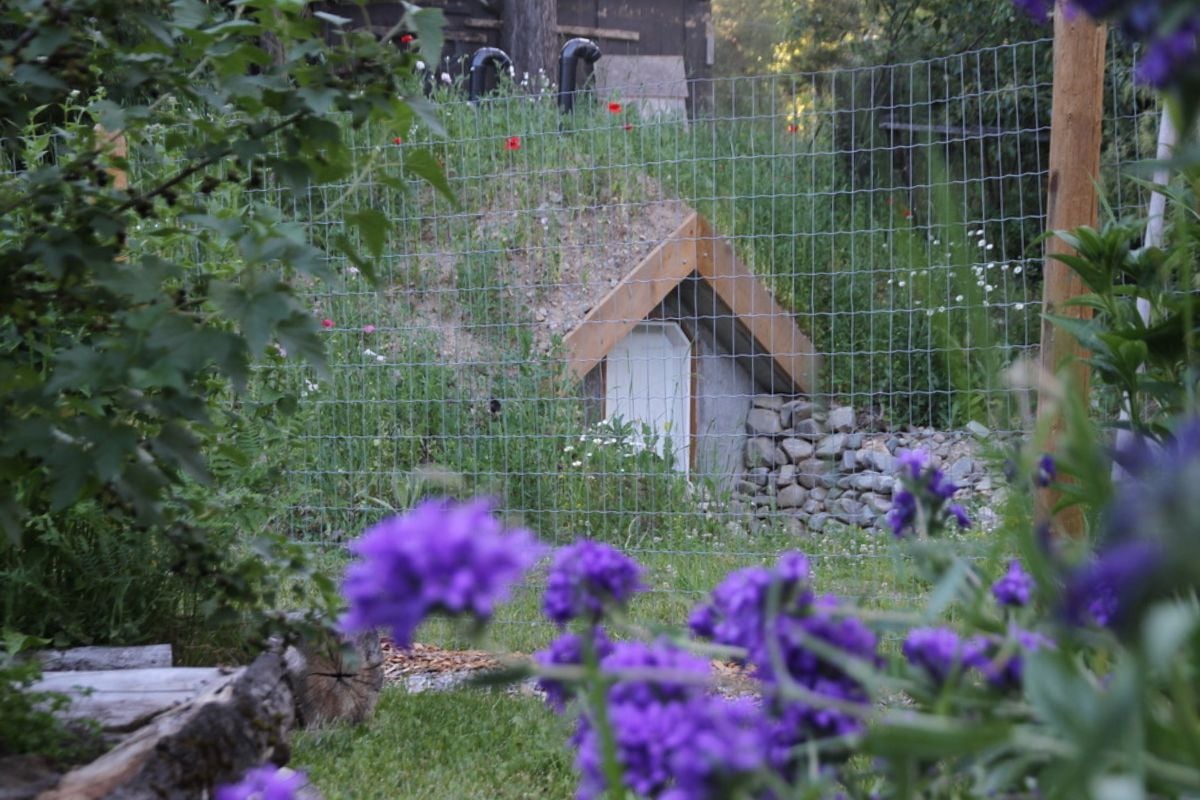
Here's the practical process we had to walk through when building our 8x10, concrete root cellar in a hillside.
Construction Materials You'll Need
These are the construction materials we used to build our root cellar.
- 3 yards gravel
- Sump pit (5 gallon bucket with a lid & drilled holes)
- 2x4 lumber for framing
- Plywood forms
- Form oil for plywood (or diesel)
- Quick strip ties
- Waler bar
- Rebar
- Tie wire
- 2x10 treated lumber for doorway
- 6 inch round duct sheet metal for vents
- Concrete walls: 1.5 meters
- Concrete roof: 1 meter
- 4 inch ABS pipe
- 4 inch PVC pipe
- Hydraulic cement
- 1 exterior door
- 1 door jamb
Tools You'll Need
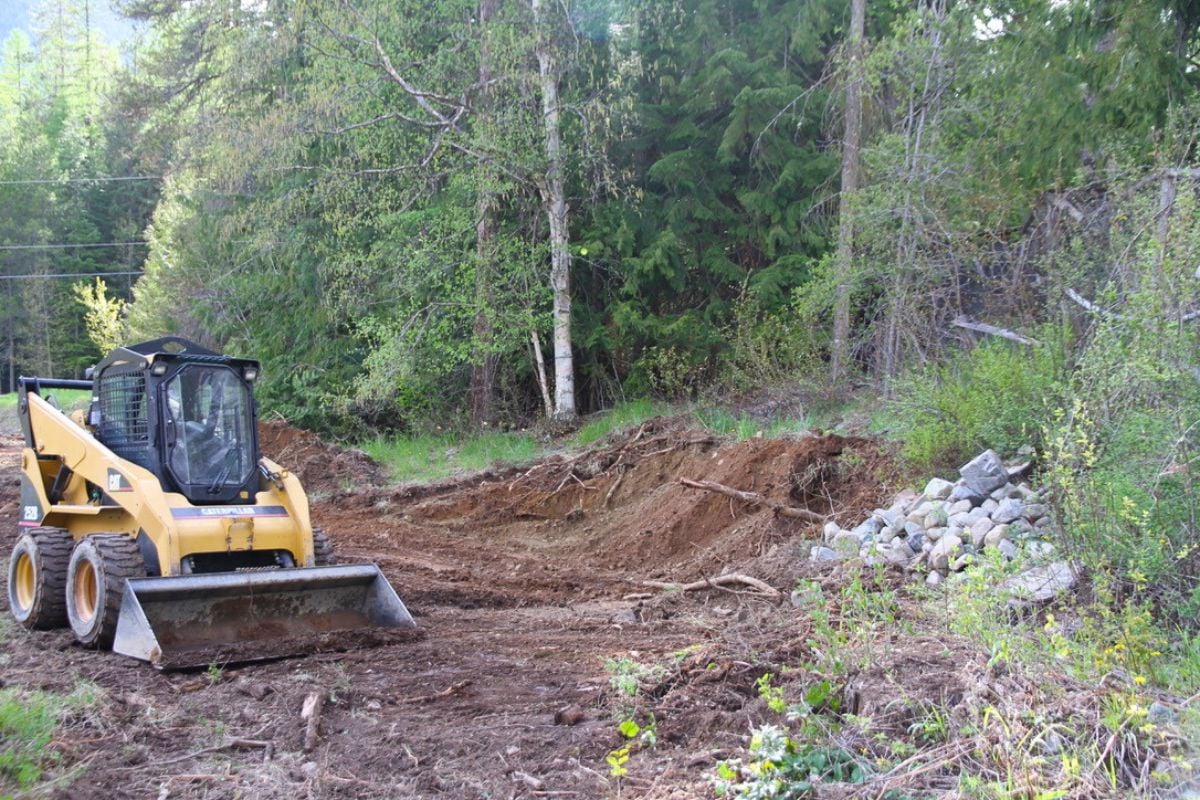
- Excavator (optional: a bobcat is useful if you need to move huge amounts of dirt)
- Plate compactor
- Rebar bender
- Pencil vibrator
- Paint roller to apply oil or diesel to forms
- Chop saw
- Table saw
- Nail Gun
- Drill & screws
- Shovel
- Hammer
- Crowbar
Watch Our Root Cellar Build
Watch and see how we built a concrete root cellar in a hillside just off our home.
How to Build a Root Cellar with Concrete
If you've ever done form work for the basement of a house, you should be able to make your own root cellar. This cellar design is built in two parts, but it is simple. I walk you through the basics here.
Be sure to watch our video tutorial, too! You can leave any questions in the comments below.
Step 1: Dig the Hole
Old timers dug their cellar holes by hand, but my man and I aren't that tough or determined! We used heavy equipment to get the job done.
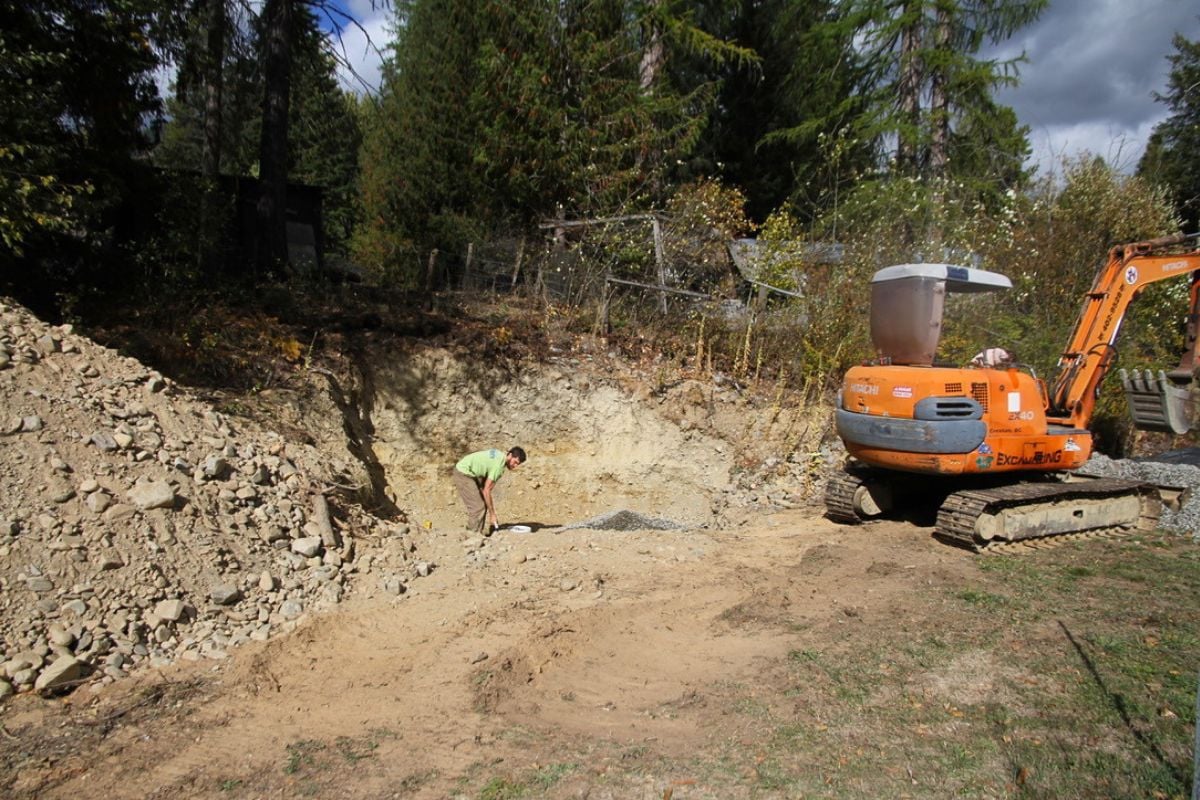
An excavator was handy for digging into the hillside where we wanted to place our root cellar. We also had access to a Bobcat, which helped us quickly move loose sand and rock away from the building site.
The hole was dug deep enough to bury our roofline under 2-3 feet of soil.
Step 2: Put in a sump pit
We don't worry about flooding around here. Our land is like a sieve. But as a precaution, we did install a 5 gallon bucket with a lid, as a backup sump pit.
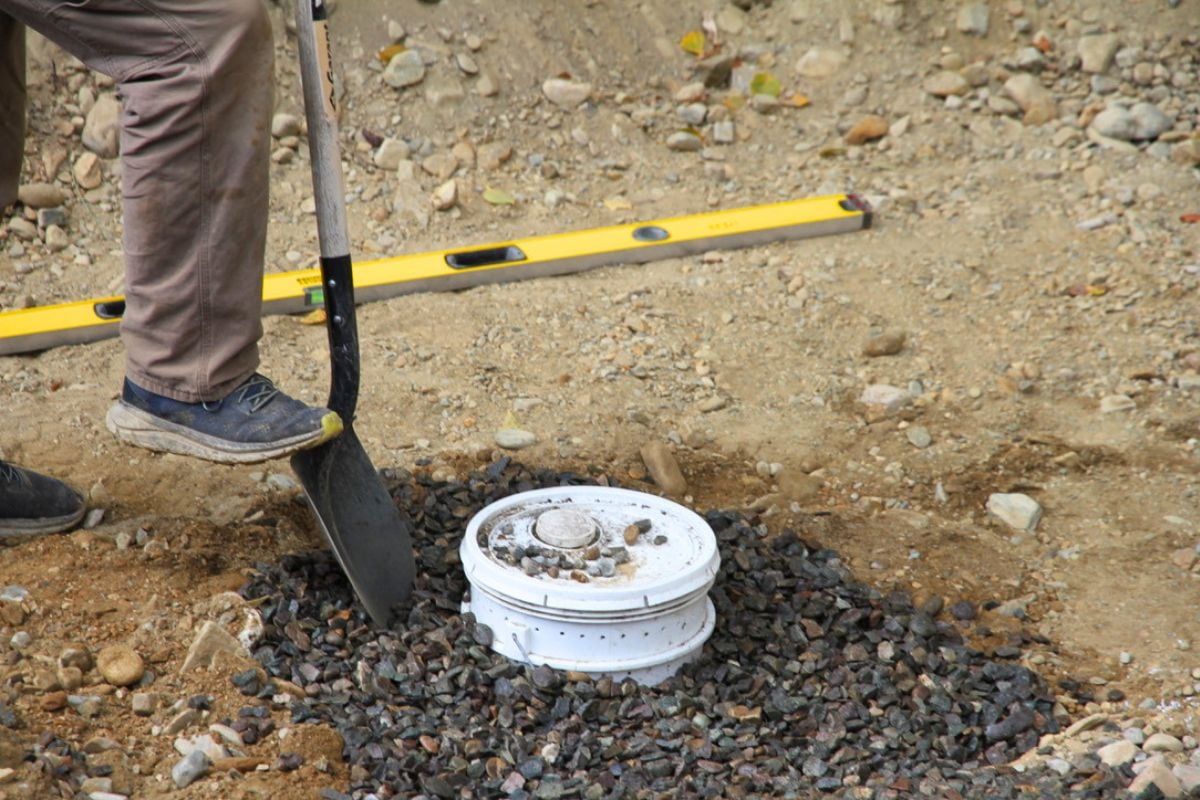
My man took time to carefully drill holes in the bucket before settling it on the dirt floor. Then he added gravel, until the bucket's lid was covered.
Step 3: Spread 6-8 inches of gravel across the floor
After sinking a sump pit, we spread 6-8 inches of gravel on the floor and packed it with a plate compactor. If a small flood does occur, there are several inches between the gravel and natural earth, so things won't get muddy.
Step 4: Frame the walls and hang concrete forms
Most of our time was spent painstakingly building forms for concrete!
We started with the walls. And because we have such gravely soil, we didn't pour footings, like you do with a house basement.
Here is a basic breakdown of the wall forming process.
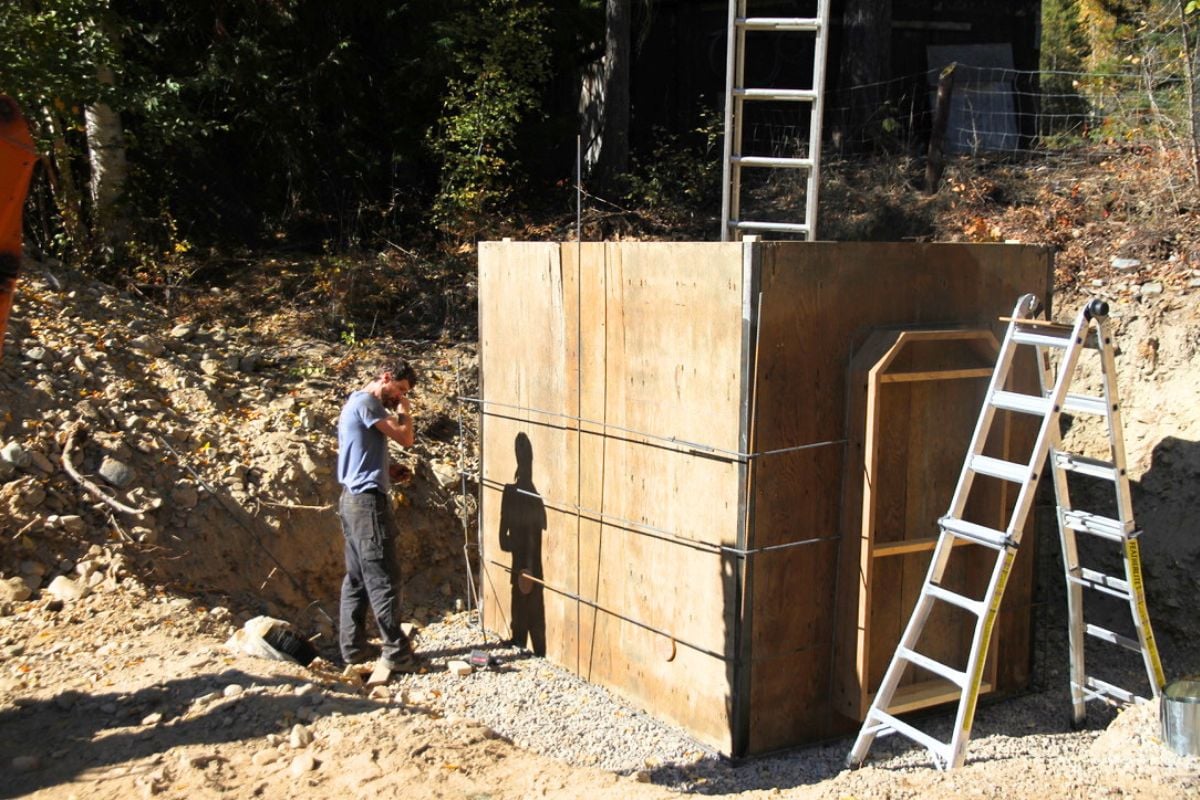
- Use 2x4 lumber to create a framework for the interior forms (see our video).
- Hang concrete forms for the interior wall, first.
- Install block outs for vents and the doorway (see video for tips on this).
- Drill a small hole in the threshhold of the door frame, so concrete can push air out and flow underneath the wood.
- Wire 10mm rebar in a 2 foot grid pattern, with enforcement around the door.
- Note: we extended rebar several feet above the wall, so we could bend it into the roof forms later, tying wall and roof together.
- Insert quick strip ties.
- Set up exterior forms.
- Slide waler bar through the quick strip ties to securely hold the interior and exterior walls together.
- Screw a 1x2 piece of lumber inside the form at the desired height of the wall and gables for screeding purposes.
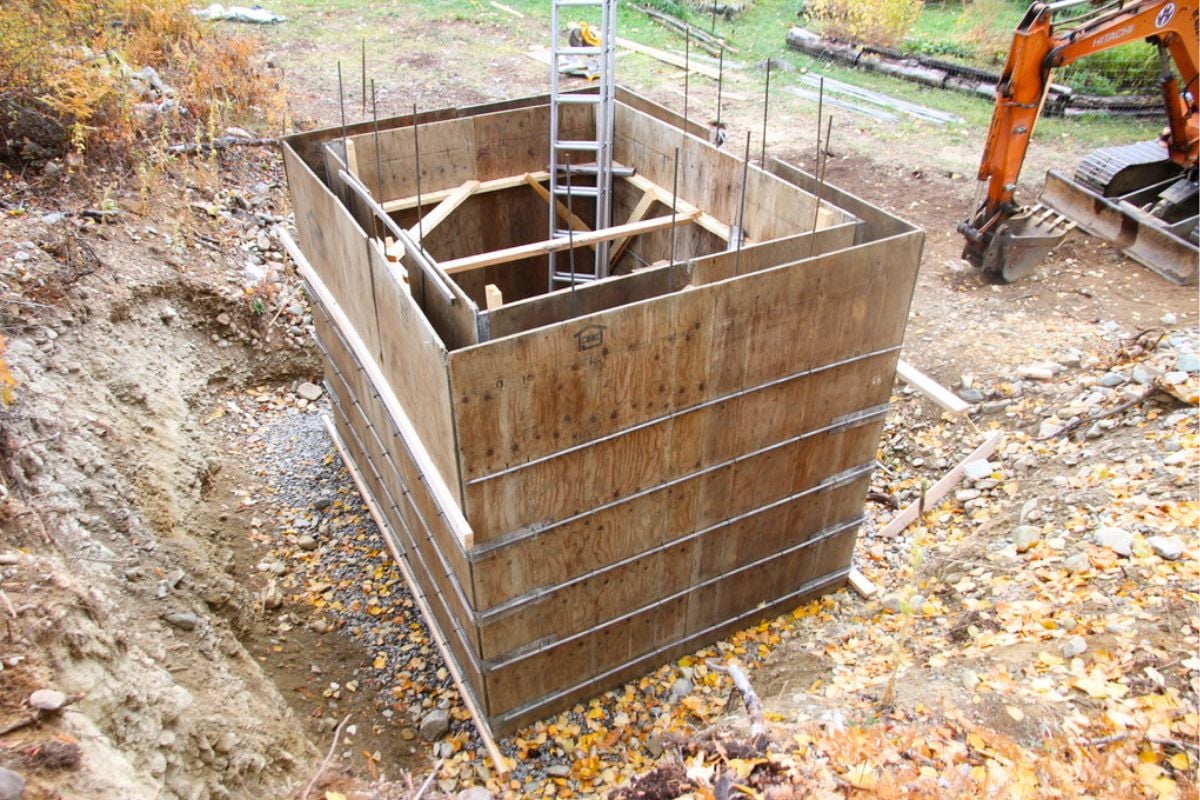
Step 5: Pour concrete walls and let them cure
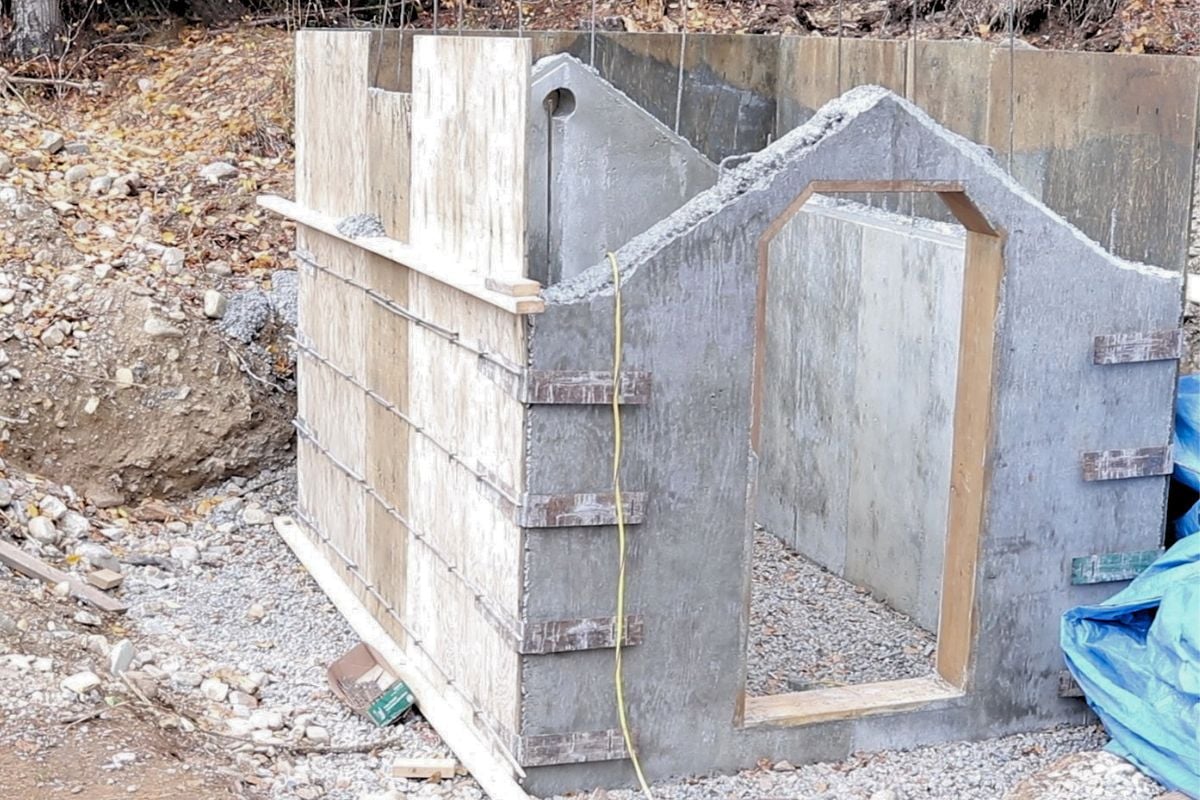
When pouring day came, our vent holes were blocked out at ground level.
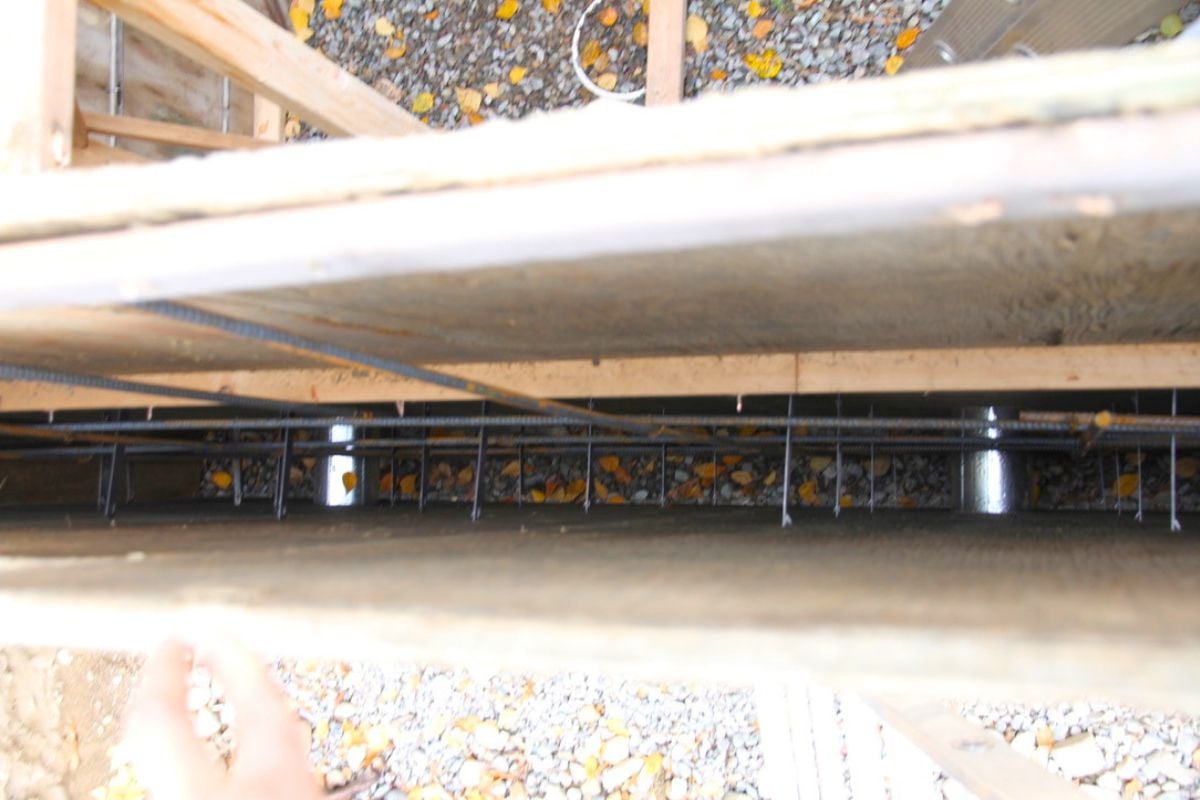
Rebar was run in a 2 foot grid pattern, and the doorway was blocked out with treated lumber.
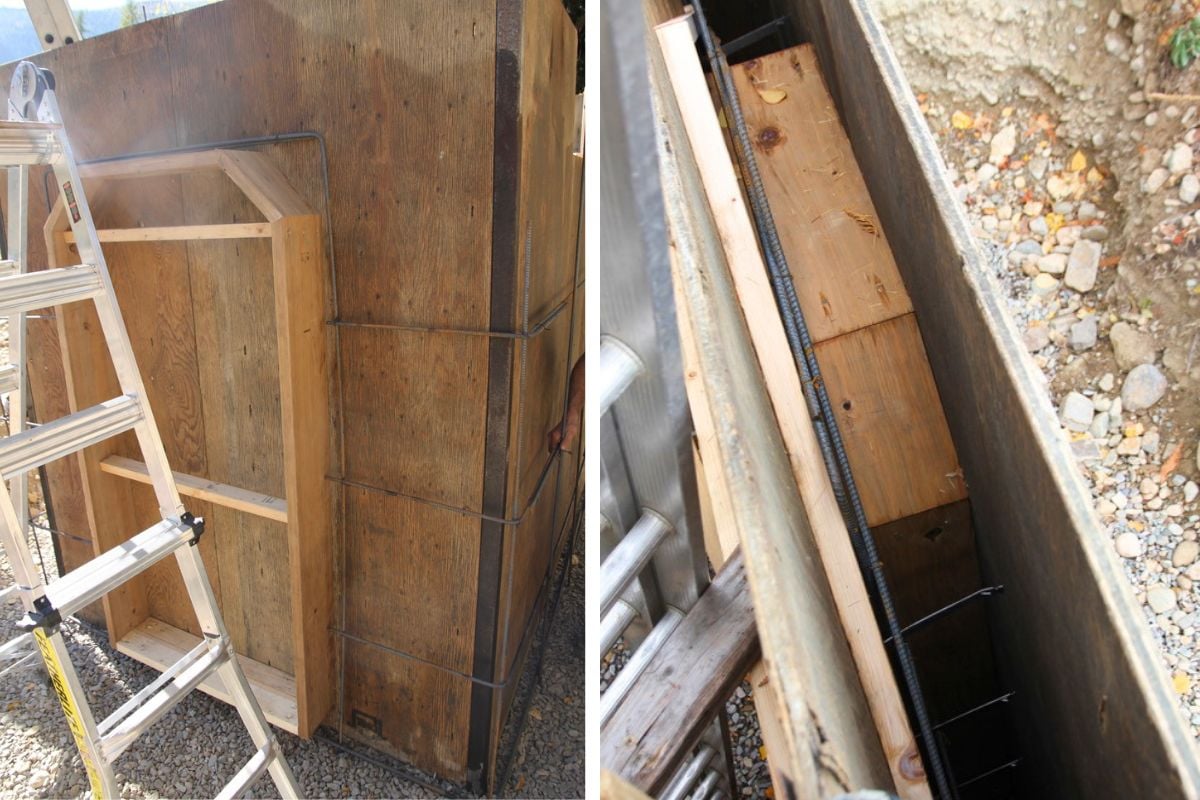
Right: top of doorway blockout inside concrete forms, before pouring concrete.
We were lucky to have hilltop access to our forms from a neighbor's property, so we didn't have to hire a pumper truck.
Instead, we just added plasticizer to the concrete and used a chute (with all the extensions!). Without a pumper truck, we had to shovel concrete around inside the forms. But we figure it was worth the extra labor, with the money we saved!
A pencil vibrator was essential and helped ensure there were no pockets of air in the concrete.
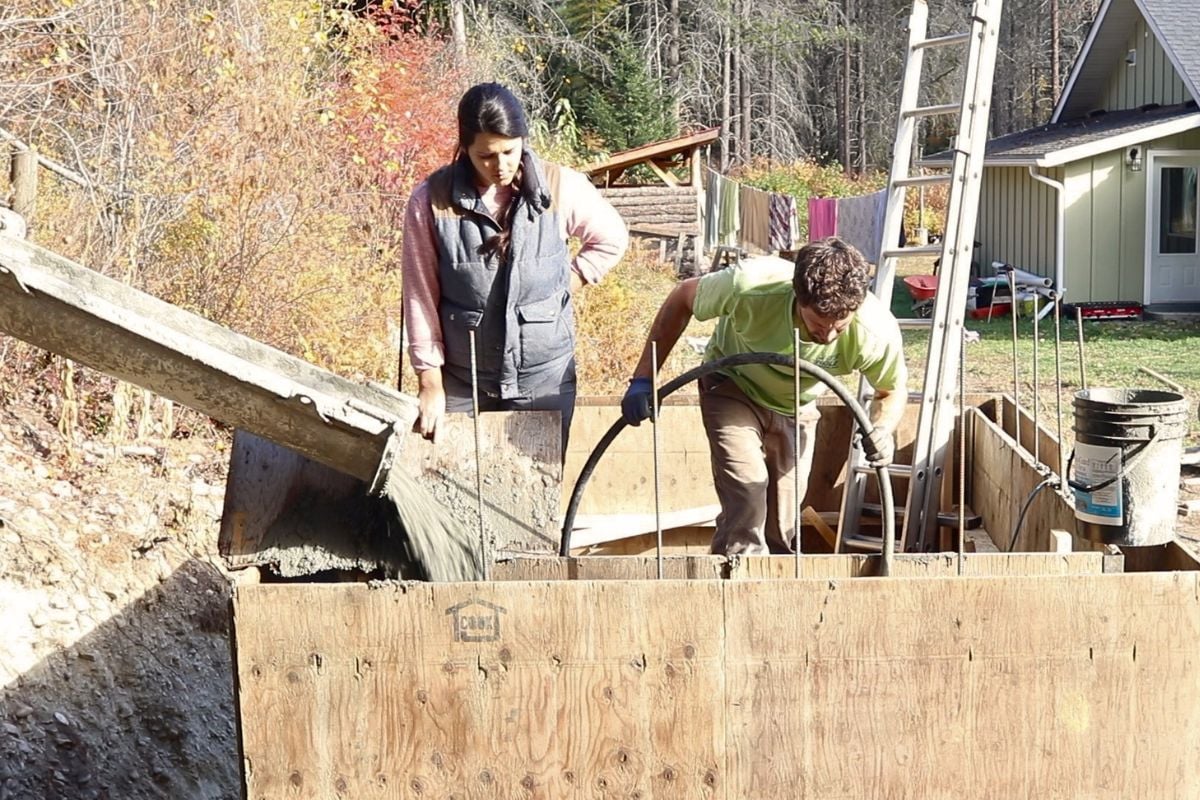
My man carefully shaped the end gables (see our video), and concrete walls were left to cure for a week before we moved on to the pitched roof.
Step 6: Framing the pitched cellar roof
Once the concrete walls set, my man pulled down the interior and front wall forms. But the exterior and back forms were left intact, to form the eaves of the peaked concrete roof.
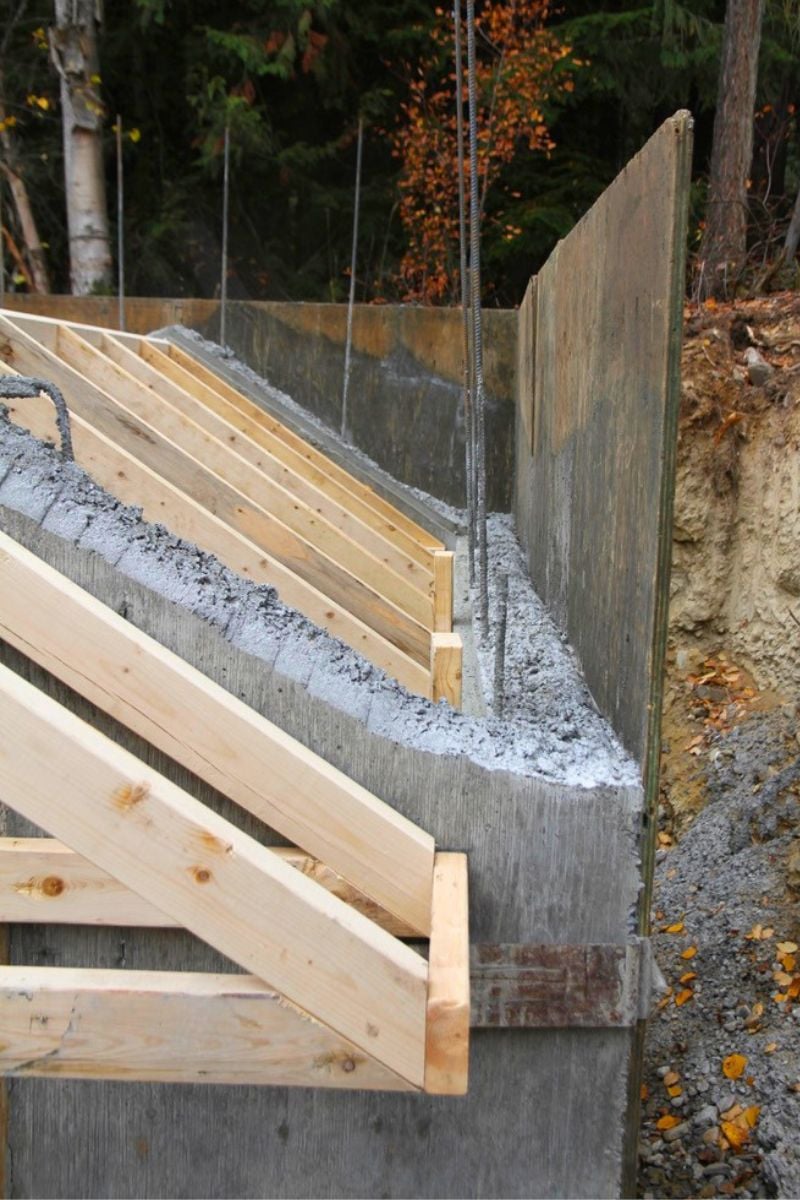
Rebar was purposely extended several feet beyond the walls, so it could be bent and tied into the concrete roof.
Before we tackled forms for the pitched roof, my man built 2x4 rafters for the forms to sit on, and braced them up from underneath.
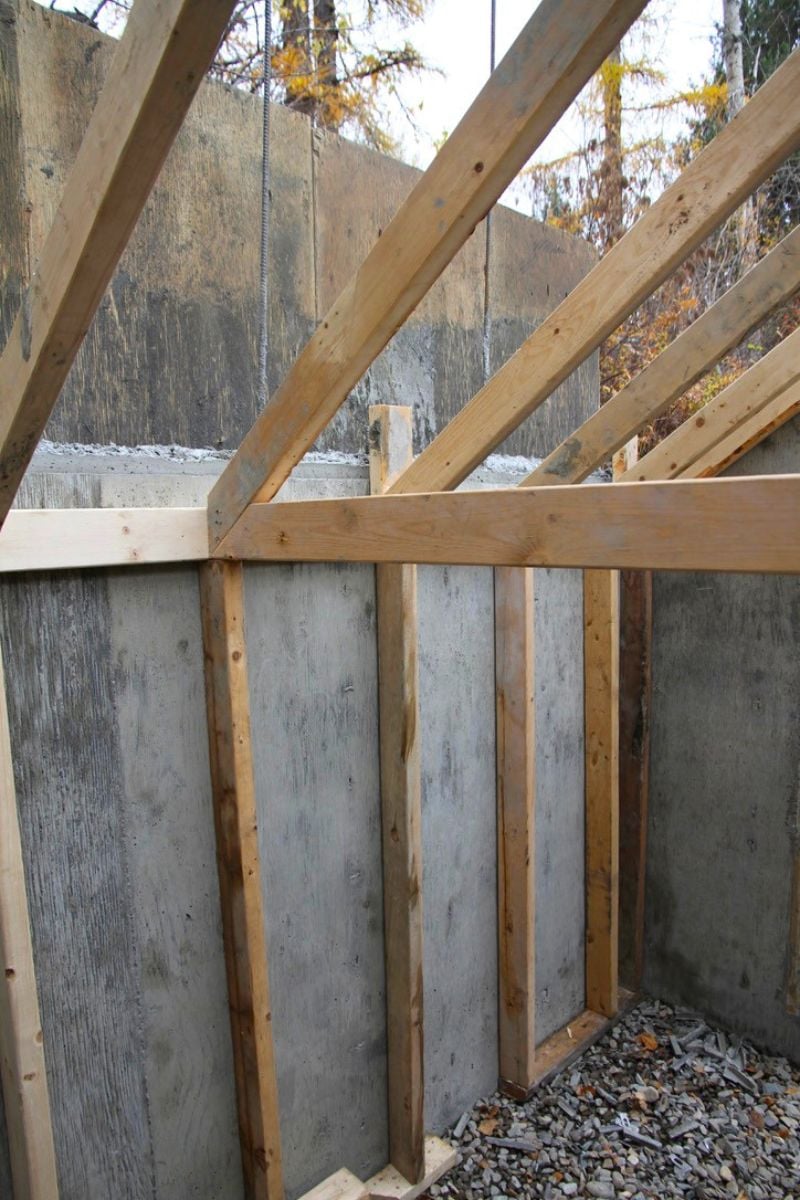
He also framed extra trusses for an overhang on the frontside of the roof, so the exposed doorway would be better protected from the elements.
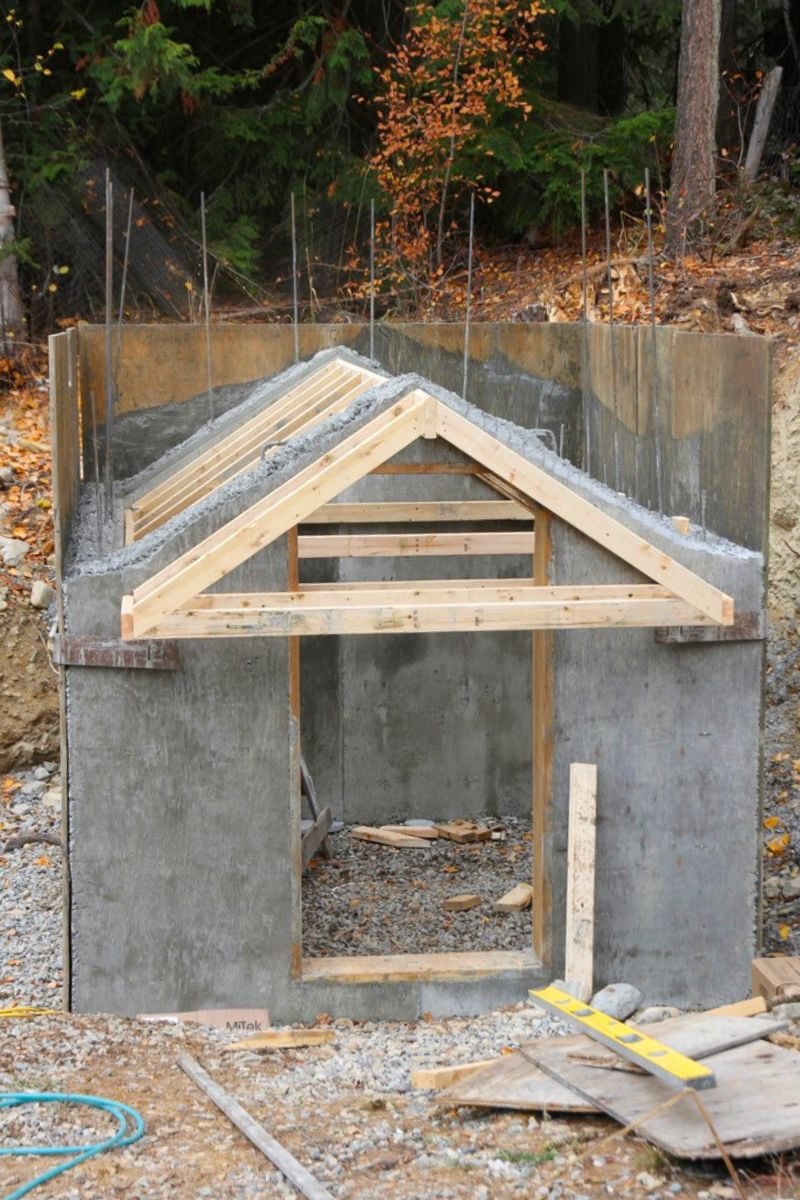
This overhang in the roof extended about 12 inches past the wall. If you need to see better examples of this, please watch our root cellar building video!
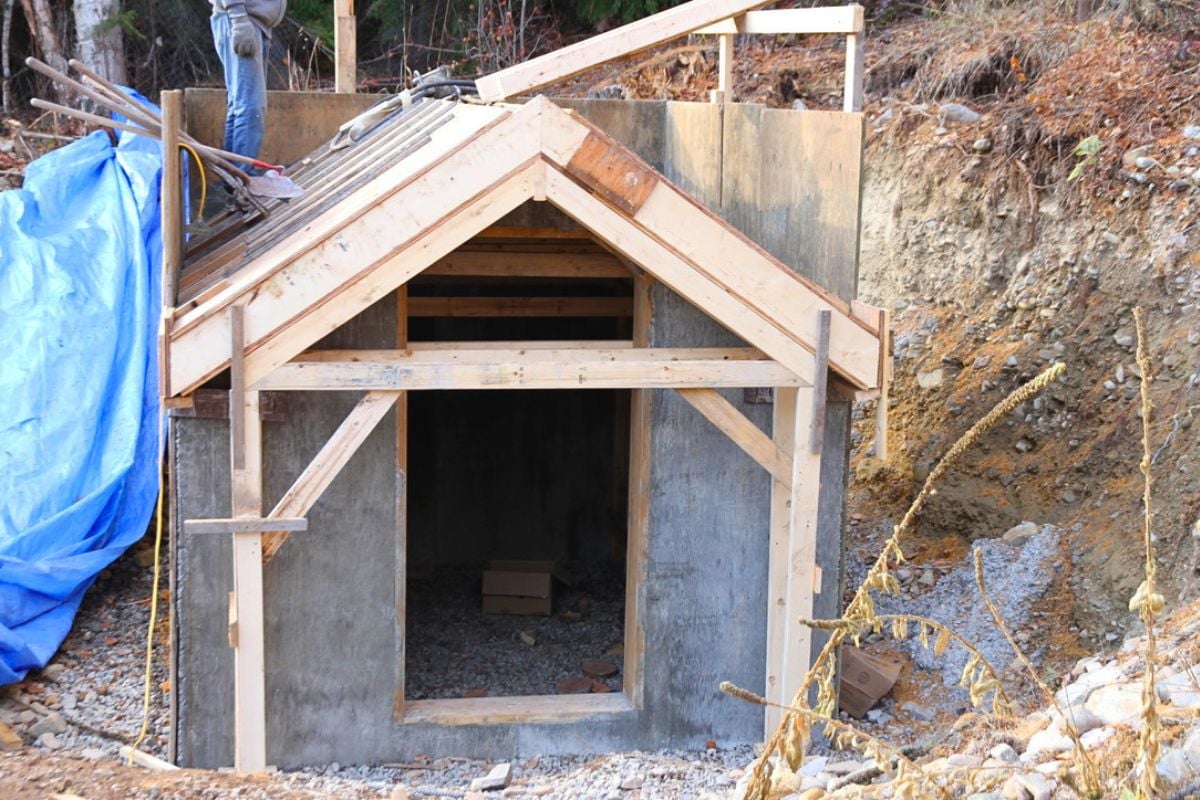
The roof overhang was braced up with lumber, to make sure it held during the concrete pour. With the roof framing aside, my man began constructing forms on top of the trusses.
Step 7: Forming the Concrete Roof
The roof required custom forming. Plywood had to be cut to exact lengths, so our concrete roof would tie into the existing walls.
To strengthen the roof, we used 5/8 inch rebar, spaced in a 16 inch grid pattern. At this point, rebar sticking up past the wall was bent and tied into the roof.
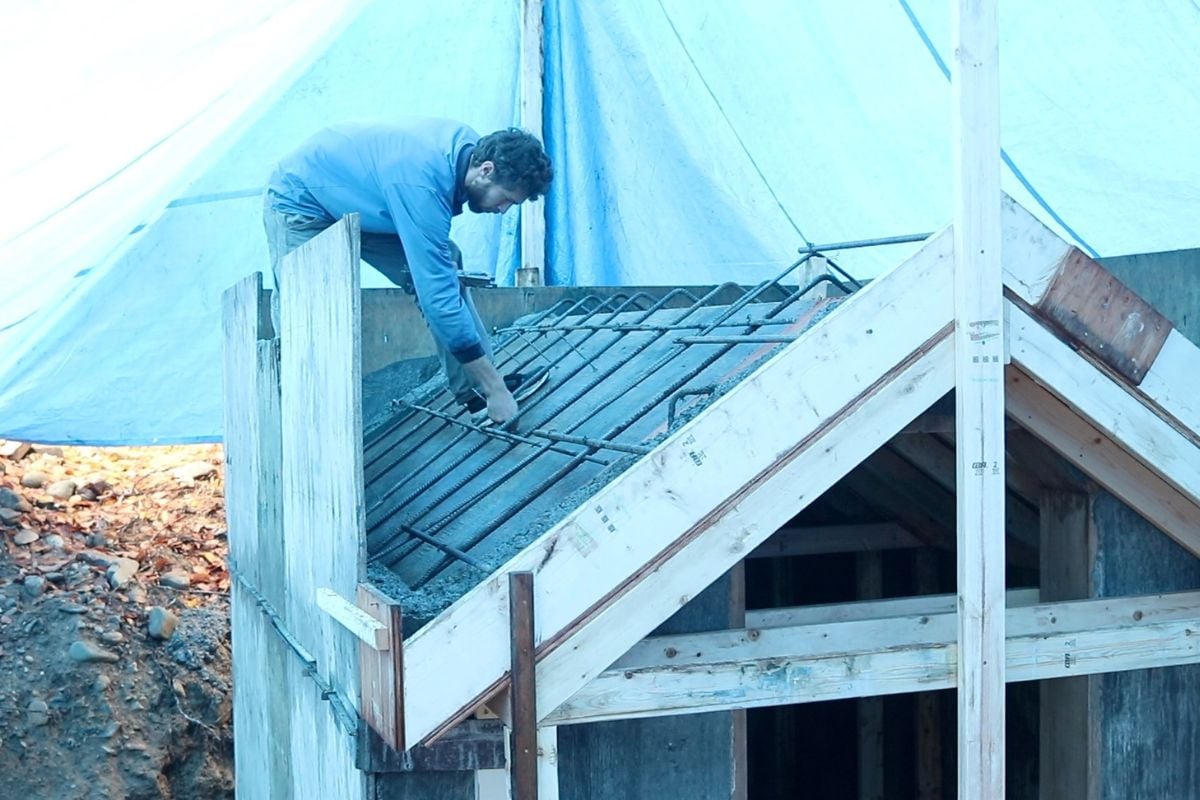
Just like forming the walls, quick strip ties were slipped into place, and block outs were fitted for roof vents. The top form went on and was held in place with waler bar.
At the peak of the roof, we left a 6 inch gap for pouring concrete, and made sure the pencil vibrator would fit into the space.
Step 8: Pour a concrete roof and cure
It was more difficult to pour concrete for the roof, with only a 6 inch gap to aim for. A friend and his pencil vibrator saved the day! It took a lot more vibrating to ensure there weren't air gaps in the wet concrete.
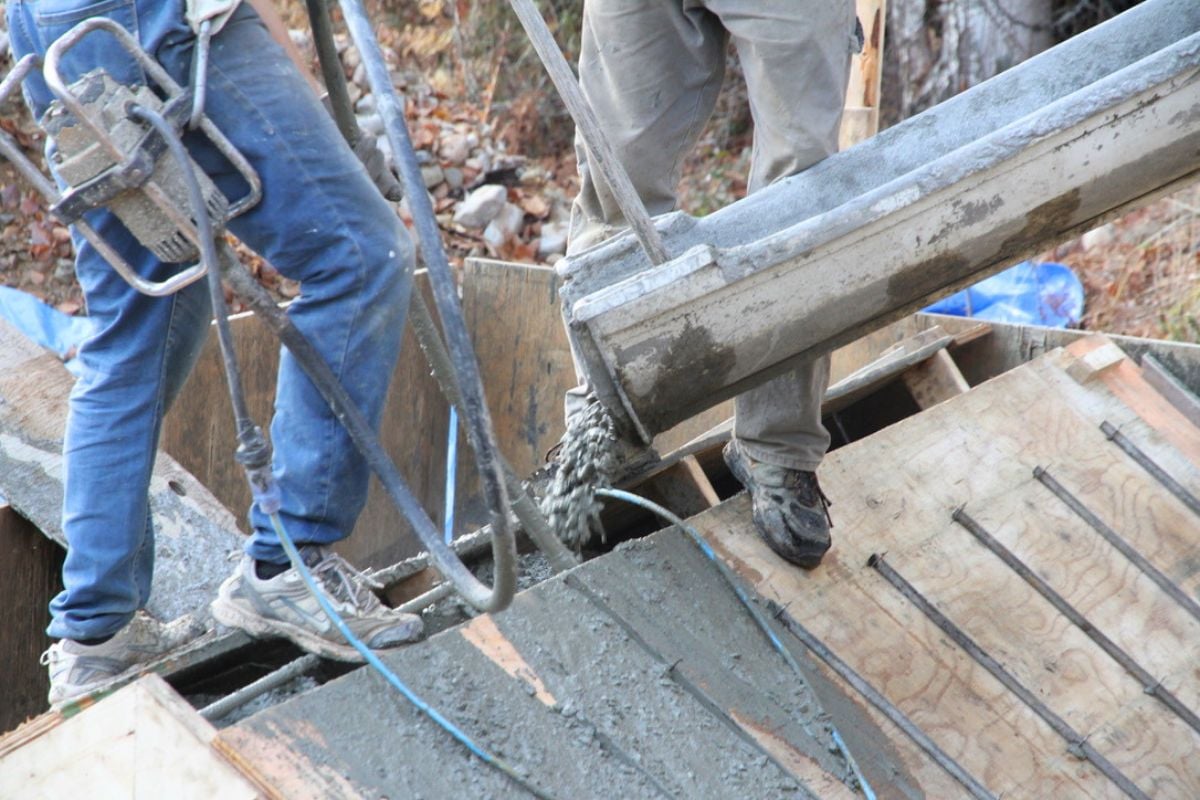
When the roof forms were filled, my man shaped the 6 inch gap into a rough peak. He let everything sit for 3 or 4 days before removing the forms.
Step 9: Remove concrete forms and install venting pipes
It was exciting to see the plywood forms come down, and our very own concrete root cellar appear!
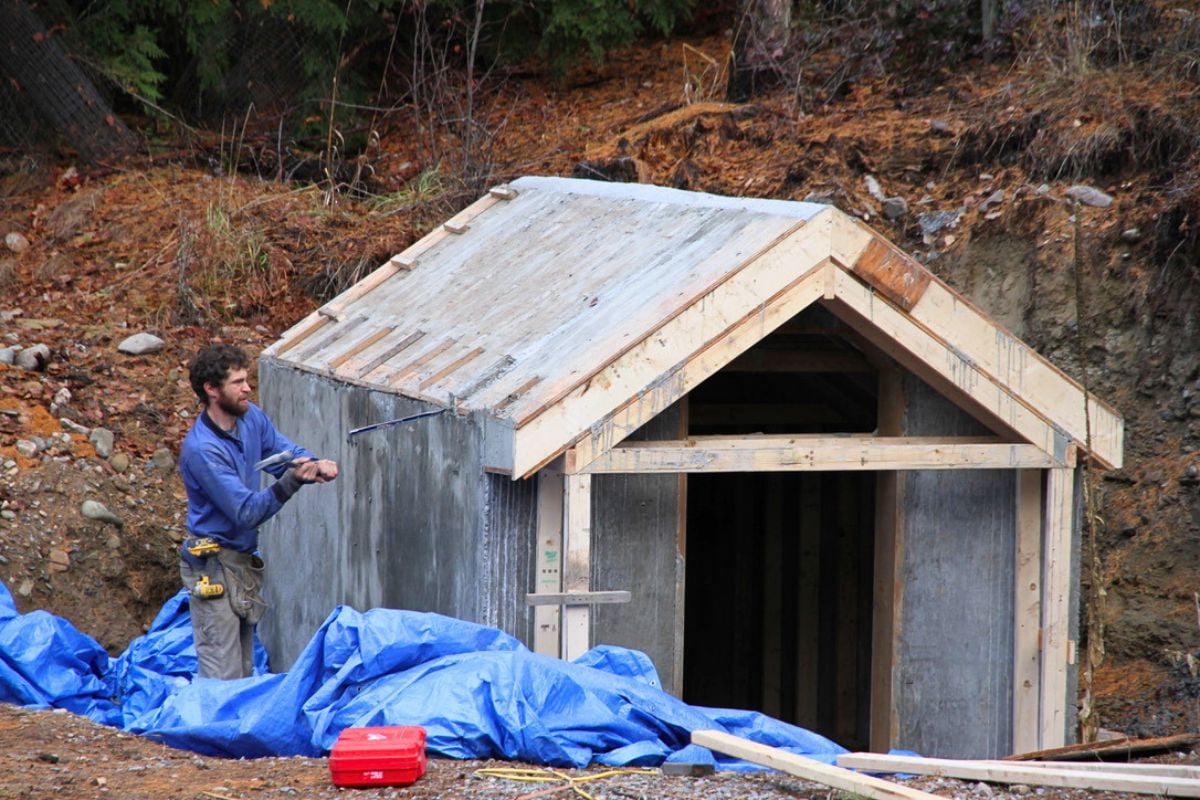
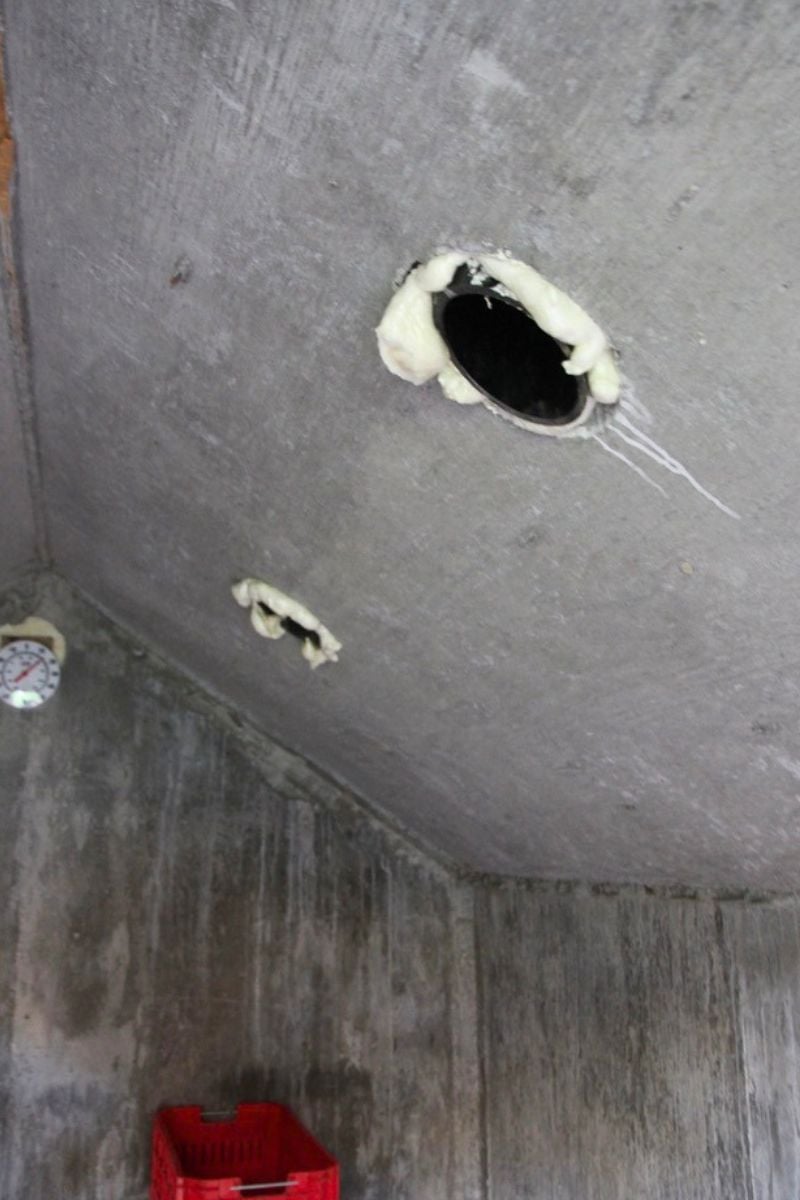
Before the land was backfilled, PVC and ABS pipes were inserted into the vent holes in the walls and roof.
My man used hydraulic cement to seal around the outside of air vents, and he used spray foam to seal the inside of each PVC or ABS vent.
Step 10: Backfill and landscape around the cellar
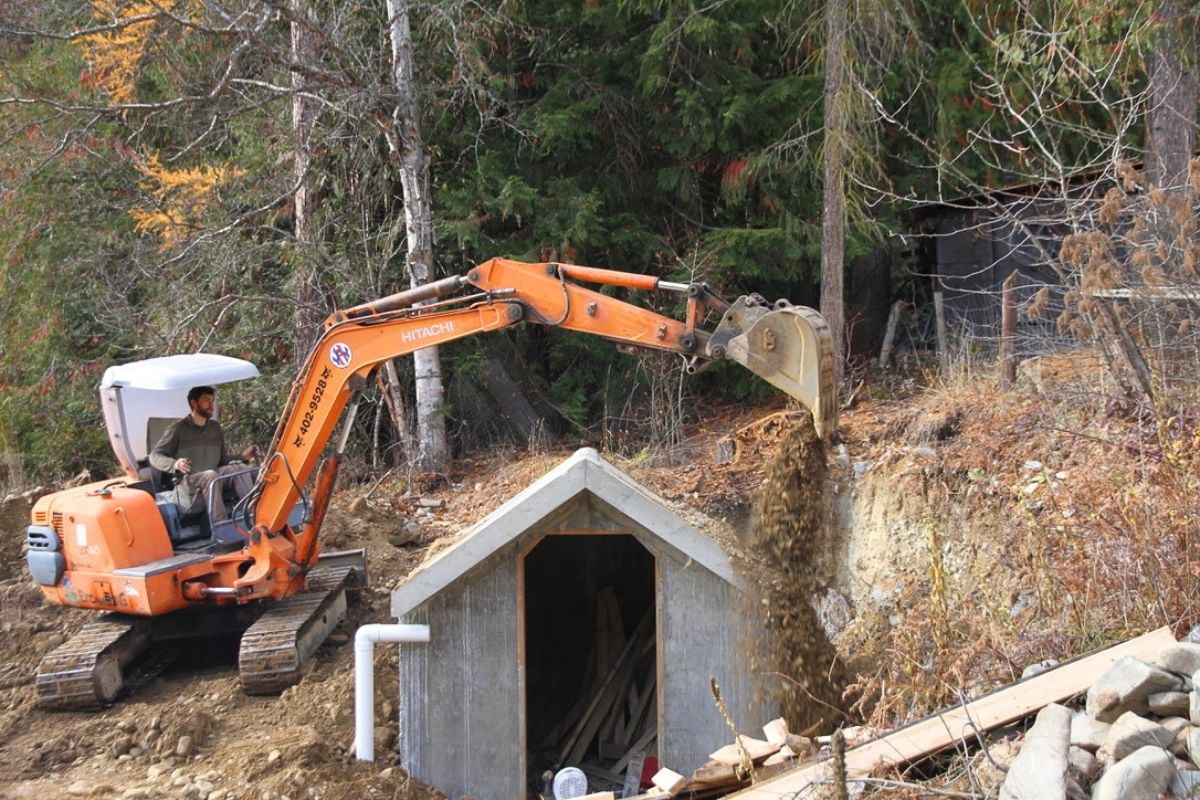
We used an excavator to backfill around the root cellar. Later on, my man used a small tractor to round the hill over, and finished it off by hand.
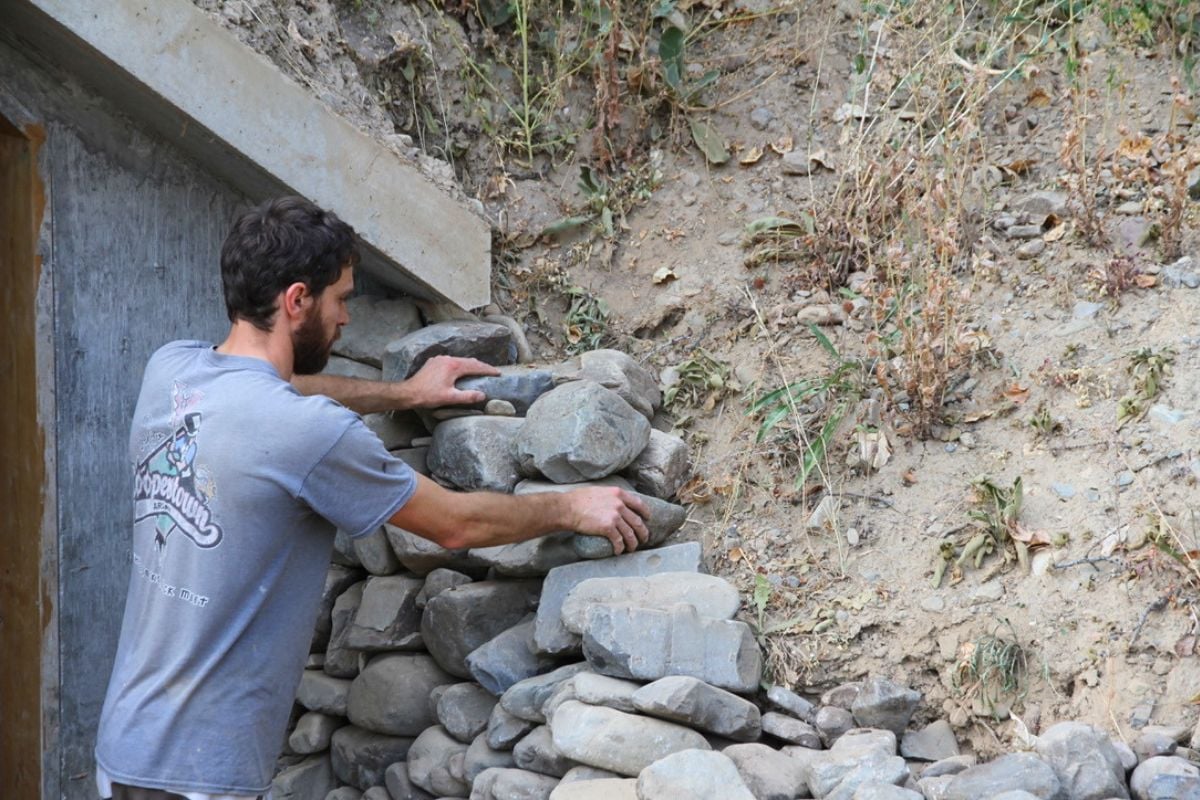
At the doorway entrance, native rock from our land was stacked for a small retaining wall, with sloping path to the door.
Step 11: Hang the Door
We put 45 degree corners on our doorframe. My man cut jambs and an exterior door to shape. After capping the cut door top with sheet metal, he installed it just like any other door.
As an afterthought, we bolted treated 2x12 lumber to the front peak of the root cellar, to keep dirt from slipping down.
And just like that, we had our root cellar!
Root Cellar Printable PDF
Cost of Building a Concrete Root Cellar
Our little, 8x10 concrete root cellar cost us just less than $3,000 CAD to build.
We did most of the work ourselves, so we didn't have to pay for labor. A friend loaned us plywood concrete forms and a pencil vibrator. Another deal on an excavator rental helped us out!
Depending on where you live and what you have access to, you may be able to build a concrete root cellar for far less than we did.
But before you leap into making your own root cellar, here are some tips for finding a great location, choosing your design, the interior setup and pricing your project.
Tips for Designing and Building Your Own Root Cellar
1. Know your average winter temperature, so you can build a cellar to suit
Before you build a root cellar on your land, you need to know what your average winter temperature is. Temperatures affect how you build and position your root cellar.
Let me explain.
If you live where winter temperatures hover around freezing (32F or 0C), you should be able to use a concrete hillside root cellar without any problems. Part of a wall and even the door can be exposed, and the produce inside shouldn't freeze (as in our case).
However, if you live where winters are bitterly cold (-30C to -40C) and have a 4 foot frost line, your root cellar should run deep in the earth, so the earth's thermal energy can keep the cellar above freezing.
If you live in a very cold climate, bigger root cellars collect the earth's warmth, better. Two separate rooms within a cellar are always a good idea, and you may also need a bulk head, or special, protected entrance.
Our little, hillside root cellar isn't suitable for very cold climates!
Note: in northern Canada, I know folks who prefer a basement root cellar. It's easy to moderate temperatures, and it's so nice to have everything attached to your house when -40 weather hits!
2. Assess your land for a prime root cellar location
Once you know what type of cellar you're going to build (in-earth or hillside, big or small), it's time to assess your land. Here are some questions to ask.
- Where is a spot with good drainage?
- How does the sunlight hit each possible location?
- Is there a good place close to home?
- Is the cellar location out of the way, where cars or heavy equipment don't ever drive?
3. Choose a size for your root cellar based on storage needs
It's easy to oversize a root cellar. In their book Root Cellaring, Mike and Nancy Bubel tell us that an 8x8 foot space is usually big enough to hold all the food an average family (I assume they mean a 4 person household?) can grow and use.
Before you size your root cellar with the intent of storing all your foodstuff in it, you should know there are 4 things that don't keep well in a moist, cold cellar.
- Dry goods: seeds, nuts, dry fruit, flour, etc, will mold in the humidity of a winter root cellar.
- Home canned food: tin lids can rust through in the humidity of a root cellar, and wood storage shelves will decay, which can lead to sudden collapse and breakage of canned goods.
- Onions and garlic: alliums don't like the humidity or near-freezing temperatures of a cellar, and will actually last longer in a dry and cool place (50F or 10C).
- Pumpkins and winter squash: they decay faster in a cold, humid cellar, so store them with your onions and garlic in a dryer place that hovers around 50F or 10C.

You should plan on storing the following produce in a root cellar.
- Apples
- Pears
- Quince
- Beets
- Cabbages
- Carrots
- Parsnips
- Potatoes
- Rutabaga or turnips
- Winter radishes
- Potted celery, leeks or hardy greens
For our little family, an 8x10 space is more than enough! But if you have a large family or live in a very cold climate and want to use more of the earth's thermal energy, you can build a bigger cellar.
I highly recommend getting Mike and Nancy Bubel's book as a resource, because this couple is knowledgeable on all kinds of root cellars and storage techniques!
4. Decide on the interior set up
Before you build your concrete root cellar, it's important to think about how you want the inside set up.
- Do you want electricity in your cellar?
- It's easier than carrying a light with you!
- You can leave a lightbulb on for extra warmth in cold climates.
- What will you do for drainage?
- A sump pump
- French drain
- Something else?
- Are you going to have two rooms within the root cellar, or only one?
- If you plan to have two rooms, you need a venting system for each room.
- Should you embed metal hangers or hooks in the concrete for built-in shelving, or will everything be free standing?
In our cellar, everything is free standing. We use gunny sacks for storing potatoes and parsnips. Everything else is stored in stacking crates that are easy to handle and clean during the summer.
5. Create a detailed design
Once you know the location, size and interior setup, it's time to design your cellar on paper. Of course, we share our root cellar design with you, but if you want to make modifications, be sure to outline the following:
- Square footage and height of cellar.
- Choose a roof style (sloped is best, so moisture runs to walls, instead of dripping on your produce).
- Decide on what your floor is going to be (dirt, gravel, sand?).
- Make a drainage plan for the cellar floor.
- Mark where venting for fresh air intake and outtake will go.
- Door location and whether or not you need stairs.
- Where to place hooks or hangers, if using.
- How you will finish the exterior around the door (retaining walls, storm cellar door, covered steps, etc).
In Root Cellaring, the authors go over different designs and styles of cellar, plus great finishes for the exterior doorway. I can't recommend it enough. If you're serious about building a root cellar, get the book!
6. Calculate the Costs
After your design is finished, be sure to calculate how much it will cost you.
Here's a list of the building supplies you need to price out in your region. If you're hiring out the work, be sure to add the cost of labor as well!
Please note: this list doesn't include saws, drills or other basic construction tools!
- Excavator rental
- Concrete & delivery fees
- Plate compactor rental
- Gravel
- Framing and form supplies
- Metal ground duct
- Pencil vibrator rental
- ABS & PVC pipes
- Treated lumber for door frame
- Door
- Door jamb
Root cellars are charming and when built with concrete, they'll outlive you. But like most quality things in life, they aren't cheap.
Even though we did the work ourselves, our concrete root cellar still cost nearly $3,000 CAD to build.
Root cellars are a long term investment, and we hope to feed ourselves from the cellar for years and years to come!
7. Save Money for the Build
A concrete root cellar is a goal worth reaching for. If you have to save up for a few years, that's ok. Just like a collection of mason jars, it'll be worth it in the end! 😉
In our case, we dug the hole for our cellar 3 years before we actually built. It wasn't intentional.
Over and over, medical bills for Lyme treatments drained our saving. Every year we hoped it would be the year. When we were finally able to build our cellar, it felt like a real accomplishment.
In the meantime, we used other methods of cold storage. I highly recommend you do the same!
Review of Year 1 in the Root Cellar
Our first year in the root cellar was successful. It was a mild winter (hovering at 0 to -5C). We installed a thermometer, so we could closely watch the temperature inside.
The air inside our cellar hovered around the 0C mark (32F). It was perfect for our root vegetables. Beets, carrots, parsnips and potatoes stayed crisp all winter long and into the spring months.
I know we still have learning curves ahead of us, and we have yet to see what happens when -20C (-4F) hits! One thing I do know: every root cellar is different, and you have to figure out what works in your climate, with your particular cellar.
I learned how to store root vegetables and fruit in a basement root cellar. Then it was the cold room on the north end of our home. Now, I get to master the ups and downs of storing fruit and vegetables my own root cellar.
I'm here for it!
If you have questions about how to build a root cellar, please watch the video. If that doesn't help, feel free to leave your questions below. My man and I will get back to you!