How to Harvest, Dry and Store Hardneck Garlic
Want to keep your homegrown garlic on hand all winter long? If so, you need to know when to harvest garlic, how to dry it and also where to keep it for long-term storage
Garlic is one of those crops I make a point of planting every year. There are several reasons for this!
- Garlic is very easy to grow and care for (you can even interplant it with flowers in a flower bed).
- Hardneck varieties thrive in my cool northern climate and are a low-hassle crop.
- Good garlic is expensive to buy locally and growing it myself is a way I can save money.
- Homegrown garlic is far more pungent, spicy and flavorful than garlic you get from the grocery store and is better for you, too.
- Most fresh garlic will keep a minimum of 6 months, provided you properly hand it before putting it into storage.
And that's what this article is all about! Let me show you how to harvest, dry and store hardneck garlic, so you can keep it on hand all winter long!
I should also specify that in this tutorial, I'm working with hardneck garlic varieties.
If you garden in the south, you should look into growing soft-neck garlic varieties.
How to Plant and Grow Garlic
If you already grow your own garlic, you can skip this section. But if you're new to gardening, I want to leave you with some tips that will inspire you to start!
And be sure to read my article: How to Grow a Year's Supply of Garlic.
Quick Tips for Planting Garlic
- Always buy your seed garlic from reputable seed company who sells disease-free bulbs for fall planting.
- Plant your garlic in the fall, and you'll get bigger bulbs than if you plant in early spring.
- Mulching your garlic in the fall with 2 inches of straw is a great way to insulate cloves and cut back on summer weeding.
- When growing hardneck garlic (this doesn't apply to softneck garlic), be sure to remove garlic scapes when they appear in summer, so the plant puts all its energy into forming large bulbs, not flowers and bulbils.
In my video on how to harvest, cure and store garlic, I show you hardneck garlic that was allowed to flower out and garlic that had the scape removed. The size difference is quite amazing!
How to Tell When Garlic is Ready for Harvest
Garlic can be pulled early without any issues. But some folks run into trouble when they leave garlic in the ground for too long.
Overdue garlic will sometimes form a second layer of cloves. The peel is often cracked on this second layer and these garlic bulbs spoil quite quickly in storage.
Here's how you can tell when it's harvest time!
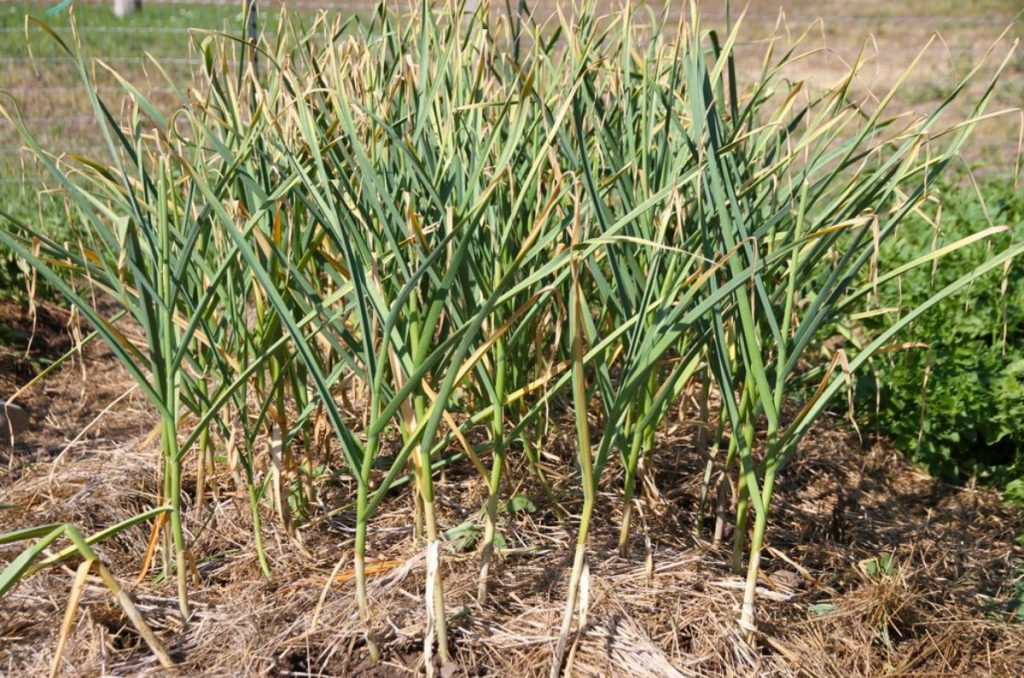
As your hardneck garlic matures, the tips of the leaves will slowly turn brown (note the brown tips in the garlic bed shown above).
When you see 3-4 levels of brown-tip leaves, it's a sign you should pull your garlic in the following 2-3 weeks.
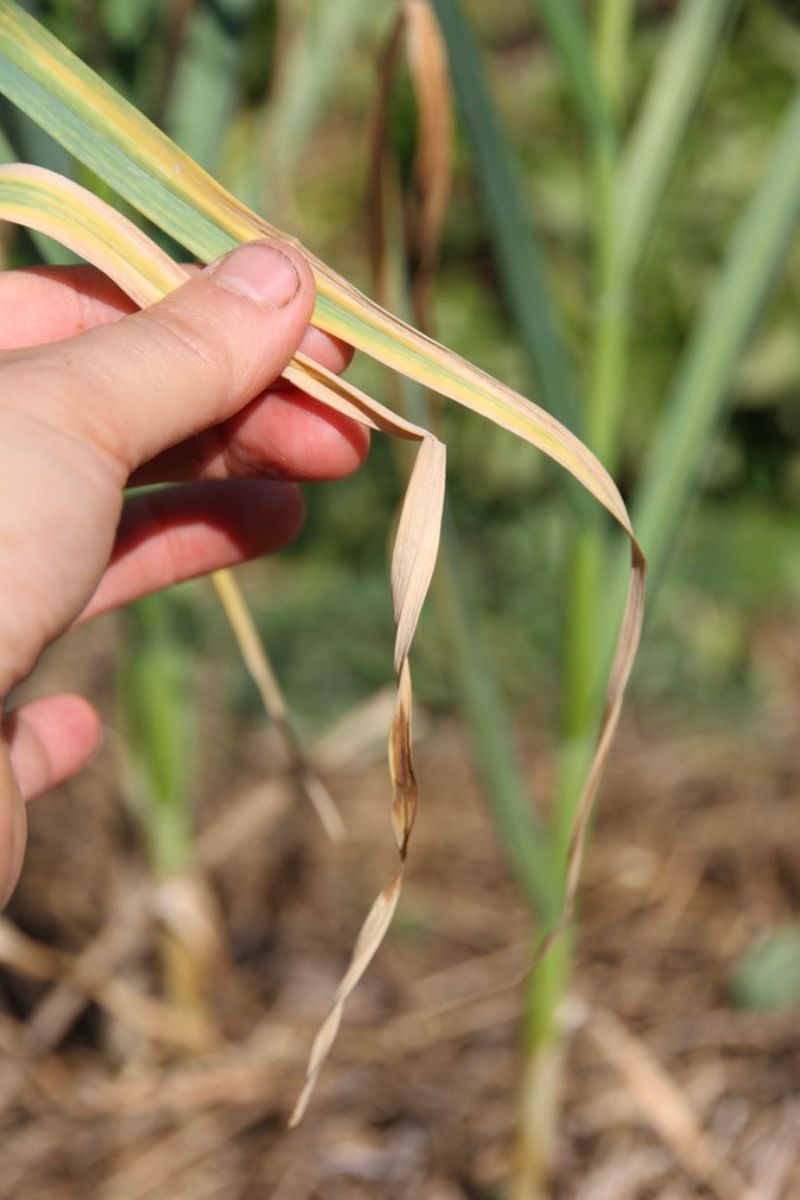
As a rule of thumb, you should start checking the green leaves in late spring or early summer, until you get accustomed to the right timing for your growing zone.
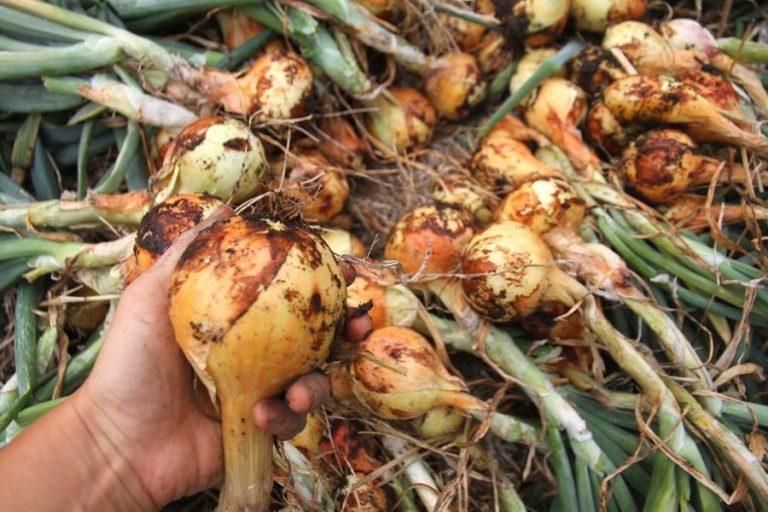
How to Harvest Garlic for Drying
Harvesting garlic is easy! Grab on and pull the entire plant up.
A whole garlic bulb will come out of the earth with the stalk. I like to pile whole plants in a wheel barrow, so they're easy to transport.
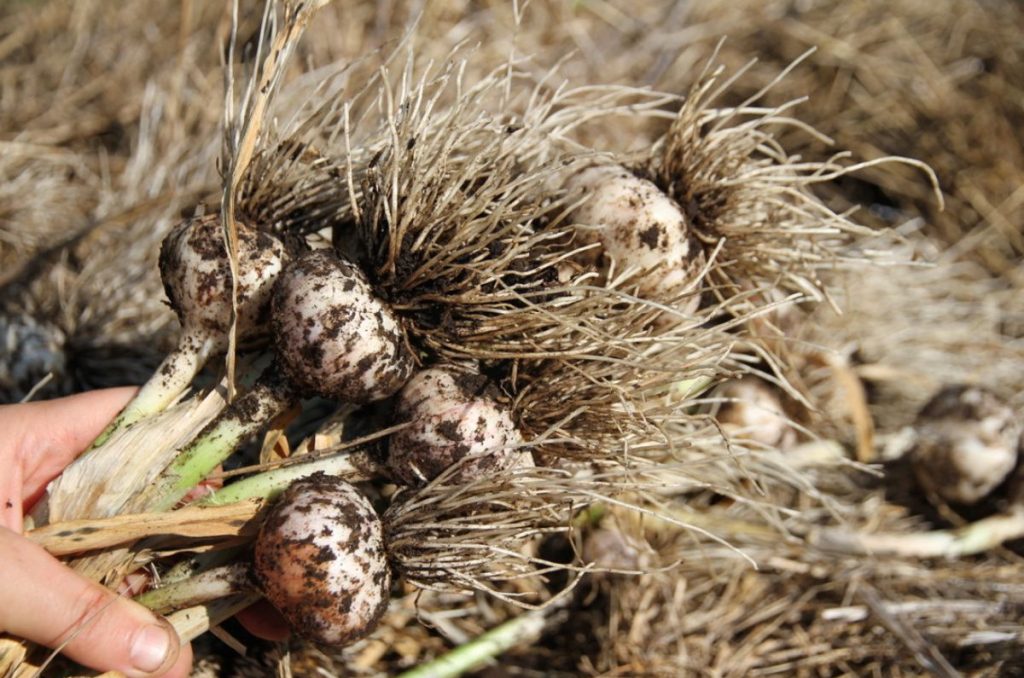
Garlic is such an easy crop to deal with, and you'll be able to harvest the entire garlic crop in no time.
Note: avoid knocking bulbs together to remove dirt; you might bruise the cloves which will cause them to spoil faster in storage. Besides, bulbs are easier to clean up AFTER they've cured!
How to Dry or Cure Hardneck Garlic for Storage
Your garlic harvest needs to dry before you clean and put it in storage. Otherwise, the bulbs will rot and you'll run the risk of molds.
Curing garlic is easy.
Just hang (or spread it out) in a dry place with good airflow. An outdoor shed or an open barn is a great place, while a basement is not!
There are all different ways to dry your garlic.
Some folks bundle up the stalks and tie them with baling twine. Bundle can then be hung from nails or a rafter until they're dry.
I like to spread mine out on a wood frame that's stretched with chicken wire (it's actually a panel to a small chicken tractor) and let it dry in our woodshed, out of direct sun.
If you spread garlic out to dry, make sure the bulbs aren't buried under stalks, so they get good air circulation.
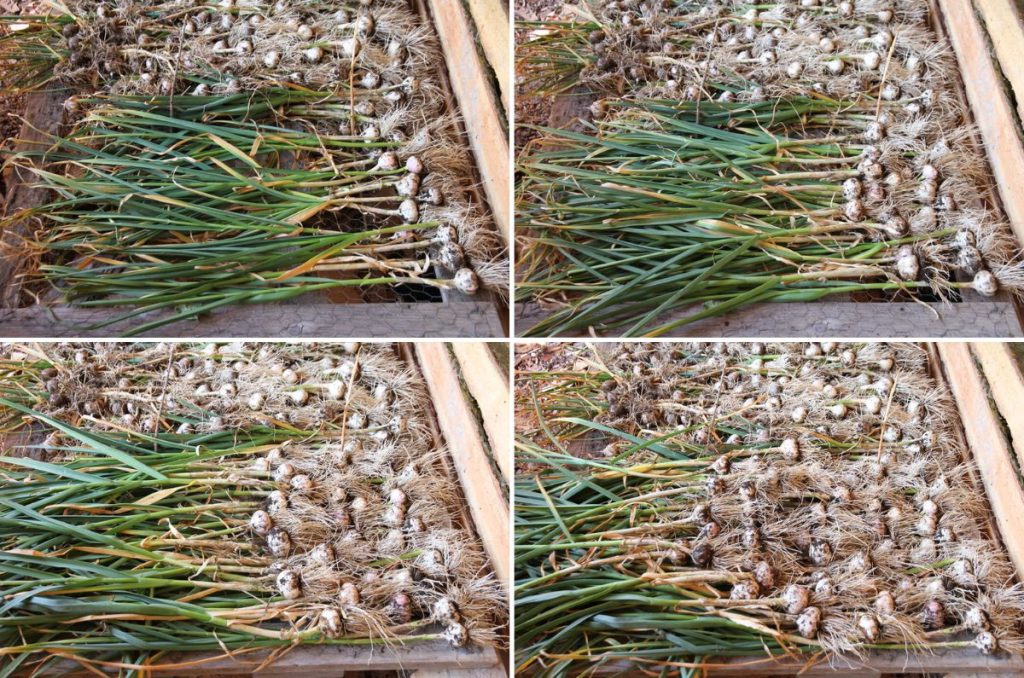
Here's an example of how I do it.
Start at one end of your drying area and put down a single layer of garlic.
On top of that layer, put down another single layer of garlic. And another, and another, until the entire area is filled with garlic bulbs.
How to Test Garlic for Dryness
It usually takes at least 7-8 weeks for garlic to go through the drying process.
When you think it's ready, you can test by feeling the outer papery skin. If the outer layer is crisp and brittle, they'll crumble and fall away when rubbed.
You can also break open a bulb and see if the skins around individual cloves are dry. If so, the bulbs are ready to be cleaned.
Watch my Video on How to Harvest, Dry and Store Hardneck Garlic!
How to Clean Garlic for Storage
I really like cleaning garlic before I bring it into my cold room and kitchen! Otherwise it makes a real mess every time you handle it. Here's how you do it.
Items You'll Need
To clean garlic for storage, you'll need:
- pruning shears
- sharp scissors
- a bucket for all the dry tops, outer peels and roots
- a basket for holding clean garlic cloves
Directions
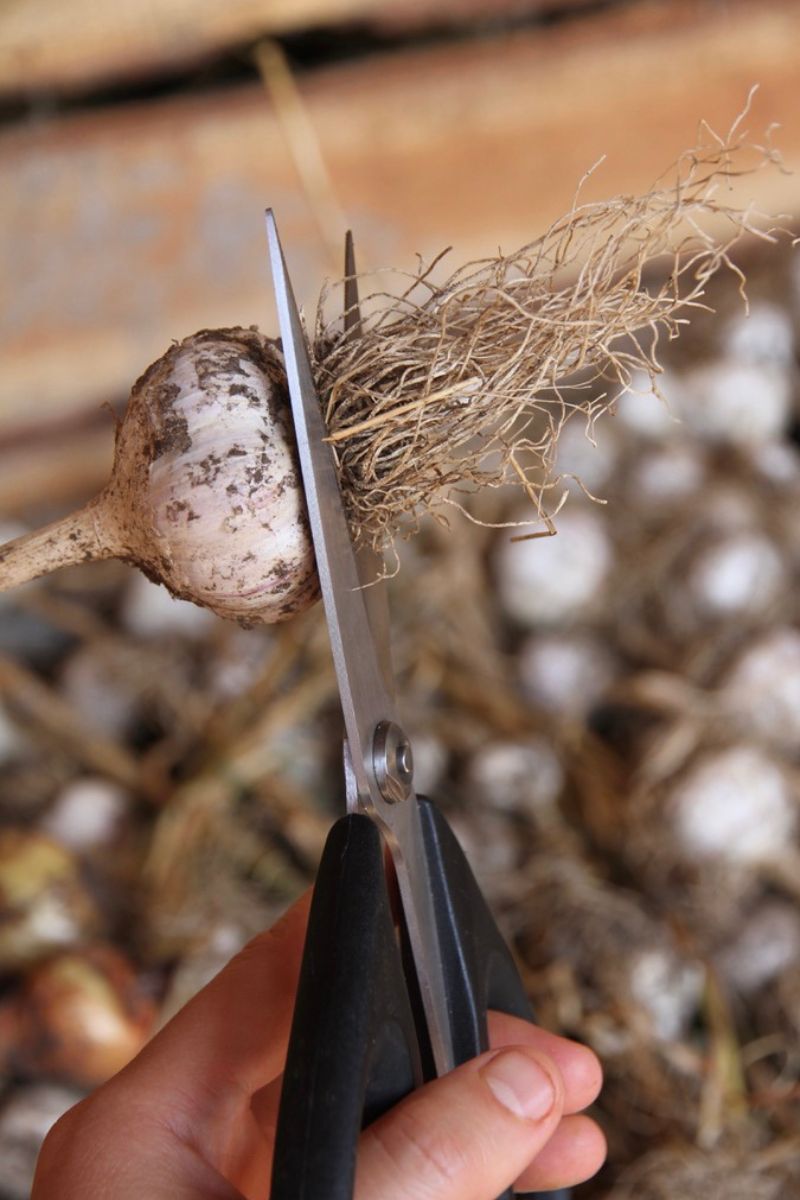
Step 1: Take a single stalk of garlic and use scissors to cut away the stringy, dry roots at the bottom of the clove. Make sure you don't cut into the clove itself!
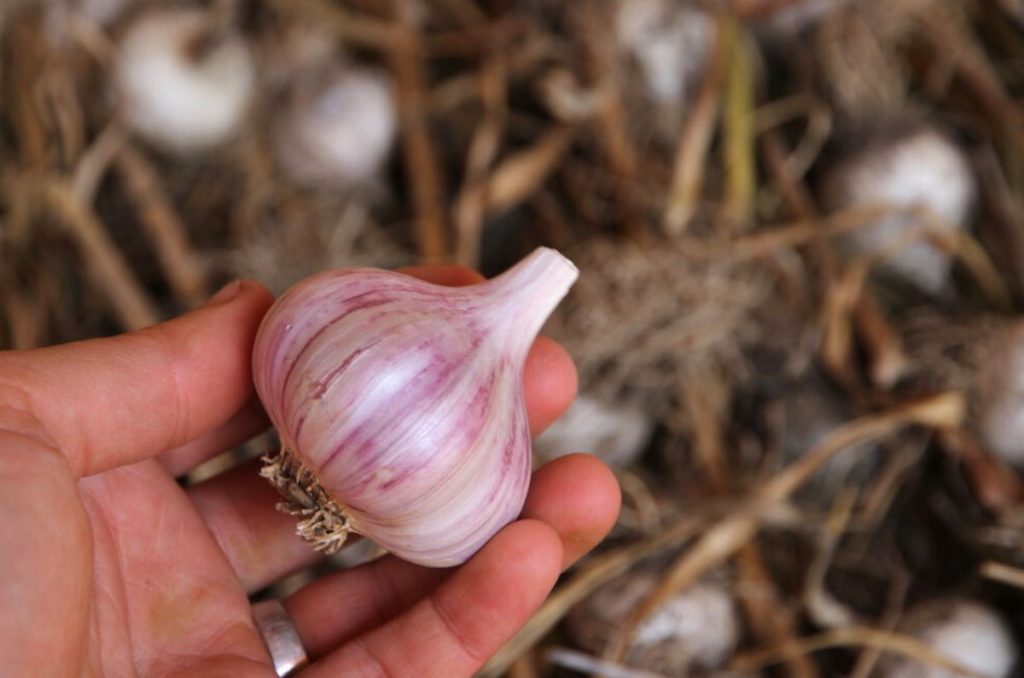
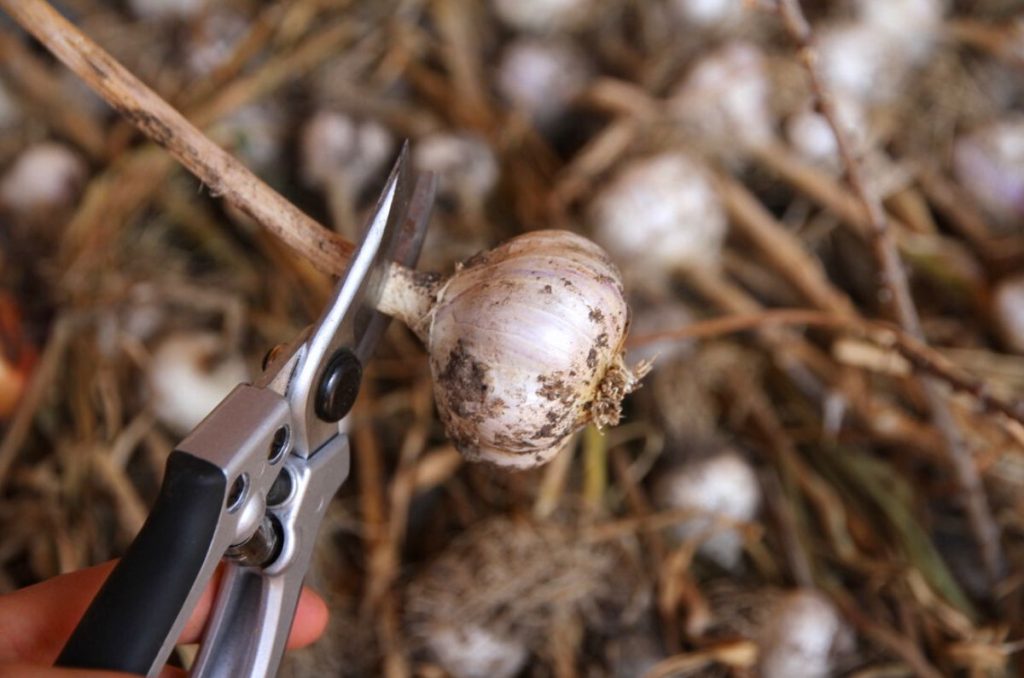
Step 2: Use pruning shears to cut the garlic head free of the tough, dry stalk at the top, leaving about 1/2-1/4 inch of stalk attached to the garlic bulb.
Step 3: Rub the whole garlic bulb between your hands and remove the top layer of dirty, outer skin or peel.
Important note: don't ever remove all layers of the outer peel. The papery peel helps protect the individual cloves in storage, so they last longer.
Step 4: Set the whole bulb in your basket and keep working, until all the garlic has been cleaned.
For long term storage, you want to 1) make sure you leave some of the outer, papery peel intact, and 2) that you don't cut into the flesh of the cloves.
How to Store Hardneck Garlic
Here are 4 things garlic needs to keep well over winter.
- Appropriate storage containers: use brown paper bags, open boxes or baskets, so any moisture released from garlic will evaporate.
- Good air circulation: don't lock your garlic up in a cupboard or store it in an airtight container.
- Cool temperatures: garlic doesn't like to be too cold (like refrigerator temperature). But it will dry out sooner if you keep it at kitchen temperature. A "between" temperature it best, like a cool entry or back room.
- Darkness: garlic will sprout much earlier in the year if it isn't kept in a cool, dark place. Whether you achieve darkness via your storage container or have a dark room to store it in, garlic will thank you with longer storage life!
Well-cured garlic can have a shelf life of 8+ months, provided you keep it in a dry, cool place.
Where I Store My Hardneck Garlic for Winter
In our home, I have a pantry just off the north end of the kitchen.
In the front partition, we keep our freezers and dry goods. This space stays cool all winter long, but it isn't as cold as the back room.
In the back room, we store fermented foods, canning, root vegetables and fruit. Temperatures are controlled with a high, small window. It stays just above freezing most of the time.
When I first started storing garlic over winter, I thought colder was better, so I stashed my supply in the back room. Come to find out, my garlic actually spoiled faster in the frigidly cold temperatures.
So the next year, I tried storing it in the front room, where it's moderately cool. And you know what? It lasts into the spring season!
Read more of my articles on homegrown garlic!
How to Grow a Year's Supply of Garlic