Pressure Canning Recipe for Homemade Beef Bone Broth
Learn to make homemade broth with beef bones. Preserve it in the pressure canner for long-term storage, so it's ready to go at the pop of a lid!
We make a lot of homemade stock in the kitchen, and use everything from deer bones to chicken, duck, rabbit and sometimes, even fish! And of course, beef bones as well.
There's nothing more nourishing than homemade soup, a gravy-filled meat pie or even a savory shepherd's pie made with homemade beef broth!
If you can learn how to preserve broth via the canning process, it will help you keep this kitchen staple on hand at all times.
Tools You'll Need
- large stock pot
- large bowl
- straining cloth
- pressure canner
- canning jars
- canning lids and bands
- canning funnel
- jar lifter
- ladle
- cooling rack
Ingredient List
- beef bones
- salt
- optional: non-starchy vegetable scraps like onion, carrot, celery or garlic
- optional: fresh herbs
Note: you can add non-starchy vegetables or fresh herbs to your broth for additional flavor. Just be sure to strain them out before canning your broth, because this recipe is for broth alone.
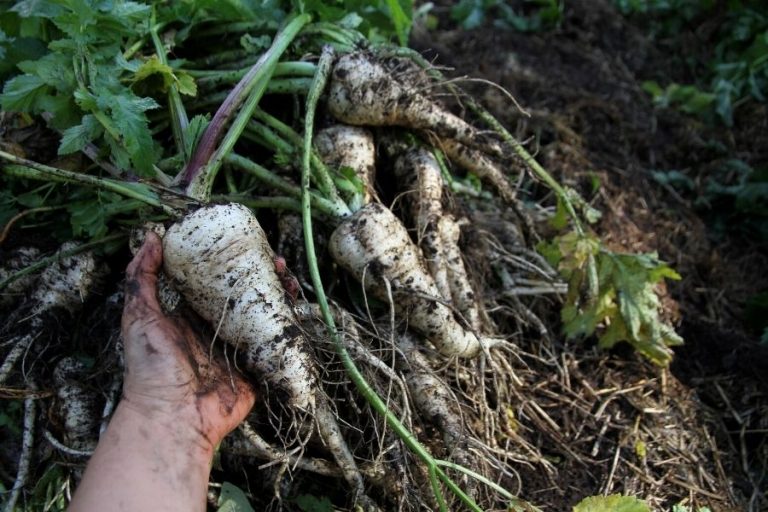
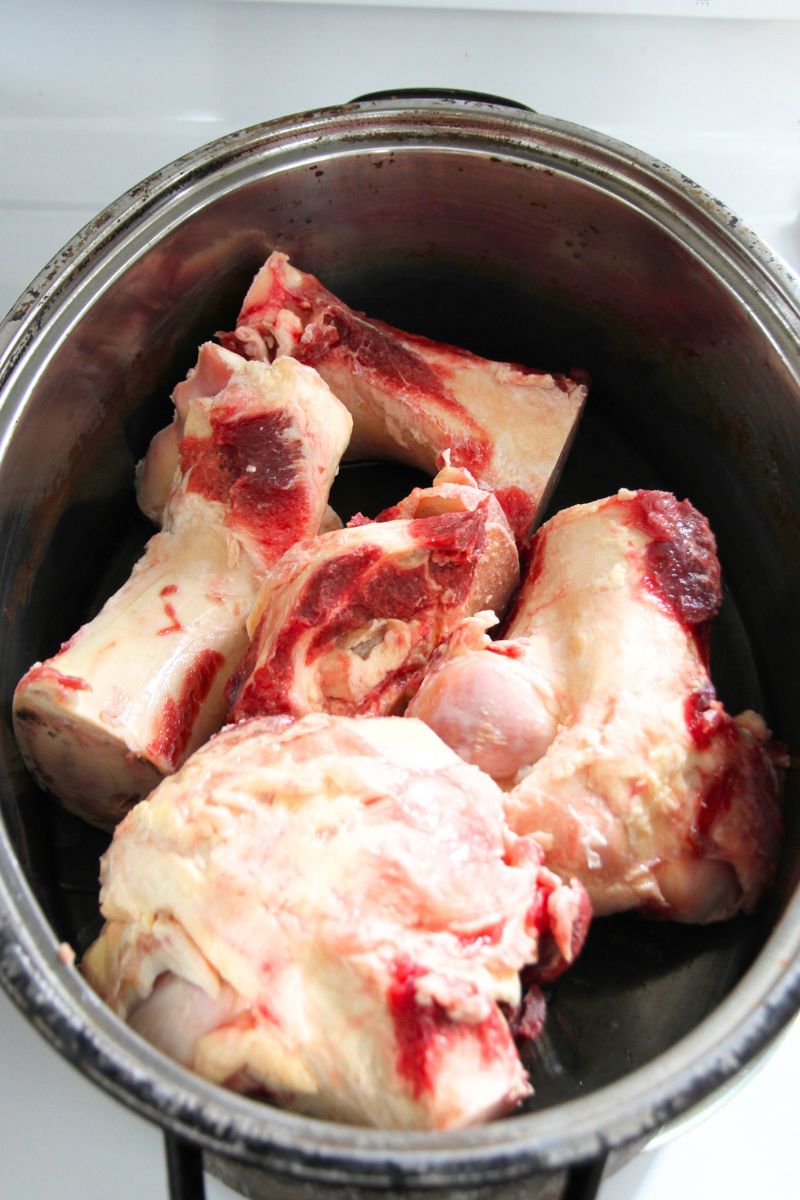
Best Bones for Broth
Beef shanks (the leg bones) are great for making homemade beef stock. But you can use the neck bones, knuckle bones or whatever you please.
Knuckle bones (knee bones) are especially rich in collagen and make an incredibly nourishing bone broth.

Where to Get Beef Bones
To find beef bones, you can check with your local butcher, a beef farm or meat shop in your area.
Personally, I sometimes get beef bones from our local butcher shop, where they are cut to size, so they'll fit in my stock pot!
How to Store Beef Bones
Beef bones are easy to keep. Just freeze them, and they'll last for months!
Because they're easy to keep, we buy a whole box of beef bones, bag them and store the bags in our chest freezer, until we're ready to use for homemade bone broth.
How to Make Beef Bone Broth for Canning
In my kitchen, I prefer to make giant batches of homemade broth in my 21 quart stock pot.
Making bone broth can be expensive, on account of long cook times. So we like to use the wood stove in our living room to cut back on costs.
I bring our broth to a boil on the kitchen range, then transfer it to the wood stove. There, the broth can merrily cook away on the wood range for 1 or 2 days, at no cost to us.
Not everyone has this option. I get that! So here are (at least) 4 different ways you can make bone broth in your kitchen.
In a Slow Cooker
- To make broth in a slow cooker, place beef bones in the pot and cover with a few inches of water.
- Add the lid and cook for 12-24 hours, or until the bones have lost their marrow.
- Lift the bones.
- Chill the broth in your fridge (in the winter, I place mine outside and it chills naturally).
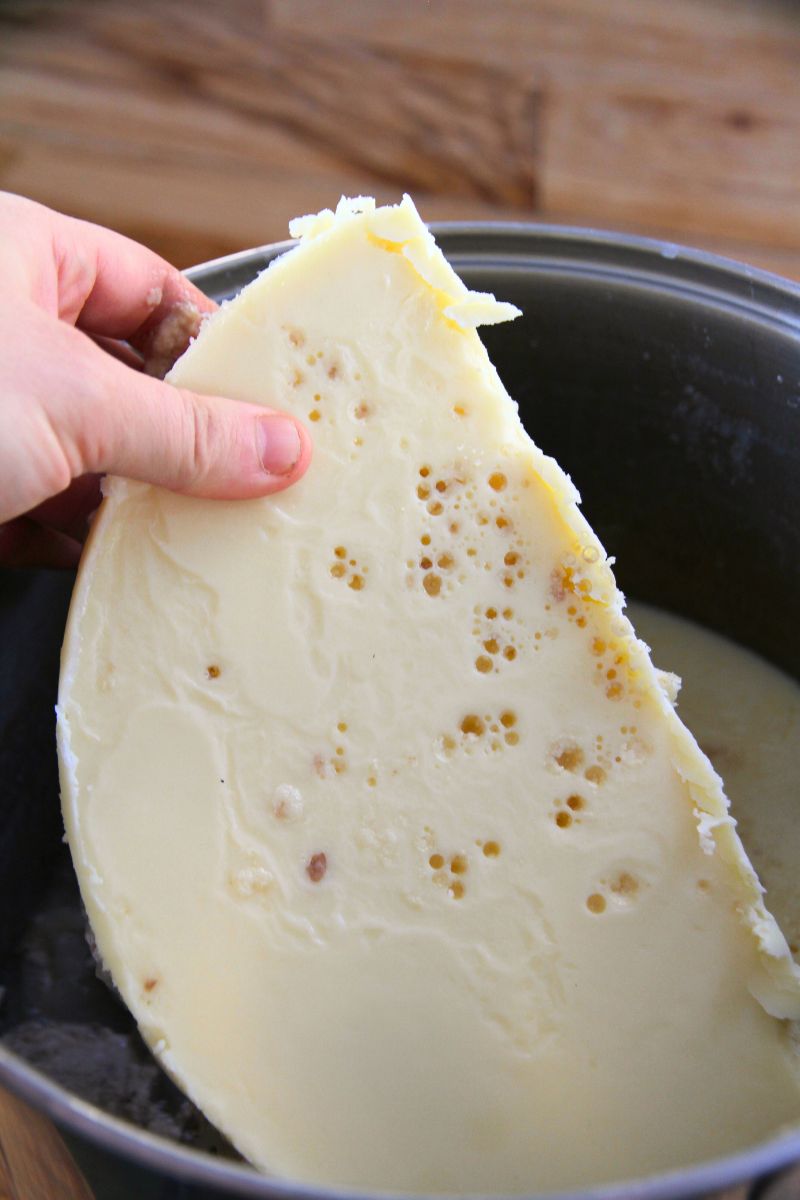
- When the top layer of fat solidifies, lift it off.
- Reheat the broth until it returns to water consistency.
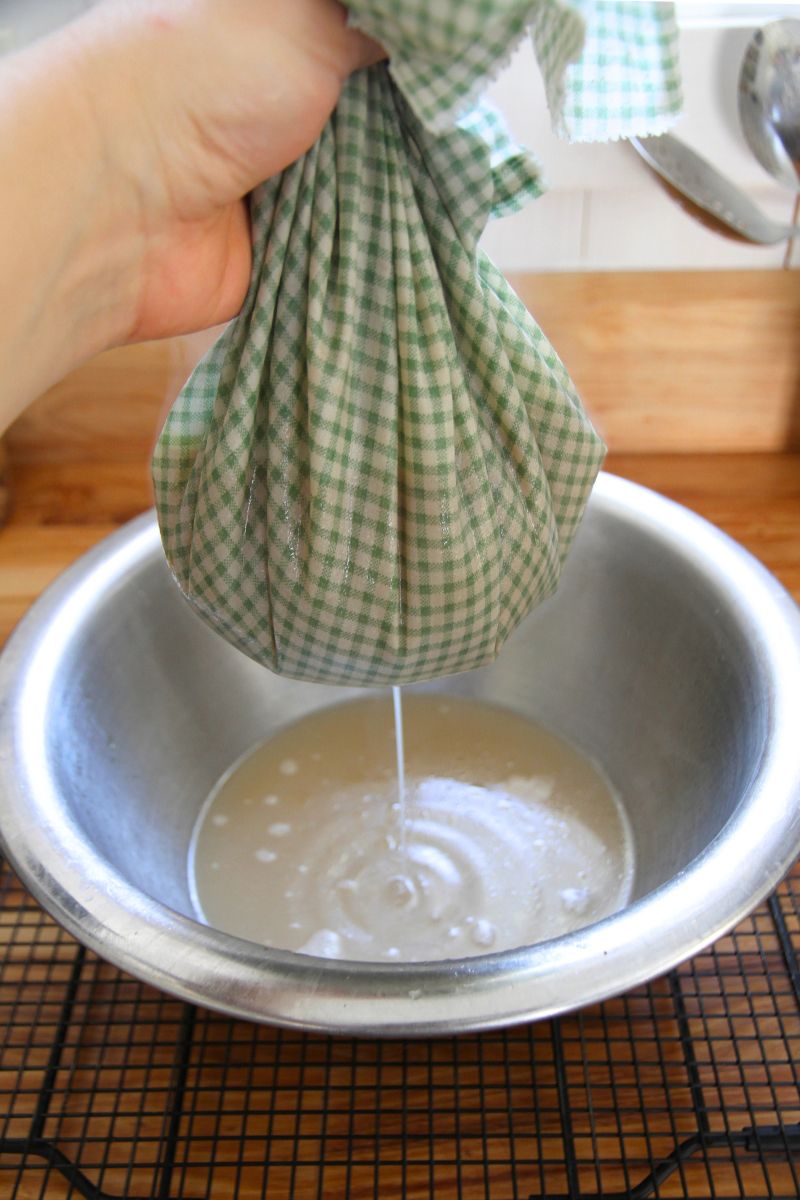
- Strain the liquid through a cotton cloth to catch bits of marrow and cartilage.
- Reheat to a boil and proceed to fill glass jars and preserve in the canner.
In an Instant Pot
I don't own an Instant pot. They've just never appealed to me! I did some research and give you an overview here, but please take time to read an actual article if you're unfamiliar with operating an instant pot. If you want a good tutorial, I recommend this one here: The Best Instant Pot Bone Broth.
- Place bones to your pot, filling it 3/4 of the way.
- Add water until bones are just covered.
- Lock your lid and choose the 120 minute cook option under high pressure.
- Repeat the cooking process 2-3x.
- Allow 20-30 minutes for pressure to decrease.
- Vent the pot to remove leftover pressure.
- Lift the lid and let the broth cool until you can safely handle it.
- Scoop out bones, then strain the liquid through a cotton cloth to catch floating bits of marrow and bone.
- Chill broth in the fridge, until fat solidifies.
- Lift off the fat and heat your broth before lading into jars for canning.
In the Oven
Making broth in the oven is a low-fuss way to go. All you need is a roasting pan, and you're in business!
- Fill your roasting pan with beef bones.
- Cover the bones with water and pop the lid in place.
- Bake in a 350F oven all day long, checking and adding water every 6 hours (if needed).
- Lift the hot bones and let your broth cool, until it's safe to touch.
- Strain the warm liquid through a cloth, and refrigerate.
- When the fat solidifies on the surface, lift it off.
- Heat the broth for canning.
In a Large Stockpot On the Stove
I've tried making bone broth several different ways, and I prefer to make it on the stovetop. I have a large pot that holds 21 quarts of water, and when I fill it with marrow bones, I can make a lot of broth all at once.
I often bring the broth to a boil on our kitchen stove, then transfer it to our wood stove, where it cooks until done. It's a great way to keep cooking costs down!
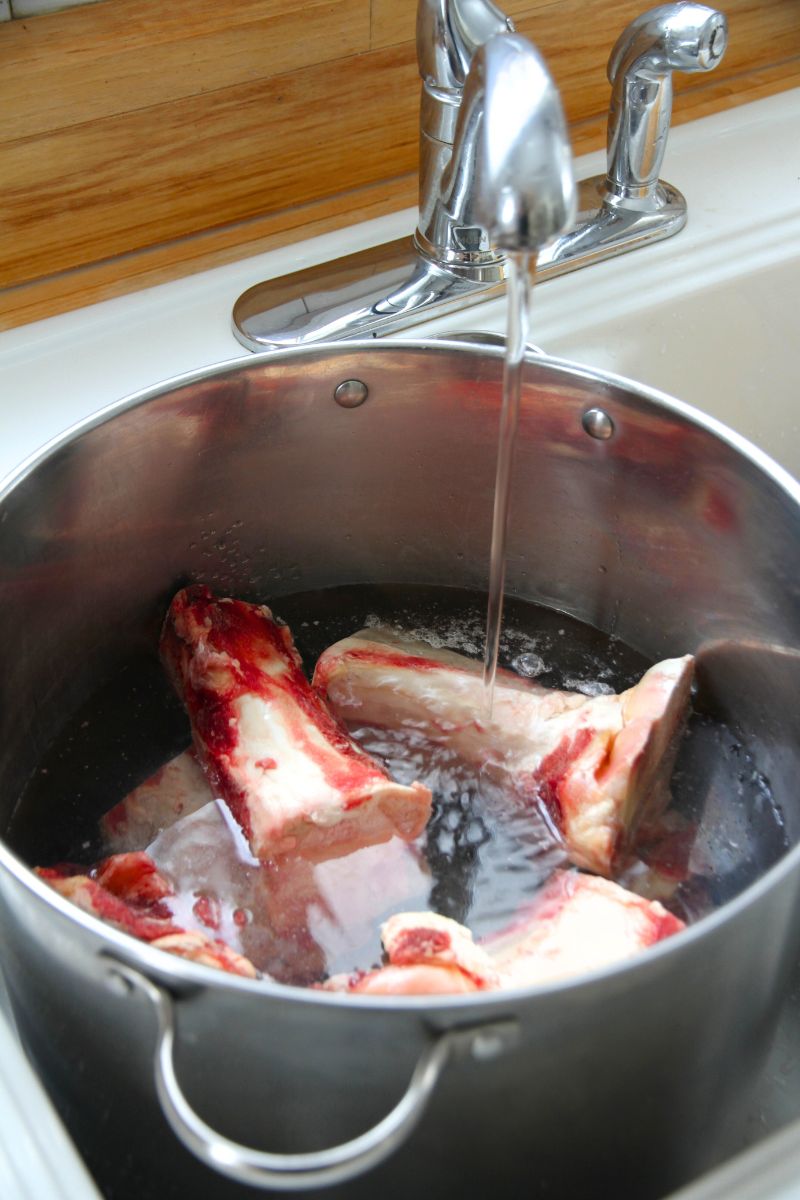
- Fill your pot with bones, leaving about 3 inches of open space at the top (broth foams when boiled, and you don't want things to boil over).
- Cover the bones with cold water.
- Add the lid and bring to a boil on the stove top (note: after the pot boils, we often move it to our wood stove, where it continues to simmer until done).
- If a heavy froth appears on the surface and causes things to boil over, skim it off with a large spoon.
- Boil your bones for 1-2 days, or until you're happy with the results.
- Lift the bones and let the broth cool until it's safe to handle.
- Strain the broth through a cotton cloth to gather up bits of bone and marrow.
- Chill in the fridge (if I'm making broth in the winter, I set it outside my kitchen door).
- Lift the layer of white fat when it solidifies on the surface.
- Bring broth to a boil and proceed with the canning process.
Best Canner for Preserving Bone Broth
Because it's a meat product, you can't use a water bath canner to preserve your broth.
Pressure canning bone broth is the only safe way to preserve it in jars, so it's shelf stable.
There are two types of pressure canners available for household use today: a weighted gauge pressure canner or a dial gauge pressure canner.
The two canners are very similar in their function. The difference is mostly found in how you read the PSI (pounds of pressure).
In your kitchen, you get to choose. Just be sure to follow directions for the right canner type!
How to Can Beef Bone Broth
Add water to your pressure canner as manufacturer's instructions direct, and heat on the stove.
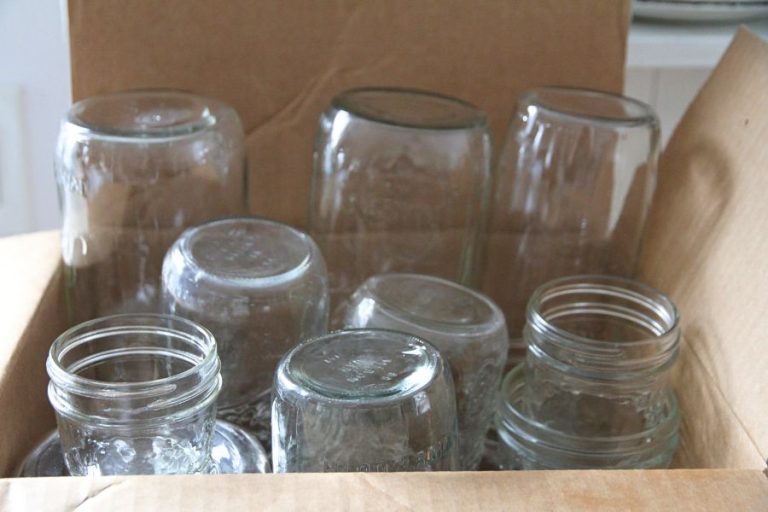
Wash your glass jars in hot soapy water, then fill each quart jar (or pint jar, if using), with fresh, hot water and leave them to warm in the kitchen sink.
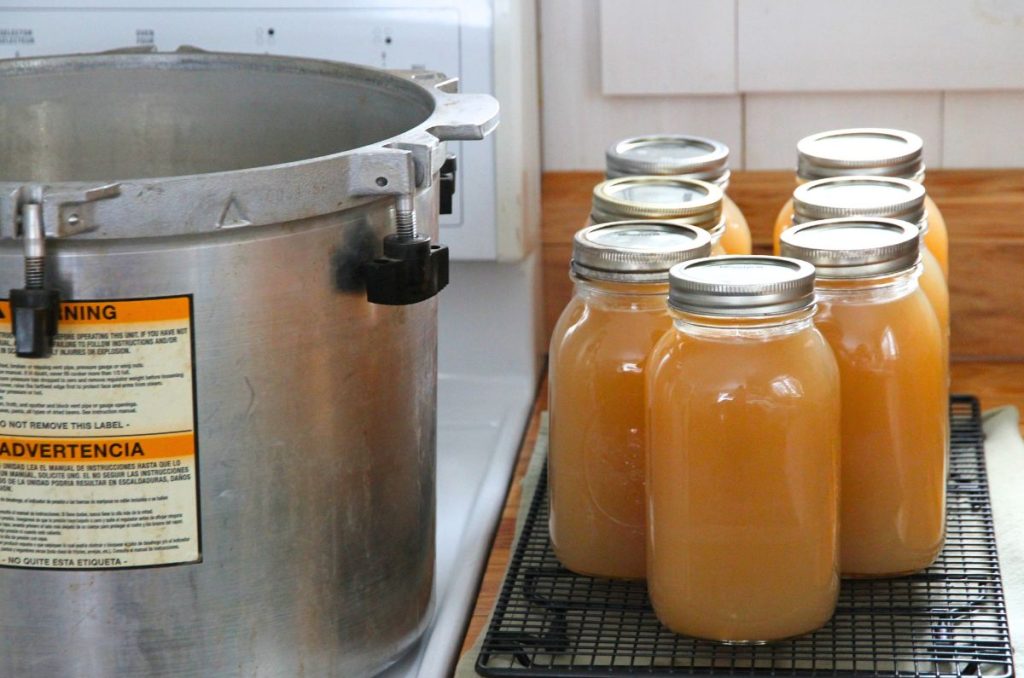
Bring your pure, strained broth to a boil on the stove.
Move it to the kitchen sink, by your warm jars. Dump out the hot water, and fill jars with hot broth (a funnel keeps things tidy).
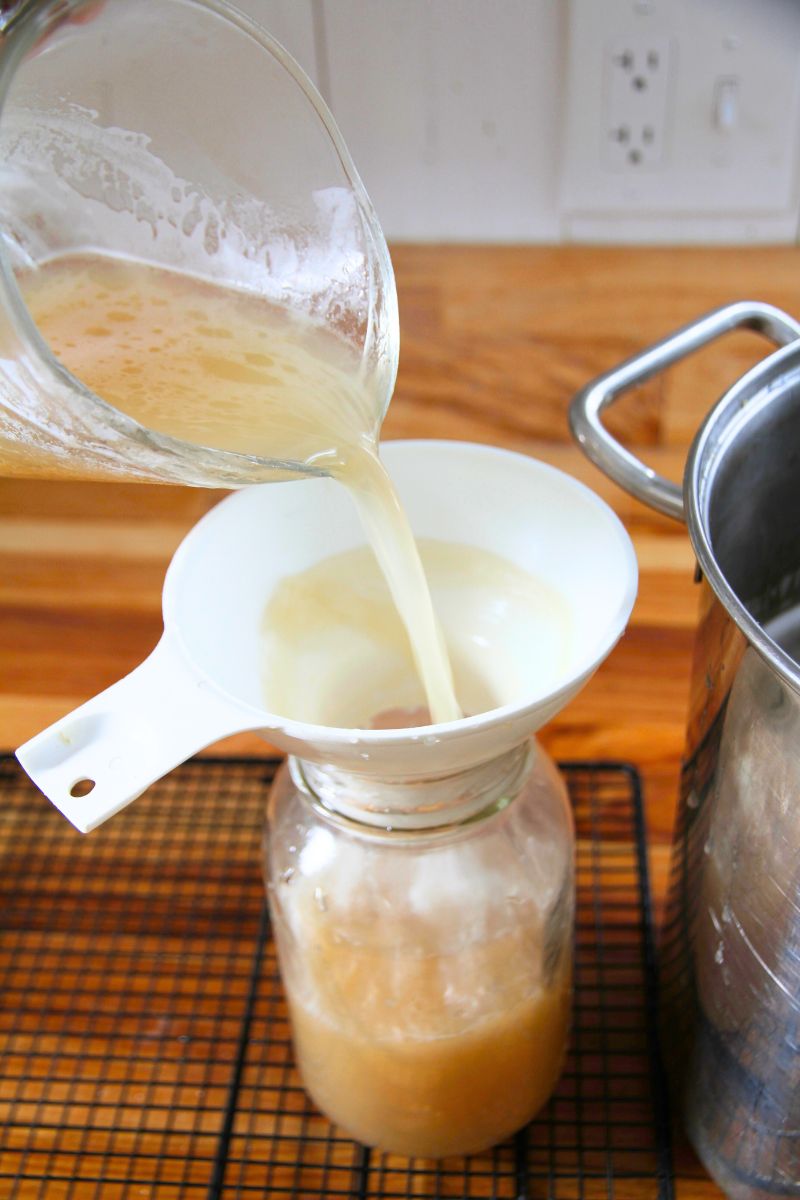
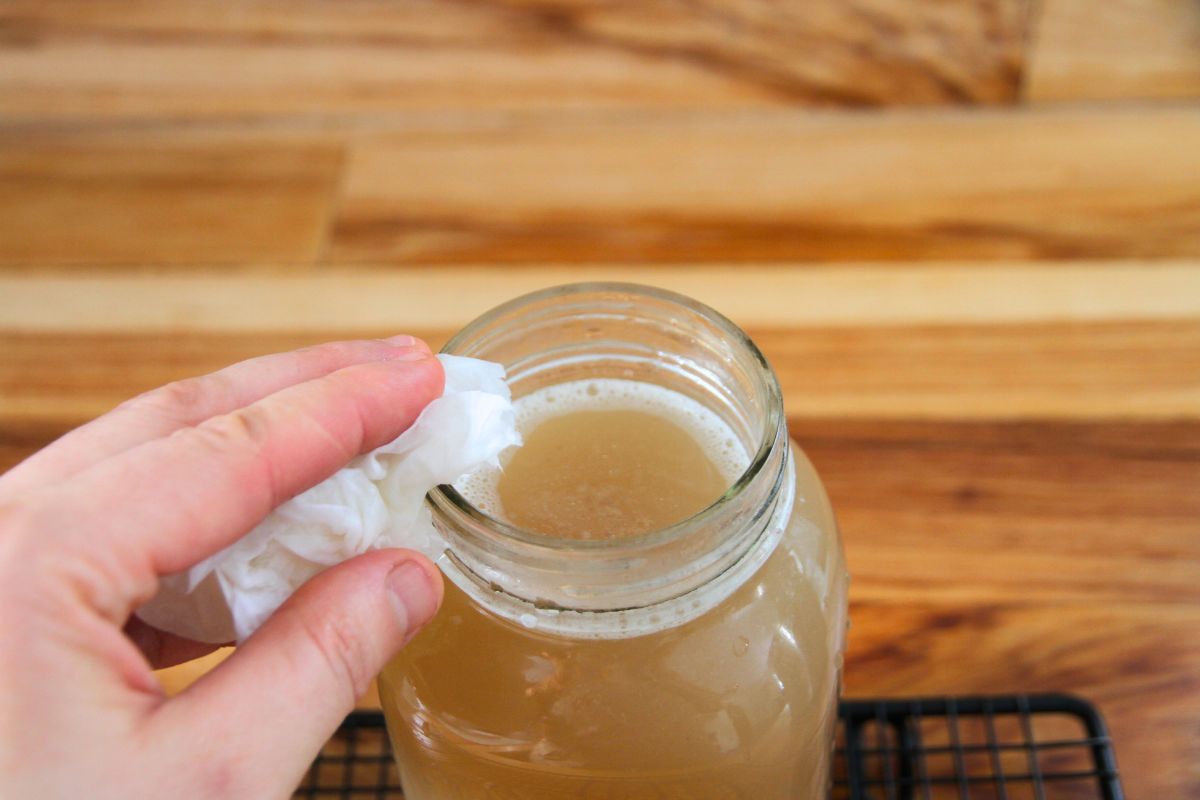
After filling, wipe the rim of each jar with a vinegar-soaked paper towel. This removes any fats or particles that would prevent the lid from sealing.
Add a canning lid and band, tightening to fingertip tightness.
Note: you don't need to haul on the lid! In fact, I find I usually get a better seal when I tighten the band about 1/4 inch past the resistance point.
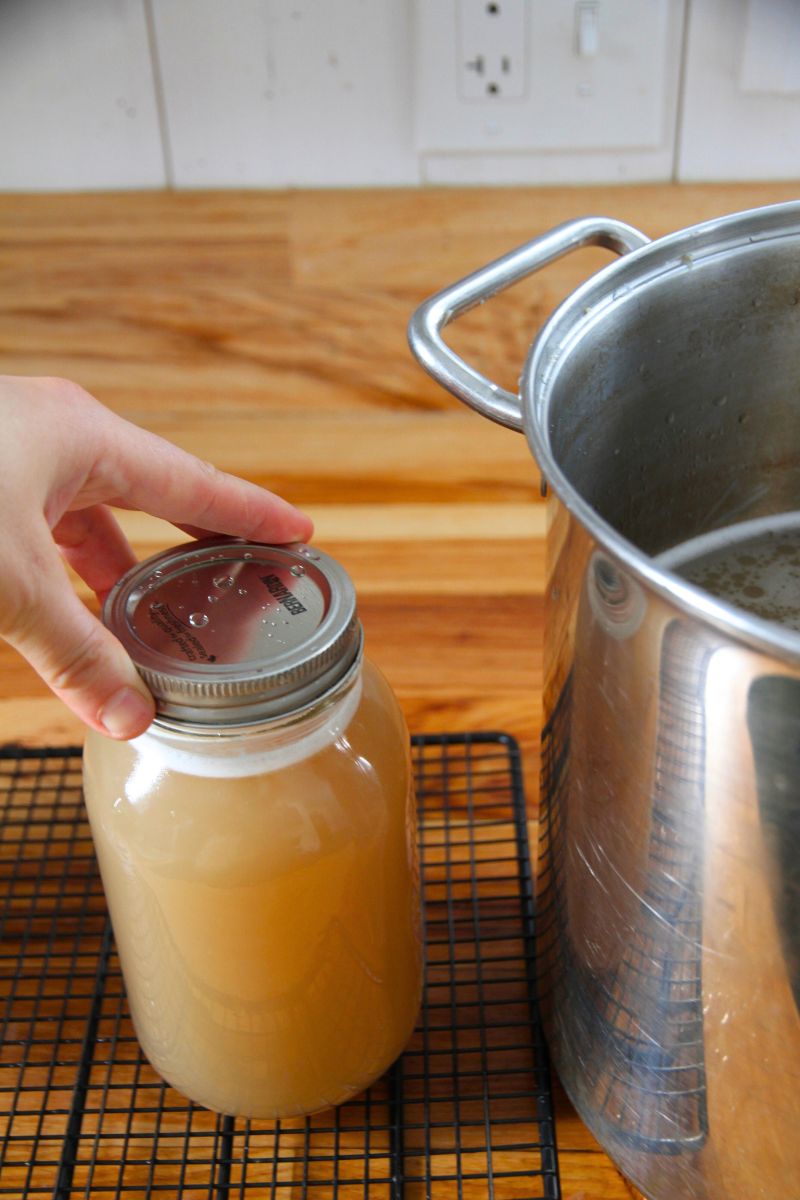
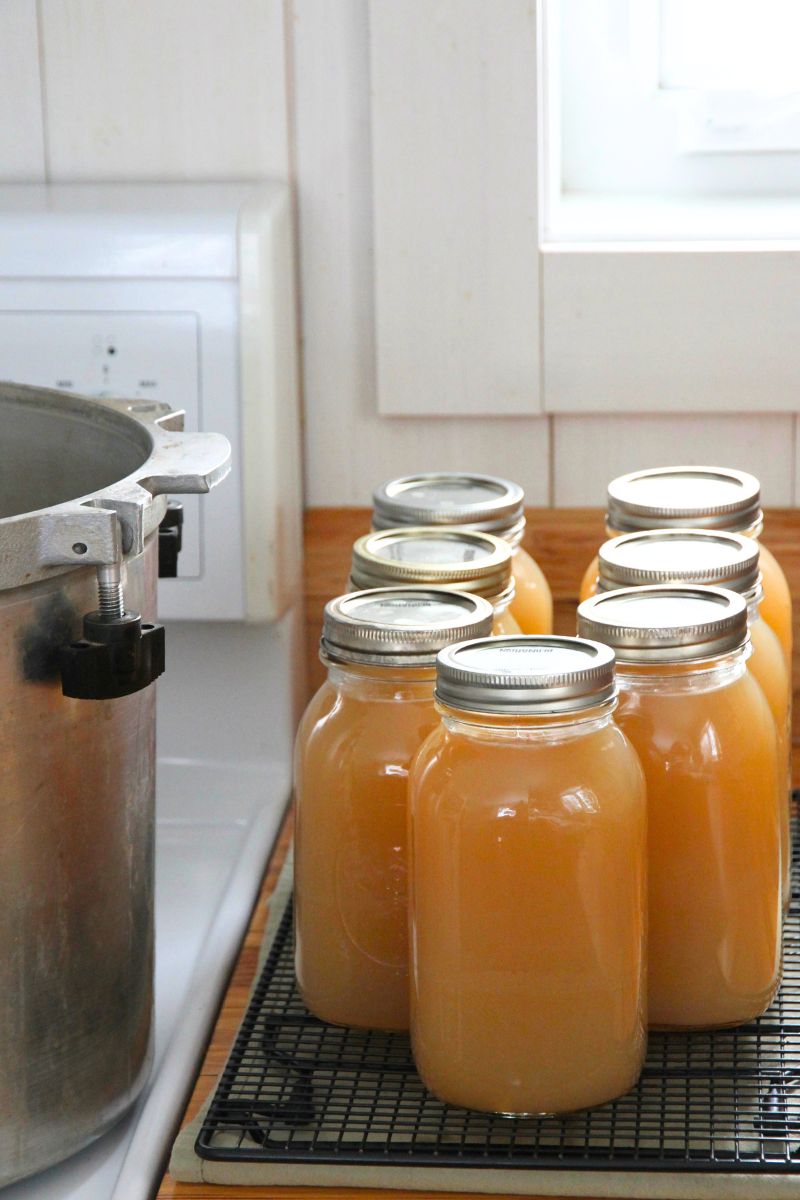
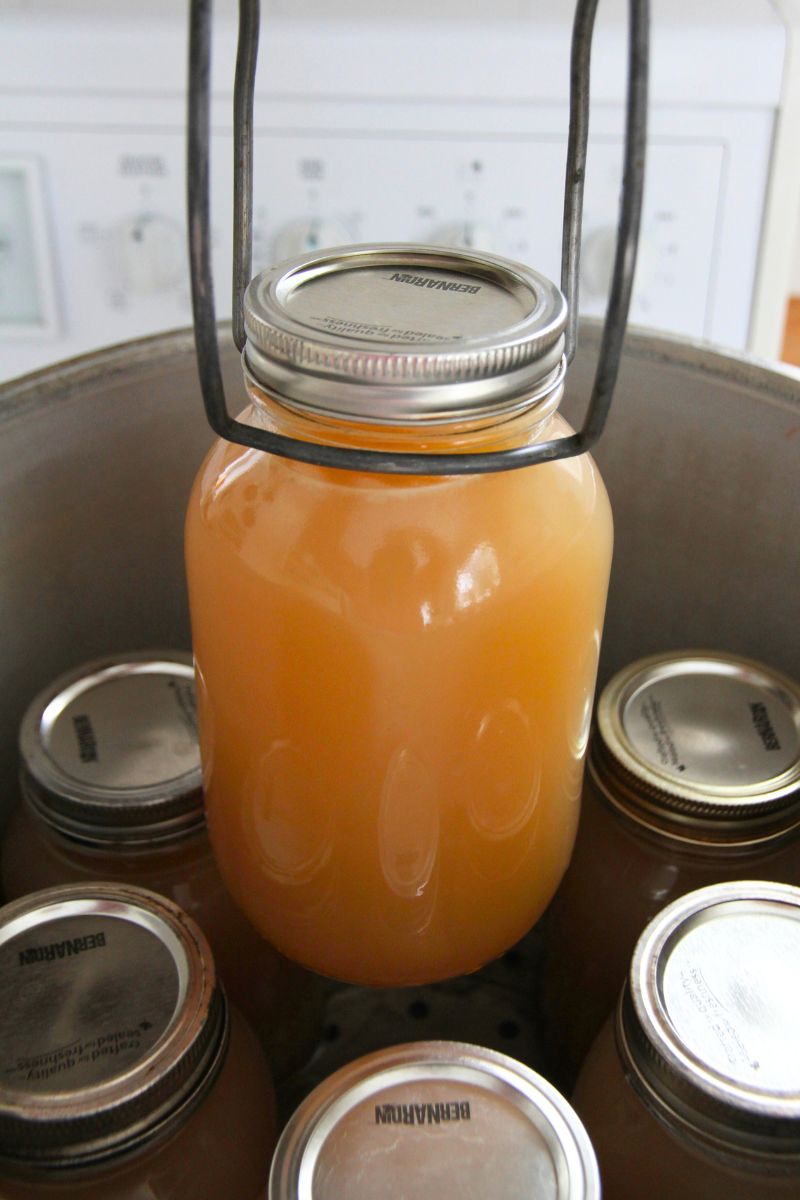
With the lid in place, transfer jars to the canner until it's full.
Fasten the canner's lid into place and process according to your pressure canning type (see printable directions below) and your altitude!
Processing Time for Beef Bone Broth
Weighted Gauge Pressure Canner
Pint jars: 20 minutes
Quart jars: 25 minutes
- 0-1,000 ft in elevation: 10 pounds pressure
- 1,001 and upwards: 15 pounds of pressure
Dial Gauge Canner
Pint Jars: 20 minutes
Quart Jars: 25 minutes
- 0-2,000 ft: 11 pounds pressure
- 2,001-4,000: 12 pounds pressure
- 4,001-6,000: 13 pounds pressure
- 6,001-8,000: 14 pounds pressure

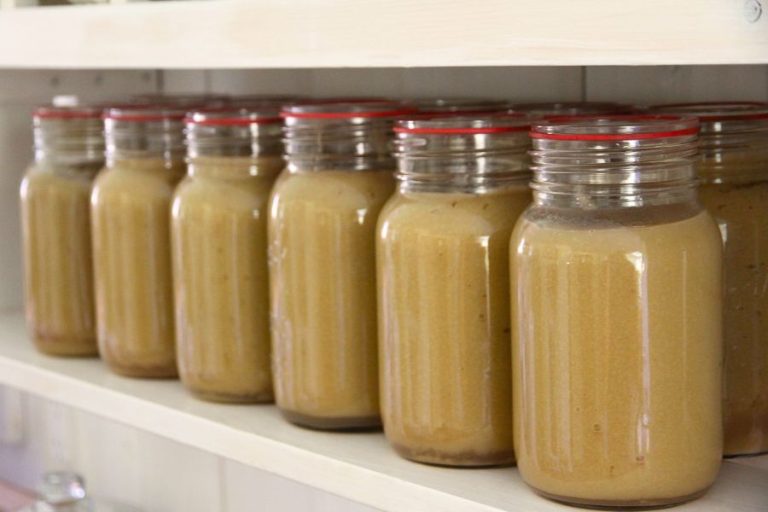
Canning Beef Bone Broth
Equipment
- 1 large stockpot
- 1 large bowl
- a cotton straining cloth
- a pressure canner
- 7 canning jars
- 7 canning lids and rings
- canning funnel
- a ladle
- jar lifter
- cooling rack
Ingredients
- beef bones cut to size
- salt to taste
- vegetables or alliums (optional)
- fresh garden herbs (optional)
Instructions
How to Make Bone Broth in a Stock Pot
- Fill your pot with bones, leaving about 3 inches of open space at the top.
- Cover the bones with cold water, add a lid and bring to a boil on the stove top.
- If a heavy froth appears on the surface and causes things to boil over, skim it off with a large spoon.
- Boil your bones for 12-48 hours, or until you're happy with the results.
- Lift the bones and let the broth cool until it's safe to handle.
- Strain the broth through a cotton cloth to gather up bits of bone and marrow.
- Chill the broth, then lift the layer of white fat that solidifies on the surface.
- Bring broth to a boil and proceed with the canning process.
Weighted Gauge Canning Instructions
- Turn heat to high.
- Let the canner warm up until a full blast of steam is hissing from the vent.
- Set a timer for 10 minutes and let the canner vent steam to remove all oxygen.
- After 10 minutes, add the weighted gauge, at the weight needed for your altitude (see below).
- Let the pressure build until the weight starts jiggling.
- Lower your heat, so the weight is only jiggling a few times per minute.
- Start your timer and process according to jar size (you'll have to continue to lower heat in this time).
- When the timer goes, turn off the stove top burner. Let the canner sit undisturbed, until the dial reads 0.
- Use a pot holder to remove the weight and let any remaining air release.
- Remove the lid and lift hot jars to a cooling rack.
- Let them sit undisturbed for 12 hours before testing for a seal.
- Sealed jars can go into your pantry, but any that failed should be refrigerated and used in the next 7-10 days.
Processing Details
- Pints: 20 minutes
- Quarts: 25 minutes
- 0-1,000 ft elevation: 10 pounds pressure
- 1,001 and up: 15 pounds pressure
Dial Gauge Canner Instructions
- After your canner has been filled with jars, seal the lid.
- Set the burner's heat to high and wait for a steady stream of steam to appear.
- Set your timer for 10 minutes, while leaving the vent open.
- After 10 minutes, flip the vent down (or if you have a weight for your dial gauge canner, add that for the proper PSI for your altitude).
- Watch the dial and let pressure build to the proper PSI for your altitude.
- When you've reach the proper pressure, start your timer.
- Keep an eye on the dial and lower your heat as needed to keep it at the proper pounds of pressure.
- When your timer goes, turn off the canner.
- Let it sit undisturbed until the dial reads 0 pounds of pressure.
- Open the vent (or lift the weight, if had) and let any remaining pressure escape.
- Remove the lid and lift the jars with a jar holder.
- Let jars cool on a rack for 12 hours.
- Test for a seal and place sealed jars on the pantry shelf.
- Jars that didn't seal should be refrigerated immediately and use in 7-10 days.
Processing Details
- Pints: 20 minutes
- Quarts: 25
- 0-2,000 ft: 11 pounds pressure
- 2,001-4,000: 12 pounds pressure
- 4,001-6,000: 13 pounds pressure
- 6,001-8,000: 14 pounds pressure