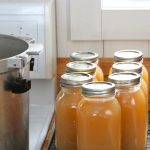
Canning Beef Bone Broth
Learn how to make and can homemade beef bone broth so you have in available at all times!
Servings: 7 quarts
Equipment
- 1 large stockpot
- 1 large bowl
- a cotton straining cloth
- a pressure canner
- 7 canning jars
- 7 canning lids and rings
- canning funnel
- a ladle
- jar lifter
- cooling rack
Ingredients
- beef bones cut to size
- salt to taste
- vegetables or alliums (optional)
- fresh garden herbs (optional)
Instructions
How to Make Bone Broth in a Stock Pot
- Fill your pot with bones, leaving about 3 inches of open space at the top.
- Cover the bones with cold water, add a lid and bring to a boil on the stove top.
- If a heavy froth appears on the surface and causes things to boil over, skim it off with a large spoon.
- Boil your bones for 12-48 hours, or until you're happy with the results.
- Lift the bones and let the broth cool until it's safe to handle.
- Strain the broth through a cotton cloth to gather up bits of bone and marrow.
- Chill the broth, then lift the layer of white fat that solidifies on the surface.
- Bring broth to a boil and proceed with the canning process.
Weighted Gauge Canning Instructions
- Turn heat to high.
- Let the canner warm up until a full blast of steam is hissing from the vent.
- Set a timer for 10 minutes and let the canner vent steam to remove all oxygen.
- After 10 minutes, add the weighted gauge, at the weight needed for your altitude (see below).
- Let the pressure build until the weight starts jiggling.
- Lower your heat, so the weight is only jiggling a few times per minute.
- Start your timer and process according to jar size (you'll have to continue to lower heat in this time).
- When the timer goes, turn off the stove top burner. Let the canner sit undisturbed, until the dial reads 0.
- Use a pot holder to remove the weight and let any remaining air release.
- Remove the lid and lift hot jars to a cooling rack.
- Let them sit undisturbed for 12 hours before testing for a seal.
- Sealed jars can go into your pantry, but any that failed should be refrigerated and used in the next 7-10 days.
Processing Details
- Pints: 20 minutes
- Quarts: 25 minutes
- 0-1,000 ft elevation: 10 pounds pressure
- 1,001 and up: 15 pounds pressure
Dial Gauge Canner Instructions
- After your canner has been filled with jars, seal the lid.
- Set the burner's heat to high and wait for a steady stream of steam to appear.
- Set your timer for 10 minutes, while leaving the vent open.
- After 10 minutes, flip the vent down (or if you have a weight for your dial gauge canner, add that for the proper PSI for your altitude).
- Watch the dial and let pressure build to the proper PSI for your altitude.
- When you've reach the proper pressure, start your timer.
- Keep an eye on the dial and lower your heat as needed to keep it at the proper pounds of pressure.
- When your timer goes, turn off the canner.
- Let it sit undisturbed until the dial reads 0 pounds of pressure.
- Open the vent (or lift the weight, if had) and let any remaining pressure escape.
- Remove the lid and lift the jars with a jar holder.
- Let jars cool on a rack for 12 hours.
- Test for a seal and place sealed jars on the pantry shelf.
- Jars that didn't seal should be refrigerated immediately and use in 7-10 days.
Processing Details
- Pints: 20 minutes
- Quarts: 25
- 0-2,000 ft: 11 pounds pressure
- 2,001-4,000: 12 pounds pressure
- 4,001-6,000: 13 pounds pressure
- 6,001-8,000: 14 pounds pressure
