How to Harvest and Preserve Beet Greens
Did you know that the beet is a dual purpose vegetable? That's right! Traditionally, beets were grown not only for their red or yellow globular roots, but also their leaves. Beet greens have lots to offer you and I and so, I'm going to show you how to harvest and preserve them for later!
But first, let me give you a quick overview on why you should use beet leaflets in the kitchen!
Why Use Beet Greens?
Beets are part of the goosefoot family. As a result, their leaves have a very similar flavor and texture to swiss chard. Like most leafy greens, they're loaded with good stuff!
Beet greens are particularly high in vitamin C. They contain numerous other vitamins and minerals, iron being one of several. These greens make wonderful additions to salads, omelettes and many other homemade dishes!

What Type of Beets Can You Harvest Leaves From?
You can harvest greens from any type of beet! New varieties tend to develop tougher stems as they age, while heirloom types often hold a tender leaf throughout the growing season.
If you grow newer varieties, you'll want to harvest leaves while the plants are still young and tender, no more than 8 inches tall.
Heirloom beet greens, on the other hand, can be quite nice throughout the year. My personal favorite is the Lutz Green Leaf Beet. Grown by plain people groups for generations, I think it's one of the best, dual purpose beets available!
Not only does this variety hold a tender leaf all summer long, but the beetroot itself never stops growing. Even when they reach 8 inches in diameter, roots remain crisp and flavorful, as a tender young beet would be. Oh, and did I mention they're an excellent winter keeper as well?
Seriously. If you like beets, you should try this growing this variety. Particularly so, if you're interested in adding beet greens to your diet!
How to Harvest Beet Greens
My favorite time of year to harvest beet greens for preserving is in spring, when I thin out the young seedlings. It just makes sense, since you're pulling them anyway! Here's how you go about it all.

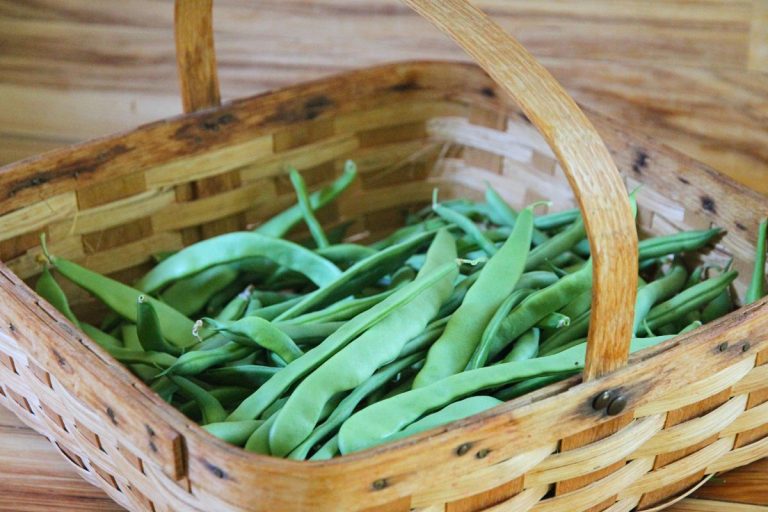
Step 1: Pull and Collect Your Thinnings
Grab yourself a basket and head out to the garden. Working on your knees, begin thinning the beet row as recommended for your particular type of beet. It varies, so be sure to check the back of your seed packet. It'll tell you everything you need to know.
Pull, thin and pull, piling the greens as you go, until you've finished thinning the row. When you have a basketful, it's time to take those beautiful greens inside!
Step 2: Trim and Prepare the Leaves
Pile your beet greens on the kitchen counter or dining room table. Using a pair of scissors, snip the roots off, collecting the greens. Leaves will pile up, until it looks like a lot! But the truth is, by the time you've finished preserving them, your stack will have diminished to about 1/5 it's original volume. Or even more! So don't be intimidated by the stack.

Once you've removed all the roots, take your greens to the sink and rinse them clean. I like to stack them in, stem side up. And then they get a good spray down!
Step 3: How to Blanch Beet Greens
On your stove top, set a pot of water to boil. Ideally, it would come with a colander insert, which makes removing greens much, much easier!
After the water has reached a rolling boil, load it up with beet greens! Keep adding them to the pot, until it's about half full. Cover with a lid and let the greens sit for about 60 seconds.
Meanwhile, add cold water to the sink, until it's about half filled. Once the greens are ready, lift them out and dump them into the cold water. Leave them there for a minute or two, until they've cooled.
Step 4: Bagging and Freezing Beet Greens
When the beet greens have cooled, scoop them up with a colander and let them drain for about 60 seconds. And then? They're ready to bag!

Place a handful or two in a heavy duty freezer bag. I prefer to use zip locks, but you can use whatever you want. Seal, label and pop your greens into the freezer.
And that? That's how you harvest and preserve beet greens!
Step 5: How to Use Your Beet Greens
Once they've been frozen, you can use beet greens in countless ways. Add them to fruit smoothies (use small amounts). Or you can dice them up and sprinkle across your morning omelette. Thaw, puree and mix into soups and stews. You can even add them into casseroles and such.
Get creative. And enjoy!
P.S. If you want to learn more about freezing fresh herbs, greens and produce, be sure to grab your free copy of my ebook, "Preserving the Harvest. "

Preserve Beet Greens
Equipment
- A large stockpot with a colander insert
- Pair of scissors
Instructions
- Thin your beet greens in the coolness of morning and collect them in a basket.
- Bring them indoors and set a large pot of water on to boil.
- Using your scissors, trim the roots from the leaflets.
- Stack the greens, stem side up in the sink. Rinse.
- Once your pot of water is boiling, fill it approx 1/2 full of beet greens.
- Set your time for 60 seconds.
- Fill your sink half full of cold water.
- Once your beet greens are ready, lift them out and place them in the cold water.
- Let cool for a minute or two, then strain out with a colander.
- Leave the blanched greens to drain for a minute or so.
- Place meal size portions into freezer bags.
- Seal. Label. Freeze for up 12 months.