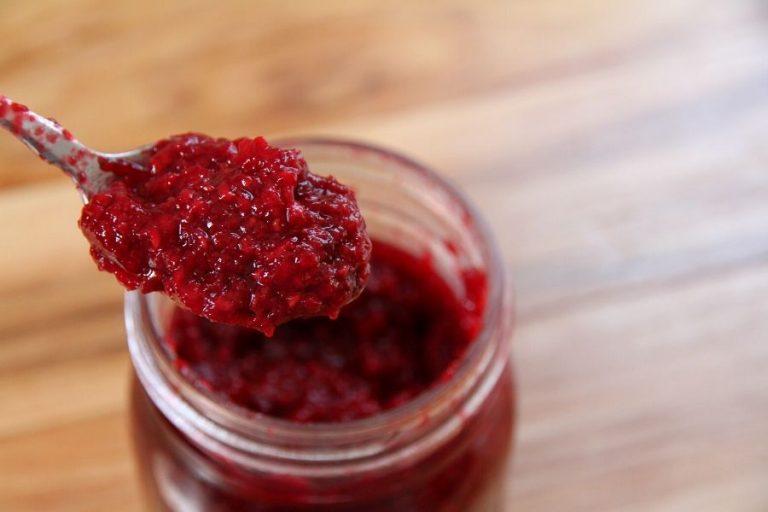
Glass Canning Lid Discovery: Part 3-How Use in Waterbath Canning
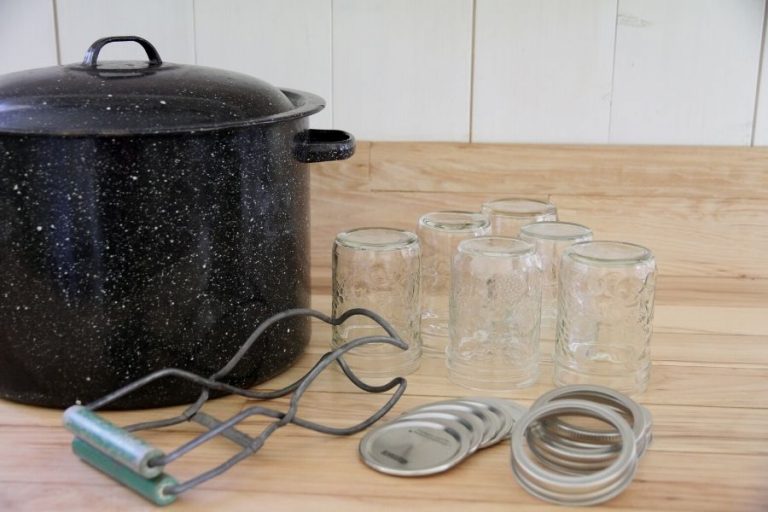
We’ve covered the basics and its time to use your canning jar sets. But first, a recap is always wise: your list of necessary items for canning with all glass Gem and Jewel sets should include the following:
- Blemish free Gem or Jewel jars
- Blemish free glass 78mm lids
- Vintage or new metal 78 mm screw on bands
- New fruit jar rubber rings
If you have followed the previous steps, everything should be inspected, scrubbed, sterilized and ready to be filled with food!

I’m excited to open a new doorway for you! Want to feel self-sufficient? Removing a jar of food from the pantry or cold room with a reusable glass lid and a reusable old-fashioned rubber ring will do just that! I love it! And prepared as I know you are, we still need to chat about a few things before stuffing our jars with food!
Is it Safe to Pressure Can with All Glass?
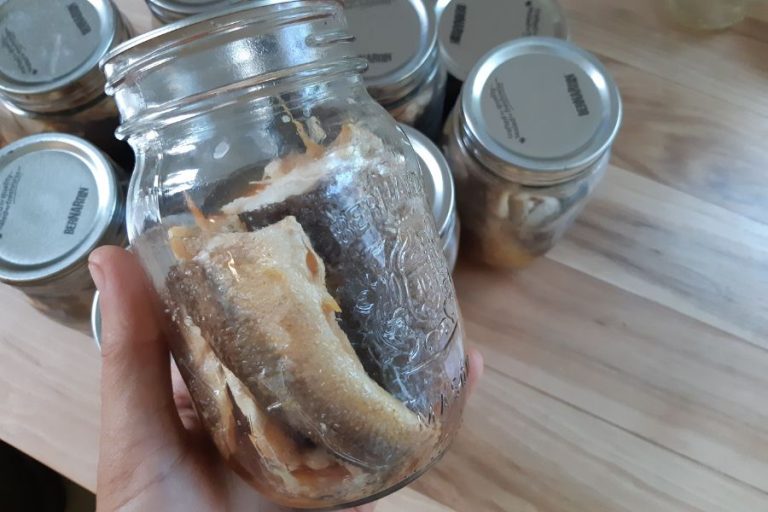
I wouldn’t recommend using your vintage jars and lids for pressure canning! Whether or not they were designed to withstand such force is debatable. A collection is a treasure that ought to be kept safe! I’d recommend that you use them only for waterbath canning and acidic foods such as fruits, fruit juices, pickled vegetables and tomatoes. They are wonderful for fermenting and making tinctures.
Is Canning with a 3-Piece Lid Food Safe?
If you have done your homework properly, there is nothing to be afraid of! And if you are comfortable using the Tattler lid, there is no reason in the world to be afraid of canning with a glass lid! Plus, they are easier to use: with the rubber designed to fit on the underside of the glass, it remains securer than the loose rubber seal of the 3 piece Tattler.

Differences In Jar Height
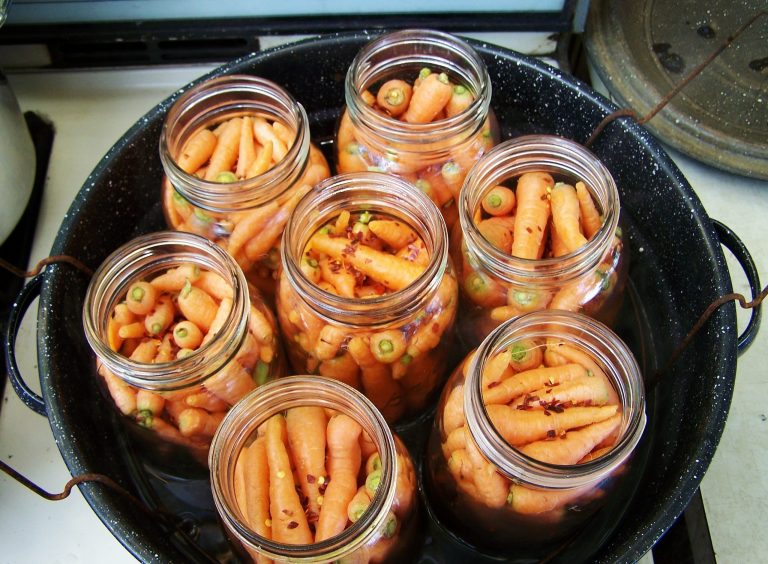
Most of these vintage jars (yes, the actual jars) are taller than our modern day sizes. Your waterbath canner will almost be overflowing and always takes some adjusting to make certain the jars are covered and the water is not bubbling over.
I usually add 1/2-1 inch to the recommended head space when canning thick sauces. Its important to keep the food line lower! Error on the side of under-filling, rather than over-filling these jars. With two places for sauce to get in and mess with the seal, (as with tattler lids) the risk is higher!

The Technique
If you have ever used Tattler lids, you know the procedure already!
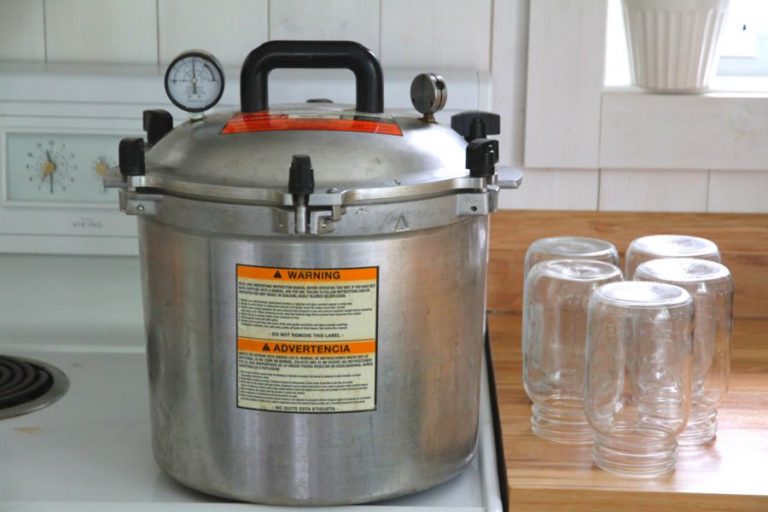
- Sterilize the jars and pre-heat if needed
- Fit a rubber ring on the underside of each glass lid and set in a pot of water to simmer for 10 minutes. These lids stack nicely!

- Prepare the goods you are preserving according to the recipe’s instructions
- Placing a funnel at the jar’s mouth, ladle goods into jar
- Leave the headspace required in the recipe! With any 3 part lid, its best to error on the side of caution: under-fill rather than over-fill!

- Wipe the rim of jar to remove anything that would hinder a seal
- Remove lid (with the rubber seal still attached) from the pot of hot water
- Set on jar’s mouth as you would a tin lid
- Tighten the metal band down approx 1/8 inch past the natural resistance point.
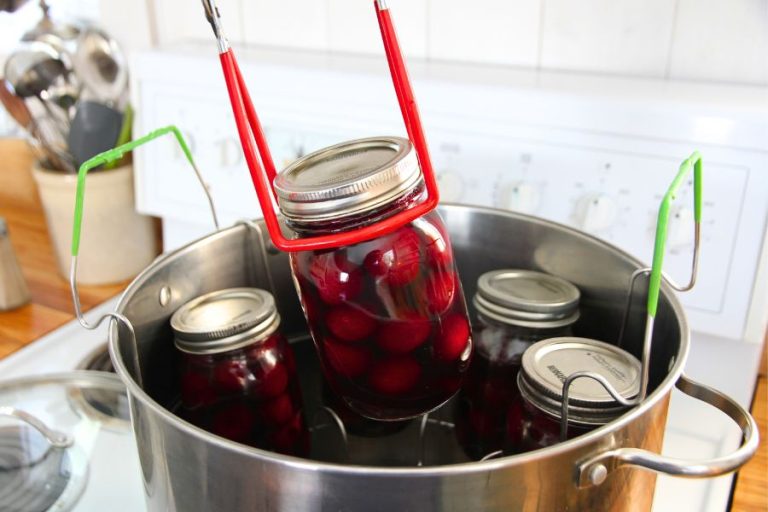
- Pop into your watherbath canner and process according to your altitude and recipe
- Upon removing the jars from the canner, tighten the metal band down far as it will go (as you do with the tattler lid).
- Let jars sit undisturbed until they return to room temperature.
Testing the Seal
Its easy to become nervous over new canning techniques! Its simple…I promise! With our modern-day tin lids, we know to interpret a “ping” as “properly sealed.” With vintage lids, there are five signs that indicate a good seal.
- If you are preserving food in a syrup or brine, look for bubbles immediately after removing the jar from your canner. If bubbles are actively rising upward, its an indicator of a good seal. If liquid is still, the jar may not seal.
- When a jar does seal, it will pull the lid downward, leaving the metal band in its original place. When the time comes to remove it, you may discover that some are wiggly and loose! Its another indicator.
- If bands are difficult to actually screw off, its also a positive thing! The rubber and lid usually shift to one side under the pressure of a solid seal. Don’t be alarmed! A careful inspection will reveal that your tin lids do the same. Being thinner, their shifting is less noticeable.
- After removing the metal band, inspect the glass lid with the eye. If slightly shifted to one side (hence the difficulty in remove the band), your jar has probably sealed.
- The true and final test that should always be applied to every jar? Lift the jar by its glass lid! Don’t lift higher than 1 inch off the table. If seal has taken, the jar will come with the lid. If not, the lid will cleanly pop off.
Storage
Never store your jars with their metal band! Longer ago, women were advised to do just this. The theory was that it helped hold the seal. However, we know differently today! When canning with vintage sets, its wise to check the seal throughout the first week. In order to do this, the bands must be removed.

After placing my freshly sealed jars in the cold room, I pop down a few times in the first week and quickly do the lifting test to newly canned goods. If something is going to let go, it’ll probably happen in that first week and, if I’m checking jars every other day, I’ll catch a broken seal before fruits or pickles spoil…which is another reason I love storing my canned goods in my cold room!
How many seals let go? Very few! The only problems I had was when I overfilled the jars and (of course) when I was just figuring it out. Tightening down the metal bands after removing from the waterbath is crucial to a good seal!
Opening a Sealed Jar
You might think this is simple…but it actually isn’t! The seal on these vintage jars is incredibly strong! Insert a butter knife between the rubber and the glass lid. Don’t attempt to break the seal between the rubber and jar’s mouth because the jar’s rim may chip under the force. Wiggle the knife in until it hits the concave glass on the understand of lid. Gently tip the knife’s end downward. The seal will gently give way. Before you wash dinner’s dishes, be certain to inspect both the lid and the seal. If they are blemish-free, hand wash both and save for next year’s canning!
Four Positives to Using Gem & Jewel Canning Sets
Inexpensive Equipment
I regularly purchase vintage Gem/Jewel jars for $6 per dozen. I can purchase glass lids with metal bands for $2.00 per dozen. Sometimes the reusable rubber seals are included. If not, I can find 1 dozen at my local hardware store for $2.19! How does $10.19 sound for a re-usable canning set?
I have to pay $15.00 for locally purchased wide-mouth jars with lids and bands. Its not cheap! Once I have wide mouth jars, purchasing new tin lids every year costs me $5 a dozen. With 145 wide mouth jars to fill, I pay out just over $60 each spring in wide-mouth lids alone. The longer I process my own food, the better re-usable lids and rubbers sound!
Economical Purposes
Everything used in vintage canning is reusable. How long you can safely reuse the rubber seals, I’m not yet certain! I suspect it would be at least several years. The Tattler website (reusablcanninglids.com) claims theirs will last for ‘several seals’ (click link for further reading). According to their calculations, rubber seals can be reused until they stretch out of shape! Of course, glass lids may wear rubber down quicker than their plastic lids. Who knows?! But either way, these rubber seals will give you more than one time use!
An Available Backup
If you need a backup (you’ve collected more jars than glass lids), local Canadian hardware stores still carries the tin lid (thanks to the homesteaders!) and the metal bands are still in production as well.
Valuable Antiques
If the production of rubber seals for glass canning lids ceases (remember, these jars and lids are an abnormal size), you’ll have a lovely vintage set whose value will only increase as the years go by. Sell or wait…either way, they will make a return profit for you! American homesteaders go crazy over them!

Costs to Account For
- It will take time to sort out supplies and decide which are defected. I had a Jewel lid that looked fine but was just too worn down to seal properly. After two canning attempts, I set it aside for storing dried good or ferments.
- The battle of the metal bands: sometimes the old bands are warped and don’t go on/off easily! For practicality’s sake, buying new ones designed for use on tin lids is a great idea.
- Cleaning time: while most of these jars aren’t in bad condition, the lids are usually the dirtiest! It takes time to remove grease or grime from them!

- Some day the rubber seals may go out of production…although considering the history we both know, it seems Canadians are quite set on keeping the Gem supplies around!
- You will be juggling another size of canning band and, if you purchase tin lids, another set of those! It pays to be organized when canning vintage style!
- The lids are more difficult to remove than the tin or tattler variety on account of their being glass.
“So is it worth your time to collect, clean, inspect and water-bath can in these lovely vintage sets?!” For my home and resources, I give it my best yes…with a quart jar of peaches in one hand and a pint of pear preserves in the other!

Most of these older jars with glass lids are very expensive where I live. People are asking for 10-40$ for EACH jar and sometimes they don't have lids or rings. I'm trying to collect but cost is slowing me down. If anyone in my area has any cheap ones let me know (SW Ontario). Sadly, I do not drive.
I have presto two piece glass canning lids. The gasket is thicker and slightly smaller than my harvest guard reusable gaskets for their lids. Can you help me out where I can purchase the right gasket?
I'm not sure I can help without actually seeing the jar myself! At this point, those pieces are probably collectables. You could check out this option I saw on Etsy: Cupples No. 10 Topseal Presto Rubber Jar Rings
Tattler rings, while thinner and not as wide, will work fine on all the regular sized glass inserts. (The wide mouth gaskets work with the wide mouth glass inserts, but those are rare)They fit perfectly on the regular ball glass flats, but all the others originally used a wider gasket. On the other glass flats, you have to be VERY careful to have the gasket lined up perfectly while screwing down the ring. They seal great, if you manage not to get them shifted to the side.
Hi Autumn!
My 100 year old neighbour recently moved from her home and, with her family’s help, set out several free items including glass canning jar lids.
She was well known for her canning so I gathered up all the lids, and happily scrubbed them clean while celebrating my memories of all the fruit and puddings she shared with our family.
I have a question for you as follows:
There are two glass “lids” with small handles on the top (one is mauve coloured similar to carnival glass) and two clear glass “blobs” (my son-in-law thought these might be weights - as they nest perfectly in the glass lids)… any ideas about what these might be?
Thanks for your help. I really enjoyed reading your research and the comments you’ve received!
What an intriguing story! I know some women use glass weights for fermenting so they can keep their foods under a brine. If you have the time, I would love to see a photo of the lid/weight combo! My email is atraditionallife@gmail.com.
When you remove the lids/ and rings from the water, should you dry them off before applying them?
No! Don't dry them off, as it could leave tiny fibers behind that interfere with your seal!
With the Crown Jars, my grandma told me to screw down the lid to a comfortable tightness (for a woman's hand!) and then back it off a quarter-inch turn. And then tighten the heck out of it when it comes out of the canning kettle. That sounds a tiny bit different from your Gem technique, but the whole seal is different too. Anyway, I have loved your series, including people's comments. I'm thinking the ladies in the 1940s probably used their jars in the pressure canner without a second thought, because what other jars did they have? But the jars were younger and easier to replace in those days.
Randomly, did you know that the Crown jars are dated? The year is embossed into the glass on the bottom of the jar. I love to know that I am using a jar from the 1930s... Depression canning. Or the 1940s... canning for victory (notice the Viceroy name and logo are as close as they could get to V for Victory!), or the 1950s, like in Blueberries for Sal.
I checked the Tattler link provided and it appears they only have white glass lids ... where can I find the clear glass lids?
Thank you! I’m new to canning and LOVE the vintage jars. They are VERY hard to come by here in the USA.
Hi Marcey! Tattler only carries white plastic lids. If you can't find glass lids online, you may want to consider getting Weck jars/lids. The only other source I know of is the Gem or Jewel lid, which is Canadian. Good luck!
I'm in Michigan and just stumbled upon a box of vintage glass Presto lids with bands and I'm trying to research. Presto seems more easily available in the US at least. I'm still not sure if I can use ball jars. The lids screw on and seem right but I don't know how to be sure.
Hi Hannah!
What an exciting find! Feel free to send me some photos of the lids and specifically, a lid on one of your jars (so I can see sizing) and I'll help you figure it out. If interested, you can send them to atraditionallife@gmail.com.
Hello Hannah... wondering if you ever managed to find rubber rings for your Presto lids? I have Ball #10 and Presto lids which are the same size... but I am having trouble finding rubber rings for them. I have some Weck jars and the small sized Weck jar lid rubber it very close and fits similar to how the rubber rings fit on Tattler lids fit, so I am going to give that a try... You can order rubber rings from Weck without having to order the jars.
They are very Canadian. I have collected over 400 and have the glass lids too.
I use the gem jars with glass lids and rubber rings in my pressure canner frequently. I have never had one break on me. I have learned to under fill them as you suggest here. Thank you for this great article.
That's SO good to know! I contemplated pressure canning bone broth with the glass lids, but was a bit afraid of breakage. Now that I have more jars (and your tips) I'm definitely going to attempt it! How do the rubber seals hold up to pressure canning? Do they wear out faster?
Thank you so much for stopping by and leaving us with your knowledge!
The deep metal bands are no longer in production. You have to find them used. You can get them with the glass inserts sometimes on ebay. (Look them over as carefully as for the glass -they are bent sometimes...)
On the other hand - the tattler caps use the regular bands for the two-piece lids! : )
Their are also regular and large mouth sized glass inserts from the same era available in the U.S.
So, don't get rid of those size jars! Look in resale shops or ebay. (You do need the deep rings for them) the rubber rings are no longer available, but the tattler rings work - just thinner and looser.
Love this! Thank you Jennifer! Are the wider metal bands still readily available? I have some large-mouth glass lids, but haven't had much luck finding the wide screw on bands. And great thought on the rubber rings (seals). One friend suggested Tattler as well, but I hadn't gotten around to purchasing them (because of the metal bands). I have lots of questions for you...
I have some Weck jars and have discovered the small rubber sized Weck gasket fits the Ball #10 glass lids really well... I am just going to trim the tabs off... and I found some old bowtie rings on ebay that I am awaiting delivery but then I will try them. I am so sick of buying cheaply made likely made in China, disposable canning rings that are no longer cheap... up here in Canada, they average 70 cents a lid now... crazy for one use.
Canning lids have gone up in a price a lot. Which is why the reusable ones are gaining popularity! Good luck with your venture. 🙂