How to Plant Potatoes in the Spring Garden
Learn how to plant potatoes first thing in the spring for a full harvest. I'll also share my best tips for low maintenance gardening, so your potatoes are easy to grow and won't take too much of your time.

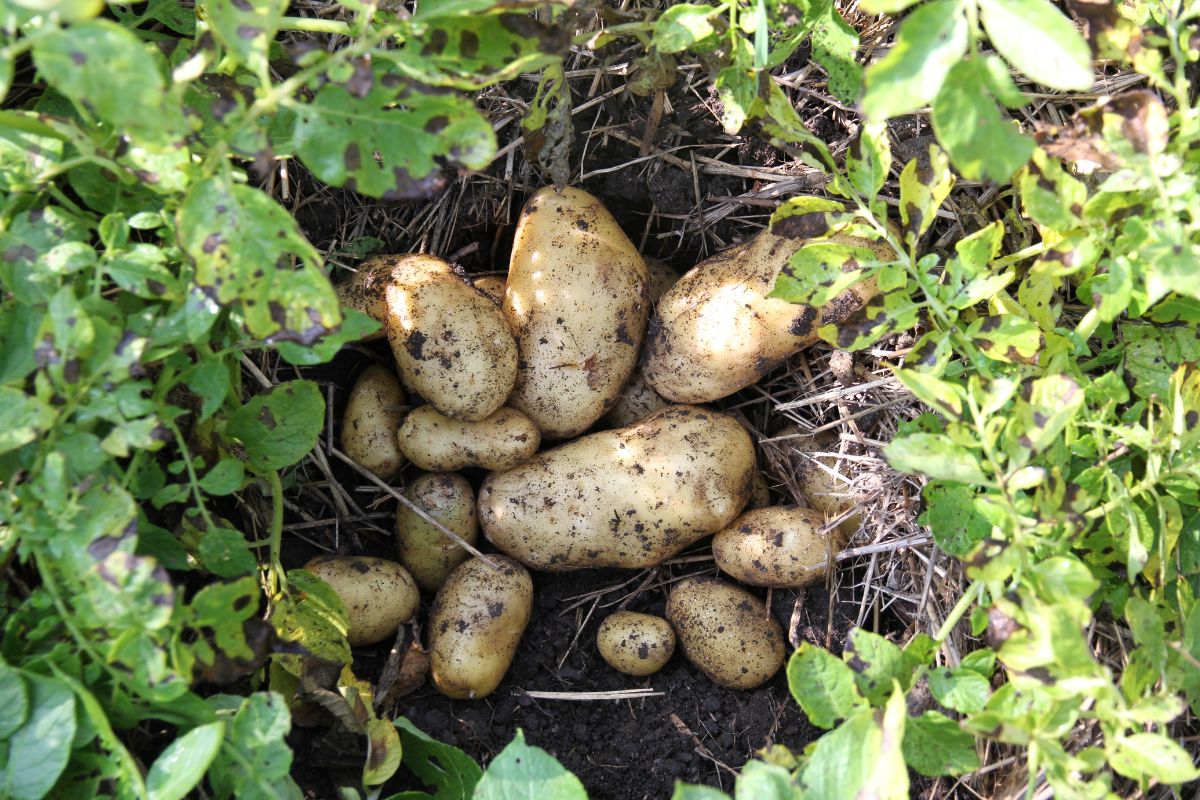
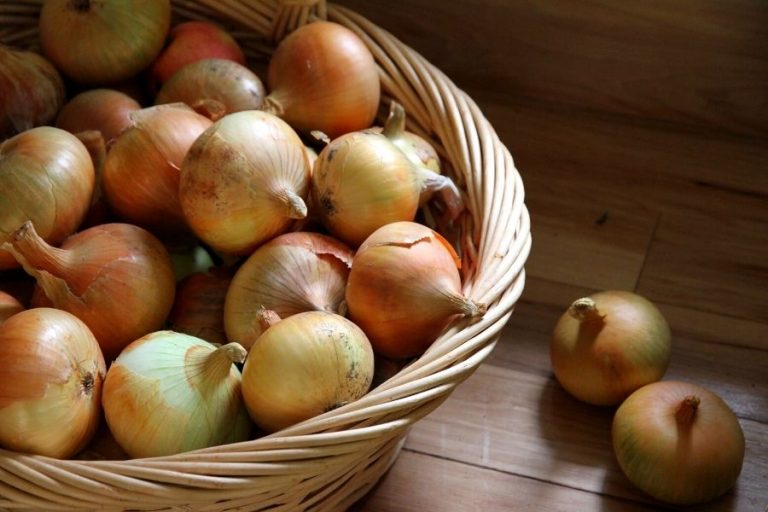
Potatoes are one of those crops I always grow every year. They take a lot of space, but I'm happy to give it to them. These tubers grow beautifully in the well-drained soil of my gardens, and store just as beautifully over the winter months in my cold room.
Here's why they're such a priority for me.
- Clean eating: commercially grown potatoes are frequently treated with pesticides and fungicides. Growing your own is a great way to put clean food on the table (something we really value as a Lyme family).
- Easy planting: because you don't actually grow potatoes from seeds, planting is easy. Just drop chunks of potato in the ground, and you're done!
- Easy to care for: potatoes grow well and produce best when covered in a layer of mulch. Mulch significantly cuts back on weeding in the garden.
- Easy to store: as I mentioned above, we store homegrown potatoes in our cold room, where they keep all winter and into the spring months.
- Easy to eat: like most homegrown produce, potatoes have a depth of flavor you don't get with store bought potatoes!
Growing your own potatoes at home is a wonderful way to put quality food on the table. So let me show you how to plant potatoes in the spring garden!
Terminology for Planting Potatoes
If you've never planted potatoes before, here are a few terms you should know before you carry on.
Potato seeds: potato seeds are rarely grown by gardeners. They take a long time to mature and have to be started indoors several months before your spring garden season begins. Most gardeners plant seed potatoes. It's the easiest way to go!
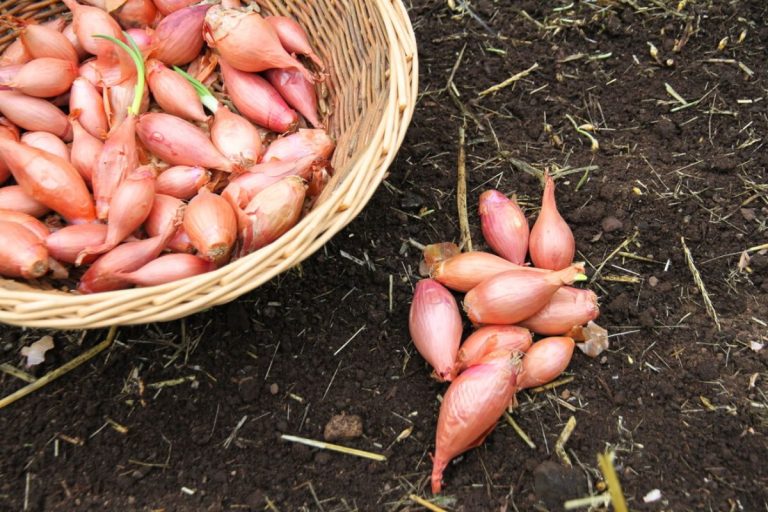
Seed potatoes: seed potatoes are just disease free potatoes that have been stored over winter and are replanted in the spring. It's very easy to save your own potatoes, and they quickly multiply.
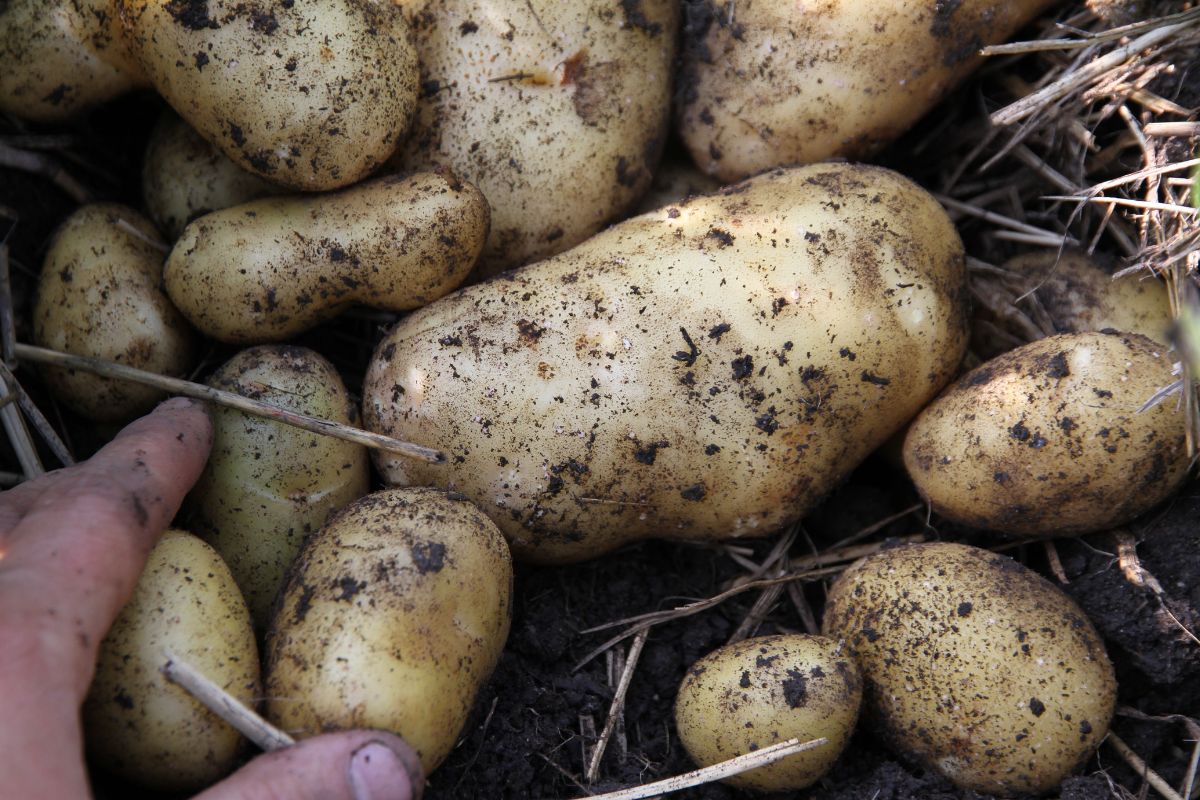
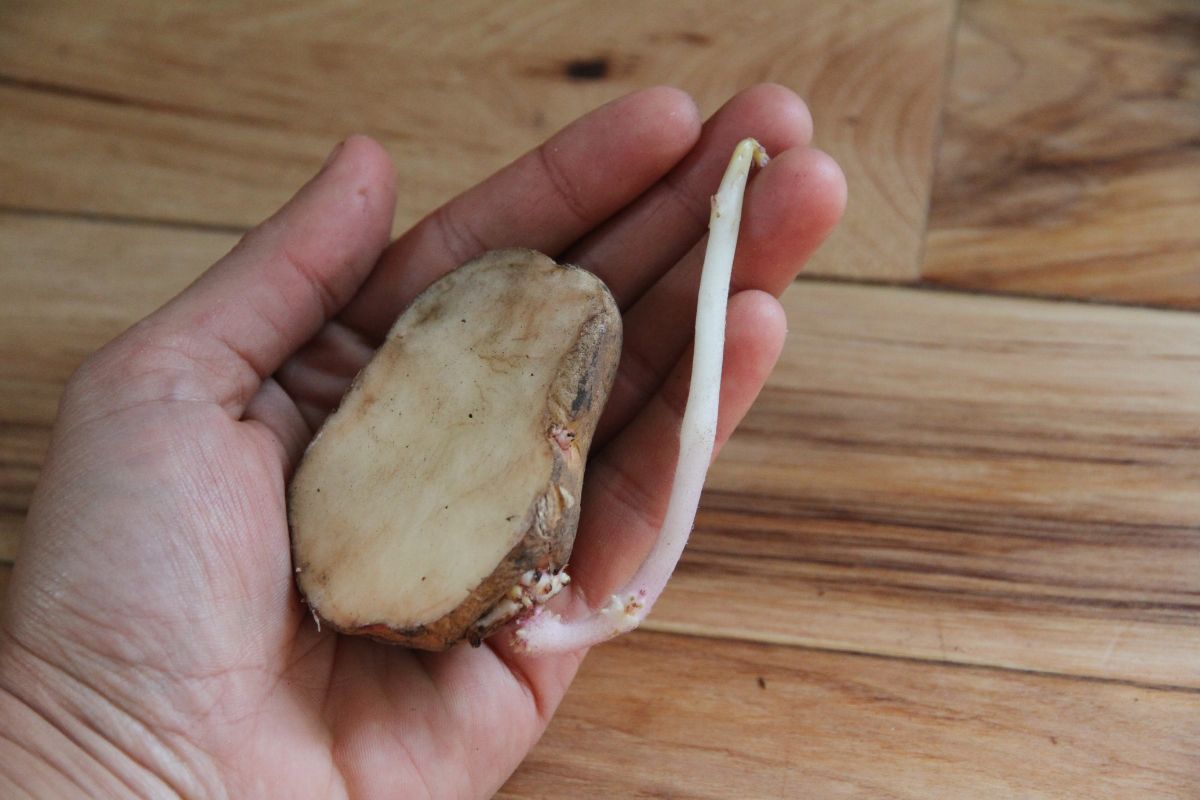
Potato Eyes: have you ever noticed tiny dents in your potatoes? These are referred to as "potato eyes." Green shoots and leaves will grow from these dents, and whenever you cut up potatoes for planting, you want several potato eyes on each piece.
Chitting: some gardeners like to set their potatoes out in a warm, bright place before planting. This encourages sprouts to develop in the eyes, and gives the gardener a head start. The process is called chitting.
Hilling potatoes: gardeners who grow potatoes in bare earth pile dirt around green potato tops when they're 8 inches high. This encourages the plant to produce more potatoes and ensures tubers don't turn green from exposure to light.
Tips for Buying Potato Seed
When growing your own potatoes for planting, always buy certified disease free potatoes from a reliable resource.
Helpful hint? Your local grocery store isn't a reliable resource!
Commercially grown potatoes are highly treated with pesticides and fungicides, as well as anti-sprouting agents, so they last longer on the shelf. There is no guarantee these potatoes are disease free, and if you've ever dealt with infected soil in your garden, you know what a pain it can be!
So buy certified disease free potatoes. I give you some tips below for buying locally, or online.
Where to Buy Locally
Your local garden center will carry disease free potatoes in the spring. If you live in a small town, you can also check at your local hardware store.
When all else fails, buying seed potatoes from a gardening friend is another great option. Because they were locally grown, these potatoes will probably produce well for you!
Where to Buy Online
Most of my readers are located in the United States, or in Canada. So I'm going to list some online companies in both countries who carry seed potato and will ship directly to your home.
American seed companies
Canadian seed companies
When buying online, try to place your order 3-4 months in advance. It's not infrequent for seed companies to sell out of seed potatoes, and you don't want to miss the window of opportunity.
Upon placing your online order, you'll be asked to enter your growing zone or zip code, so the company can ship to you at the proper time for planting in your area.
Types of Potatoes for Each Season
There are so many different types of potatoes the backyard gardener can choose from. That's partly why I love growing my own!
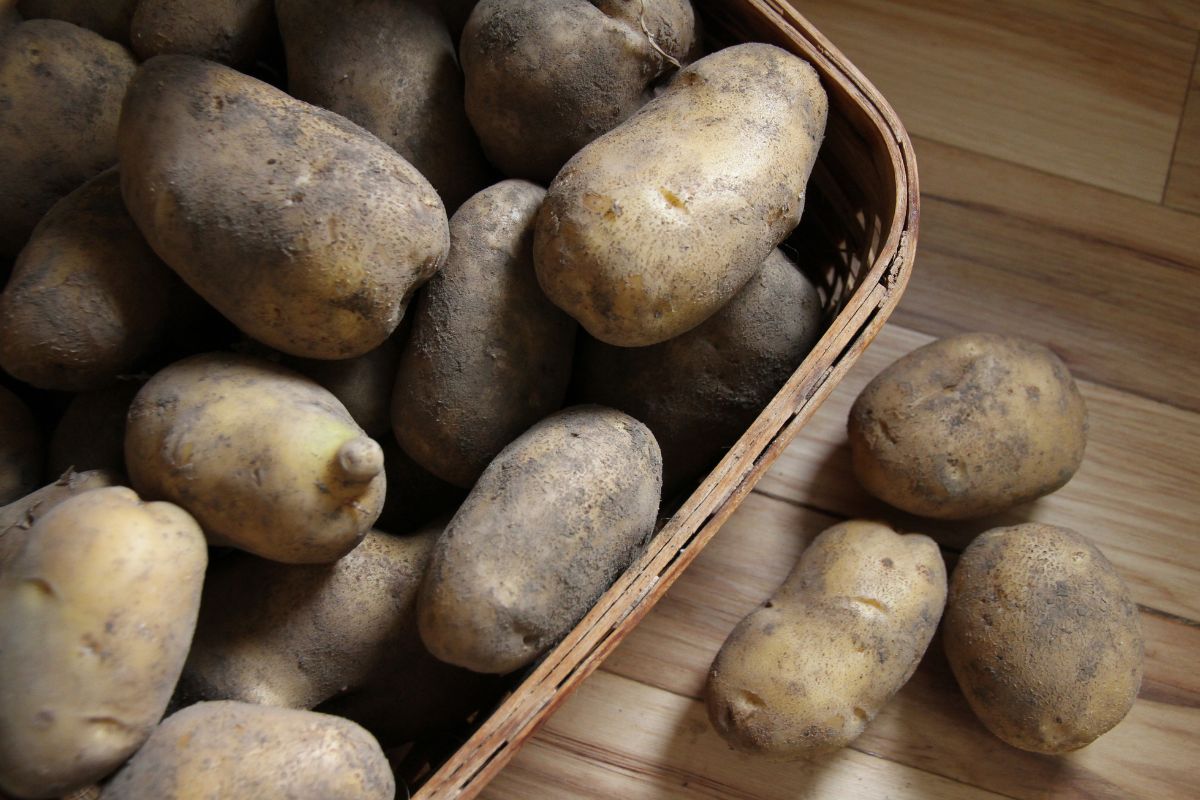
I don't have to just eat Yukon Gold or Russet varieties, but get to choose according to taste, and when I want mature potatoes. Some are ready earlier than others, and I've put them into categories for you below, as well as their best use in the kitchen.
Early Season Potatoes
- Irish Cobbler (brown potato for baking/boiling)
- German Butterball (yellow all purpose potato)
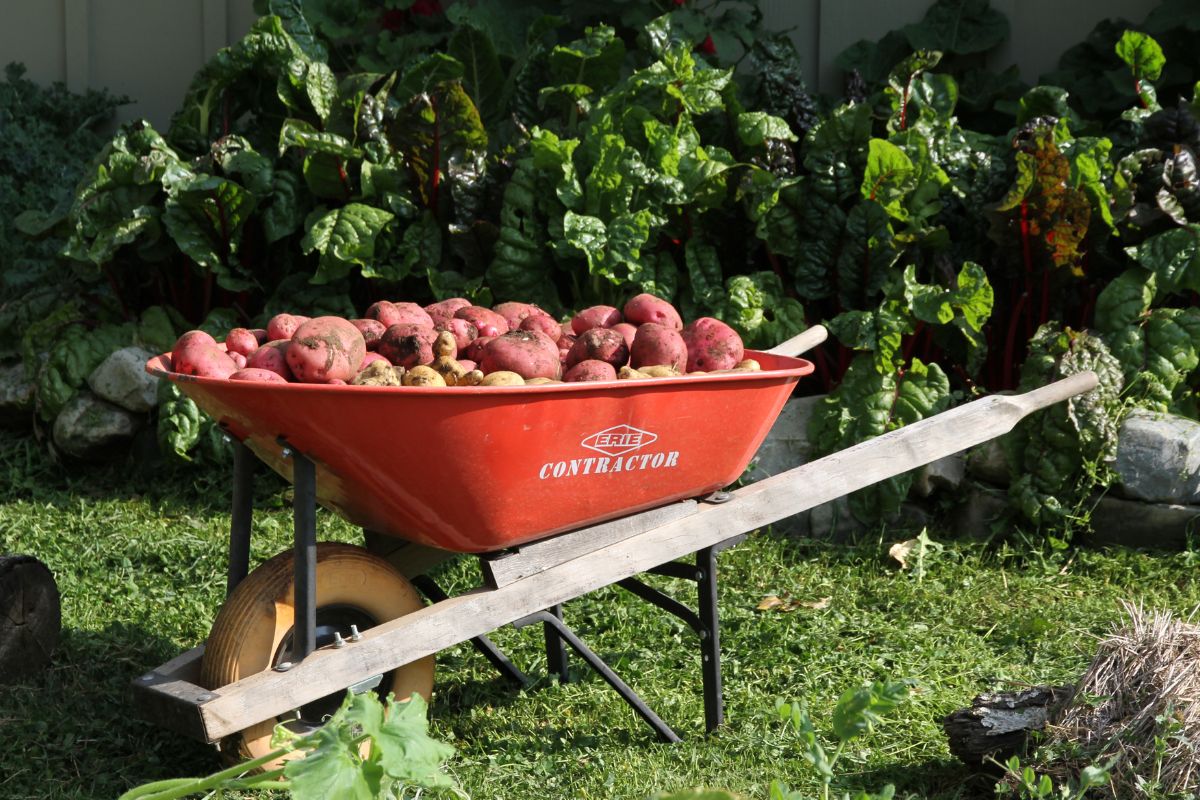
- Red Pontiac (red potato for baking/boiling)
- Warba (white potato for baking/boiling)
- Yukon Gold (yellow, all purpose potato)
Early season potatoes are planted in early spring, when soil reaches temperatures of 43F (6+C). These varieties grow quickly, and mature 75-90 days after planting.
The wonderful thing about early season potatoes? You can eat them fresh out of the garden by late summer, while your late-season potatoes are still growing and maturing for winter storage.
Mid Season Potatoes
- Chieftan (oval red potato for boiling or fries)
- French Fingerling (slender, red potato for roasting/baking/steaming)
- Gold Rush (early maturing russet for baking/boiling)
- Masquerade (multi-colored, all purpose potato)
- Red Gold (red potatoes for baking/boiling)
There isn't much difference between mid-season and early potatoes! Many times the same variety ends up in both categories. Mid season potatoes can also be planted in early spring, at the same time you put in early season spuds.
They typically mature between 90-110 days.
Late Season Potatoes
- Kennebec (brown, all purpose potato)
- Kahtadin (buff, baking/boiling potato)
- Red Pontiac (red, all purpose potato)
- Russian Blue (purple potato for baking/frying)
- Russet Burbank (russet, all purpose potato)
- Warba (white potato for baking/mashing)
- Yukon Gold (gold, all purpose potato)
While you can grow some early and mid season potatoes into the fall, they tend to have thinner skin. This can make them less suitable for winter storage, though most potatoes will keep a minimum of 4 months.
The late season potatoes are often your winter keepers and if stored properly, you’ll be eating them until spring or even early summer.
They mature 120-135 days after planting.
All Purpose Potatoes that Span 3 Seasons
There are quite a few potato varieties that make excellent early, mid summer and late season potatoes. You might call them all purpose potatoes.
These varieties put out excellent, tender young potatoes in the summer. Over time, the skins will toughen, making them wonderful winter keepers as well.
Here's a list for you!
- German Butterball or Sieglinde (my favorite yellow, all purpose potato)
- Red Pontiac (red, all purpose potato)
- Warba (white potato for baking/boiling)
- Yukon Gold (yellow, all purpose potato)
The Sieglinde potato is currently my favorite. We grow it in the gardens, eat it in late summer and store it all winter in my cold pantry. If I can get spring, mid-summer and a winter storage potato all from the same potato type…I’m in!
Watch the Tutorial
How to Plant Potatoes in the Spring
Step 1: Loosen the Soil in Your Garden Beds
Potatoes like loose soil. It's a good idea to work your beds over with broadfork or pitchfork before planting. This is especially true if you have heavy soil that tends to settle over the winter months.
Be sure to remove grass or weeds that would complete with your potato plants.
Step 2: Prepare Your Potatoes for Planting
There are three ways you can prepare your potatoes for planting and potentially increase your harvest.
- Chit your potatoes by leaving them in a warm, bright place for several days, or until you see signs of sprouting from the potato eyes.
- Cut up and divide your potatoes in 1-2 oz (28-57 g) chunks, making sure there are several eyes in each piece.
- You can plant directly after dividing, but if you have poor draining soil, leave cut pieces out at room temperature for 2-3 days to dry out the sliced edges. This will help prevent rot.
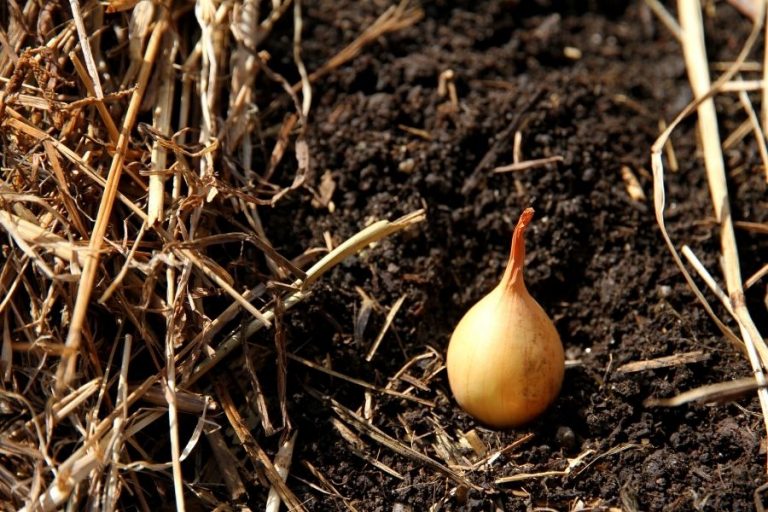
Step 3: Plant Your Potatoes
To plant your potatoes, use your hand to dig a hole 4-6 inches deep.
Set a chunk of potato in the hole, and back fill it.
Space your potatoes anywhere from 12-16 inches apart.
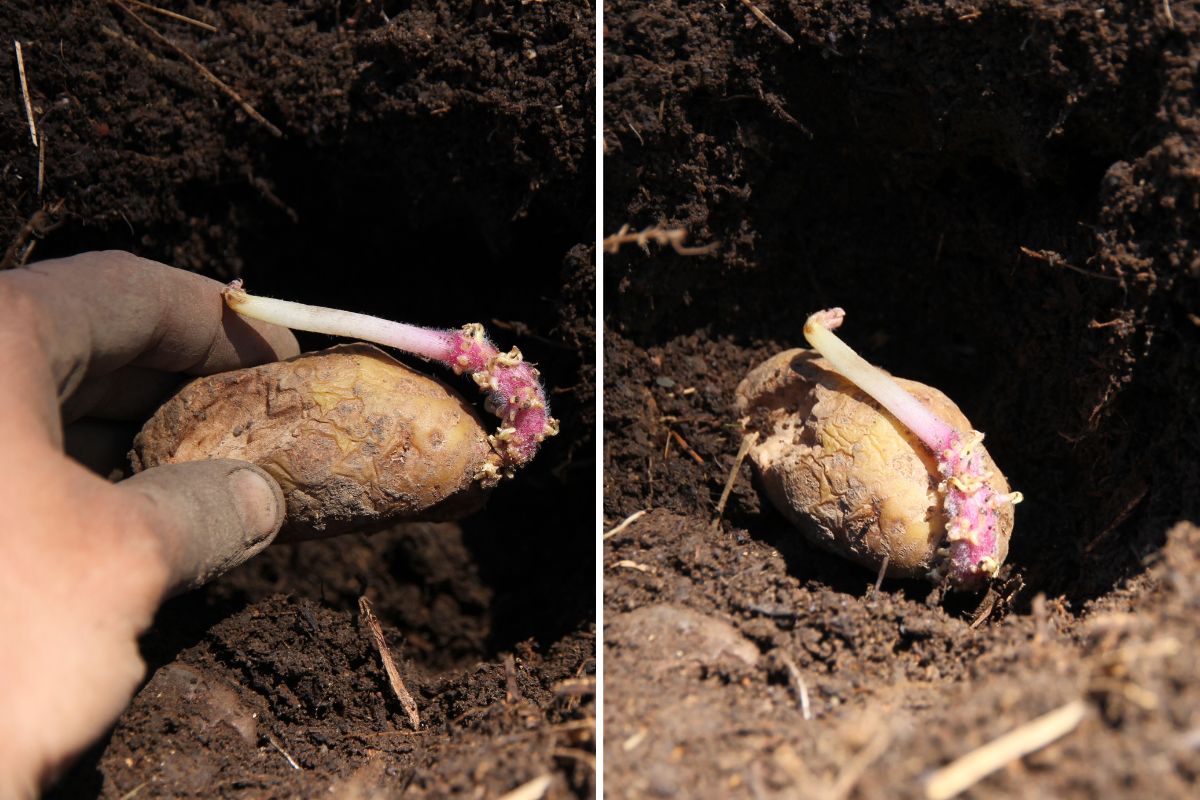
If you're planting a double row in a wide bed, make sure the rows are at least 16 inches apart. It also helps maximize space to stagger the planting in rows, so potato plants fall in a zig-zag pattern.
Step 4: Mulch the Soil
I'm a huge fan of mulching potatoes with straw. It save so much time. No only can you skip hilling your potatoes, but you also get to skip weeding your beds. I'm all about low maintenance gardening, and this is as simple as it gets!
After planting your potatoes, cut open a bale of straw and shake it all over the surface of your garden bed. For potatoes, I like to add a 3-4 inch layer.
Straw helps hold in moisture, cuts back on the weeds and it also creates a covering your potatoes will love.
Step 5: Water Your Potato Beds
If you apply a heart layer of mulch to your potato beds, you shouldn’t have to water as often because the soil won’t dry out as quickly.
But it is a good idea to water your potatoes right after planting. They need moisture to really take off, and if you can provide that for them, do it! 🙂
You can gauge future watering based on the soil under the straw. If it feels dry, it's time for a good watering!
Step 6: Let Your Potatoes Grow
If you use straw mulch, you won't have to hill your potatoes, or weed them more than 1-2x during the garden year. Water, watch and let your potatoes grow. They'll do a beautiful job of it!
You can take your first harvest 2-3 weeks after your plants put out tiny white flowers.
It's easy to grow your own potatoes at home, particularly if you use the method I outline for you above! You and your family will be eating homegrown potatoes all summer long.
If you want to learn how to store potatoes over winter, be sure to read my article below.
How to Cure and Store Potatoes for Winter
I appreciate your information - good directions, valuable.