Old Fashioned Raspberry Vinegar Tutorial
Learn how to make raspberry vinegar from scratch, using fresh red raspberries!
In this old fashioned raspberry vinegar tutorial, I'll show you how to transform not just raspberries, but any type of soft berry in a delicious, homemade vinegar.

When I first decided to try making homemade raspberry vinegar, tutorials were hard to come by. Oh, there was plenty online about soaking berries in store-bought vinegar. But I wanted to make the real, old fashioned stuff!
So I researched old cook books, gathered up the limited information I could find and finally, made my first batch. I fell head over heels in love with the tangy, bold flavor!
Not only was it a fermented food product I could add to our whole food diet, but it was actually quite simple to make.
And because I know you're interested in creating your own, I'm going to show you how to make raspberry vinegar from scratch!
Tools You'll Need to Make Old Fashioned Raspberry Vinegar
As I previously mentioned, you won't need unique or special equipment to make raspberry vinegar from scratch. Here's a quick list of necessary items, provided you use the technique I outline for you here. And good news is? You probably have these things on hand already!
- Enough ripe, red raspberries to fill your jar
- Jar for holding the ferment
- Lid for jar
- Cotton straining cloth
And really, folks? That's it!
How to Make Raspberry Vinegar from Scratch
If you've never made traditionally fermented fruit vinegar before, you're probably curious about how the process works!
To make vinegar with raspberries, you're going to through a few key steps. So let me give you a brief overview before I give you more detailed directions.
- The first step is to collect fully ripe berries.
- Next, you're going to extract the juice from the fruit (there's several ways to do this).
- Once collected, juice is poured into a jar and left to ferment with a breathable cover.
- In the first phase, airborne natural yeasts will begin consuming the juice's sugar, converting it to alcohol.
- And in the second phase, airborne acetic acid bacteria will transform the alcohol content to (you guessed it) acetic acid.
- When this happens, you'll have an old fashioned raspberry vinegar!
Old Fashioned Raspberry Vinegar Recipe
Old fashioned raspberry vinegar is the result of a slow fermenting process. It is simple to make and requires very little of your time and attention.
In this written tutorial, I'm going to walk you through the process step by step. I also made a free printable which you can access at the bottom of this blog post.
All good? Let's move on!
Step 1: Harvest Your Raspberries
Harvest raspberries when they are ripe and juicy. Fully ripened berries contain the highest concentrates of natural sugar and make a very bold, flavorful vinegar.
Don't have your own berry patch? Try sourcing freshly picked berries at a local farmer's market or fruit stand. And if that isn't an option? You can absolutely use frozen raspberries to make your own vinegar!
Should you be interested in growing some of your own fruit, I highly recommend planting some raspberry canes in your back yard.
If you live in a northern climate like I do, raspberries are easy to grow. I teach you how to transplant raspberry suckers here, so you can get starts for free!

Step 2: Prepare Your Raspberries
Because ripe raspberries are soft and fragile, don't rinse them under running water.
Instead, spread them out on a tray and pick over the fruits with your fingers. Remove any leaves, twigs or bugs.
And then, you can prepare the juice.
Step 3: Extract the Raspberry Juice
While there are several ways you can extract juice from fresh raspberries, I usually like to use a water infusion. It's simple and gives you great results. Here's how it works.
- Place your raspberries in a glass jar, filling it (roughly) 4/5 of the way.
- Add chlorine-free water until the top of your raspberries are covered by about 1 inch of water.
- At this point, you'll just cover the jar with a lid. Be sure to fasten it down so fruit flies can't get in!
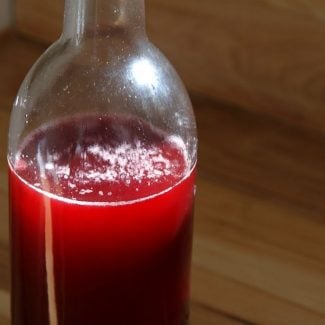
- Let the berries and water infuse at the back of your kitchen counter for about 3 days, watching as the color deepens.
- On day 3 or 4, line a bowl with a cotton cloth.
- Pour the jar's contents into it and gather up the cloth, letting the juices drip through.
- Discard the berries and hold onto the liquid.
- At this point you can leave it ferment, but I usually like to run the liquid through another batch fo fresh berries, just to strengthen the flavor of the finished raspberry vinegar.
- Do to this, repeat steps 1-6 using a fresh batch of berries, only this time cover with the 1x infused liquid, instead of fresh water.
- Once the berries have been strained out a 2nd time, you'll have beautiful, aromatic raspberry juice, ready for fermenting into vinegar!
Step 4: Pour the Juice Into a Food Safe Fermenting Container
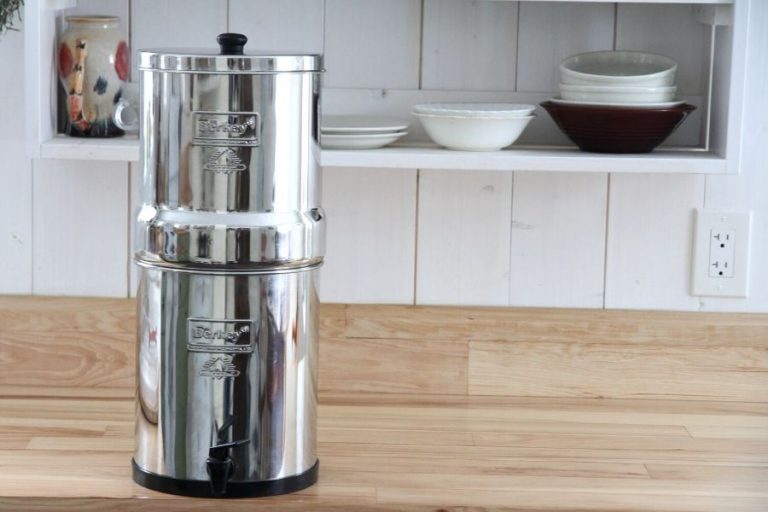
Because your berry juice is going to become more acidic as it sits, make sure you use a food grade container for the fermenting process! Glass jars or stoneware crocks are my preferred choice.
Pour your raspberry juice into a food grade container and cover the mouth with a cloth, paper towel or coffee filter.
Remember! For the fermenting process to take place, airflow needs to be able to carry the right yeasts and bacteria to the surface of your juice.
Step 5: Leave Your Juice to Ferment in Proper Temperatures
There are many different airborne organisms in your home. The ones you want working on your juice actually need a particular temperature range to thrive and multiply.
If the room temperature is too low, the organism's action will be very slow. And if the room is too warm? Spoiler yeasts may take hold and ruin the entire batch.
But don't worry! Most homes do hold to the proper temperature range.
You don't want your juice to get colder than 60F (16C) or warmer than 80F (26C). This is the perfect window.
If you live in an area where your home is very warm during the summer? Just freeze the juice (or berries) and make your vinegar after temperatures have reached the proper range.
Step 6: The First Phase of Fermentation
In the first phase, airborne yeasts are caught on the surface of your juice. Slowly, they will start to consume the natural raspberry sugars. As they feed, they convert the sugars to alcohol.
How can you tell if natural yeasts are in action? You'll see tiny bubbles (CO2) on the sides of your container and on the surface of your juice. Eventually, you'll notice a light, alcohol-like aroma wafting up from your ferment.
A pink, bubbly foam may also develop on the surface of your liquid at this time. If it appears, skim it off. It's not mold, but it may eventually give mold opportunity to grow. And you don't want that!

Step 7: The Second Phase of Fermentation
After a few weeks, the yeasts will start to die off for lack of sugar. At this point a second, airborne organism will begin to work on your juice.
Only this time, it's a group of bacteria called acetobactors (acetic acid bacteria).
This bacteria takes the alcohol content and converts it to acetic acid. The process is slow and the conversion happens 3-6x slower than the first phase.
But when it's finished, you'll have a robust, raspberry flavored vinegar quite unlike anything you'll find at the grocery store!
Step 8: How to Tell When Your Vinegar Is Finished
It isn't always easy to tell when your vinegar has finished moving through the fermenting phases. It will smell (and taste) sour several weeks before it is fully finished.
Here's the test I use to determine whether or not my vinegar has finished releasing C02 and is safe for bottling.
Set 1-2 C aside in jar or bottle. Cover with a tight fitting lid or cork and leave the vinegar to sit at the back of your kitchen counter for several days.
Break the seal. Was there a release of carbon dioxide? If so, it isn't safe for bottling. Return to the original container and let it sit for another 2-3 weeks. Test as needed, until there is no release of C02.
And then? It's ready to be bottled in a food grade container!
Step 9: Store Your Old Fashioned Raspberry Vinegar
Always use food-grade containers for storing your vinegar. Jars, glass bottles and jugs are my favorites! Whatever you choose to use, make sure you seal things up (to stop evaporation) and that you also avoid using tin or metal lids.
If you're storing vinegar in glass jars, grab a pack of these white, wide mouth plastic lids. I use them for many things in my home and particularly, for my vinegar jars. Old tin canning lids just don't hold up to the acidity of vinegar!
Once it's bottled, you can store your vinegar wherever you please. It is shelf stable and will last for 1-2 years. Over time, the flavor and acidity will mellow out. But it's so good, you probably won't be able to keep it around for long!
What is Raspberry Vinegar Good For?
There are many different ways you can use raspberry vinegar in the home. My personal favorites?
- Create a delicious, homemade raspberry vinaigrette for green salads
- Use raspberry vinegar to create a refreshing shrub or switchel drink after spending a hot day in the garden
- Add it to homemade mayonnaise for a unique and special "tang" in flavor
If you need some ideas, be sure to check out my book on How to Make Fruit Vinegar for Beginners. Not only do I teach you how to turn all kinds of fruit into vinegar, but I dedicated an entire section to vinegar-based recipes, so you'll know how to use it in your home.
If you have any questions, please feel free to leave them in the comments below and I'll get back to you!
Old Fashioned Raspberry Vinegar
Equipment
- 1 quart (litre) glass jar
- a cloth cover
- Rubber band or string
Ingredients
- 7-8 cups fresh raspberries
- 4-5 cups filtered water to cover fruit
Instructions
- Harvest ripe raspberries until you have enough for the task at hand.
- Pick over your harvest, removing leaves, twigs or bugs.
- Place part of the clean raspberries in a quart jar, filling 3/4 full.
- Add chlorine-free water until the berries are just covered.
- Cover with a lid to keep dust and fruit flies out.
- Leave the jar to rest at the back of your counter for 3-4 days.
- Strain out berries, keeping the red liquid.
- Fill the jar with berries once again.
- Pour the infused berry liquid over and let it sit for another 3-4 days.
- Strain. You can repeat the infusion process 1 more time or start fermenting the liquid.
- When you're ready to ferment, pour the liquid into a quart glass jar.
- Cover with a cloth, paper towel or coffee filter.
- Fasten your cover into place so that fruit flies cannot get in.
- Wait for several weeks, then check for bubbles on the side of your jar as a confirmation that the yeasts are working.
- If pink froth appears on the surface of your juice, skim it off.
- Let the juice continue to ferment until it begins smelling like vinegar (approx 6-8 weeks in total).
- When you think the vinegar is ready, test by sealing some up in a bottle or jar.
- Let sit for 2-3 days at room temperature before breaking the seal.
- If there is a release of CO2, let it ferment for another 2-3 weeks. Retest until there is no release when you break the seal.
- Bottle the vinegar in a food grade container and store for up to 2 years.


I have attempted to make old fashioned raspberry vinegar using this recipe twice and both batches have turned out tasting like raspberry water. PLEASE help me fingers out what I am doing wrong. I have made both apple and pear vinegar which turned out splendid but I just can’t finger out the trick with raspberries. Please help.
Are you stuffing the jar really full of berries, or just dropping them in? Sounds like the liquid doesnt have enough raspberry juice in it. I would either run the same liquid through 2-3 batches of fresh (or frozen) raspberries, or add 1-2 Tablespoons of sugar or honey to the liquid after you strain out the solids. This will give the yeasts enough sugar to feed. Let me know how it goes!
Hi, can I make raspberry vinegar with just the juice as I just been given some?
Many thanks,
You sure can, provided its unsweetened! If its had sugar added, you'll end up with a raspberry wine that will take a long time to turn into vinegar.
Hi, I have a couple questions about this. First, I assume that once you've gotten the juice to the color you want that you would not want t add any more water to add a little liquid in the jar because it might keep it from doing it's thing and turning into vinegar. Is that correct?
Second, can you explain what a release of CO2 will look or smell like? Or what exactly happens?
I've got my first jar of juice covered and ready for fermenting, but had a couple thoughts pop up about it. So, I thought I better ask while I remember them.
I'm very excited to see how well this turns out. 🙂
With vinegar making, sugar content is the important thing (not color) and yes, adding extra water would weaken your ferment, unless you add in a bit of sugar or honey. Carbon dioxide appears as tiny bubbles on the wall of your jar in the alcohol stage. And your ferment will carry a light alcohol aroma at this time, as yeasts convert sugar to alcohol.
You can grab my e-book "Fruit Vinegar for Beginners" to dive deep into the details of the vinegar making process, get step by step directions, option for fruit types and recipes as well! Grab your copy here: https://atraditionallife.com/product/fruitvinegar/
Thank you so much!
To seal the vinegar after the 6-8 weeks, do you heat the vinegar?
Hi Connie!
I dont heat my vinegar because it kills the good bacteria. I just jar or bottle it when it has finished working. Its shelf stable in its raw form because of the fermentation and acetic acid content. Hope that helps. Feel free to leave any more questions you might have!
Hi Autumn,
I followed your recipe and now I have a "mother" in my batch. It tastes like vinegar so I am not too concerned but since it wasn't mentioned I thought I would check in with you. Fran
Hey, that's great! It means you have a very strong vinegar and that's good. All is well. 🙂
Do you leave the 'Mother' in the vinegar or strain it out? Will you do a post on all things 'Mother'? It would be very much appreciated. Many thanks.
Hi Rachel! You can leave the mother in, so long as you aren't planning to transfer the vinegar to a jug or bottle (it'll stop up the neck when you go to use it). But I usually like to remove the mother because it can make things difficult when pouring off vinegar (you alway have to hold it back). There isn't a right or wrong, just an issue of convenience. I do talk more about a mother culture in my e-book on making fruit vinegar (https://atraditionallife.com/product/fruitvinegar/) but I'll see if I can get to writing a post on it this summer.
All the best,
Autumn
Hi Autumn,
You talk about straining out the berries at the end of each infusion. I would have imagined squeezing out the juice through muslin rather than simply straining. Is there a reason to not do this?
You can do it either way! Sometimes I just strain them out and other times I collect the berries in a cotton tea towel and let the juices drip through. Massaging or squeezing the berries will leave you with a thick layer of berry sediment in the bottom of your vinegar. And then in the first phase of fermentation, the CO2 will carry the sediment to the surface and form a thick, scummy layer you have to skim off several times. So really, it's up to you and what you're comfortable with!
That's clear. Now I understand and I'll stick with your way. Thank you.
I've been seeing ads for raspberry vinegar hair rinses. They are quite pricey. Can this raspberry vinegar recipe be used as a hair rinse? I'm assuming it needs to be diluted in water first.
I haven't heard about this! But I'm certain you could use it. Raspberry vinegar is weaker than ACV, so it would probably take about half the dilution you would give apple vinegar.