How to Plant and Grow Dry Shelling Beans
Learn how to plant and grow your own dry beans for everyday use in the kitchen. After you taste the rich, buttery flavor of homegrown, home dried shelled beans, you'll never want to go back!
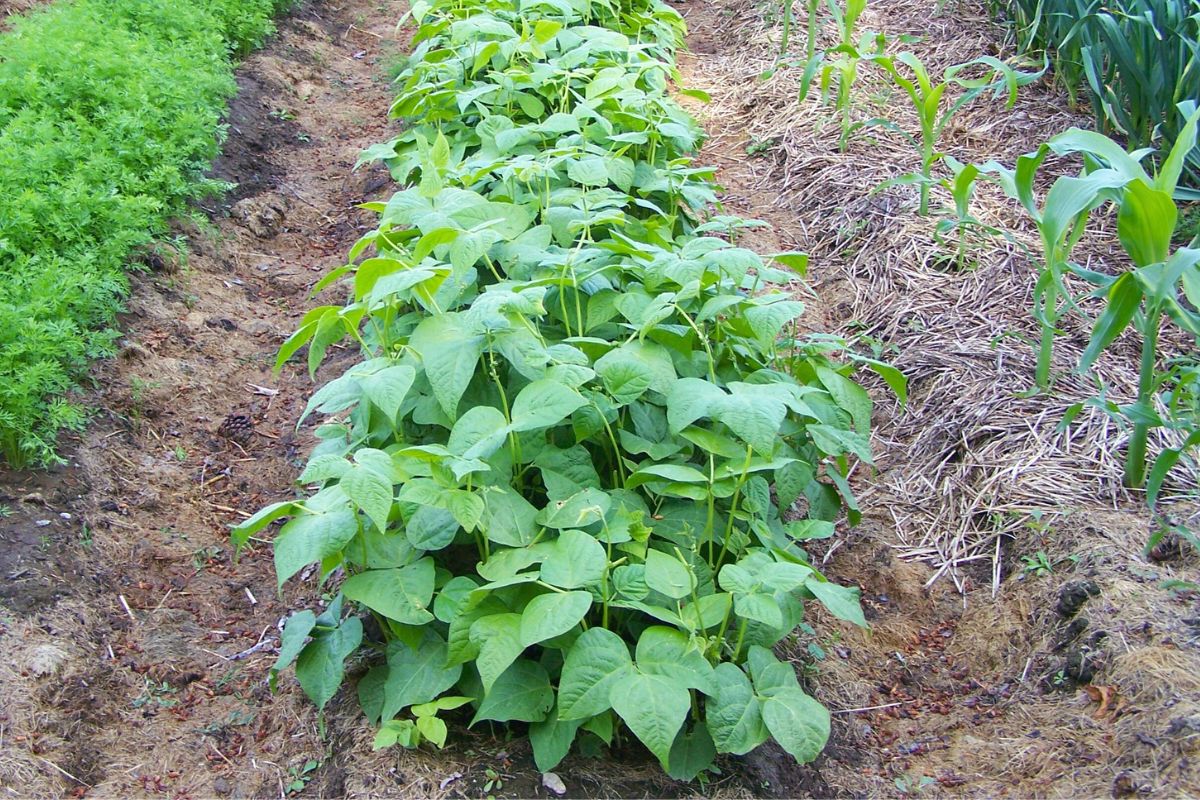
I grew up in a gardening family, and we often grew bush beans in the large garden behind the old farmhouse.
Beans liked our soil. As kids, we enjoyed grabbing a handful of fresh green beans and would sit on the lawn while eating them raw. In fact, we ate so many off the bush, beans rarely made it to the kitchen!
I didn't know anything about pole beans at the time, or that you could easily grow your own dried beans. But as an adult, I've fallen in love with both of these things!
You see, after my man and I moved to the countryside and built our little cottage, we established a beautiful vegetable garden just outside the front door.
It was then that I started trying to grow pole varieties for fresh eating. At first it was the Kentucky Wonder Brown Bean. Then I tried Blue Lake Pole Bean.
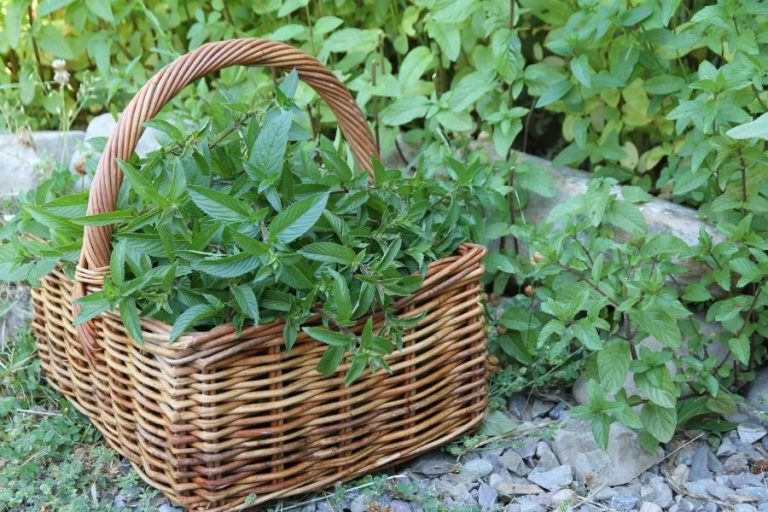
Because I always try to maximize my efforts in the garden, I decided to try growing a pole bean that would produce fresh snap beans in the early stages of growth, and dry beans in mature pods.
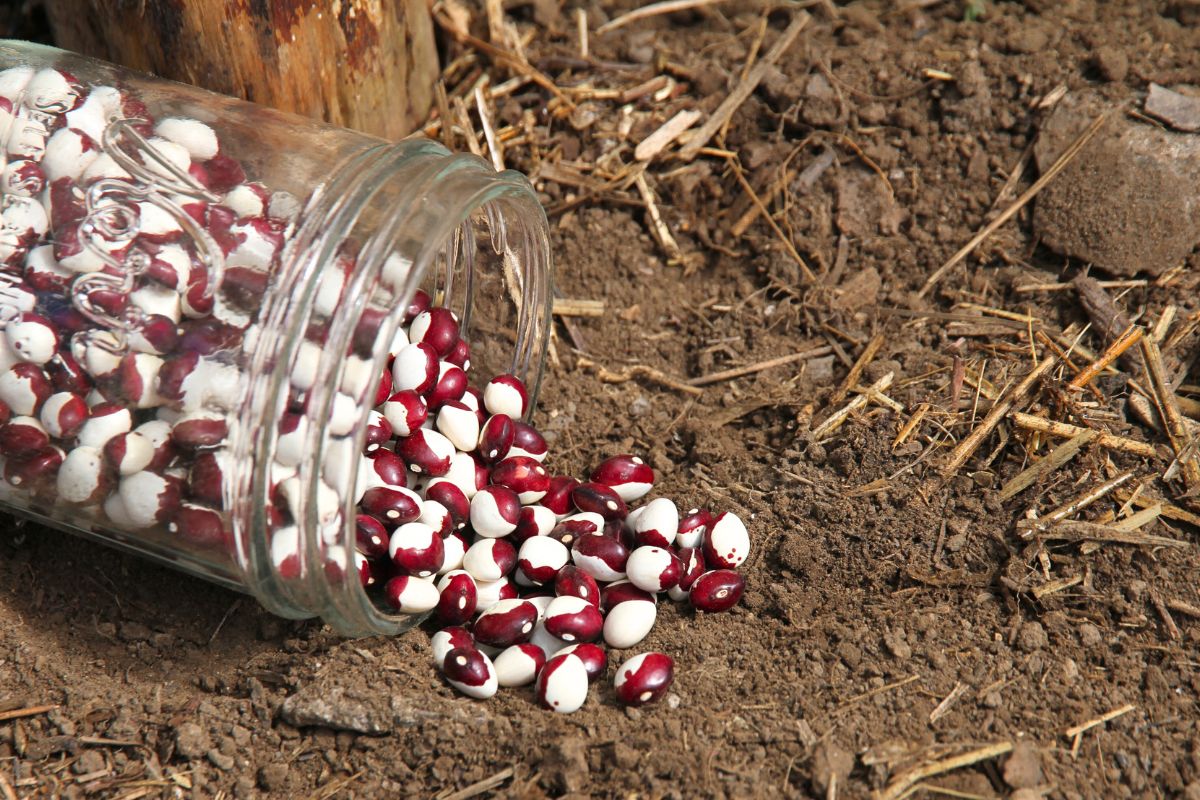
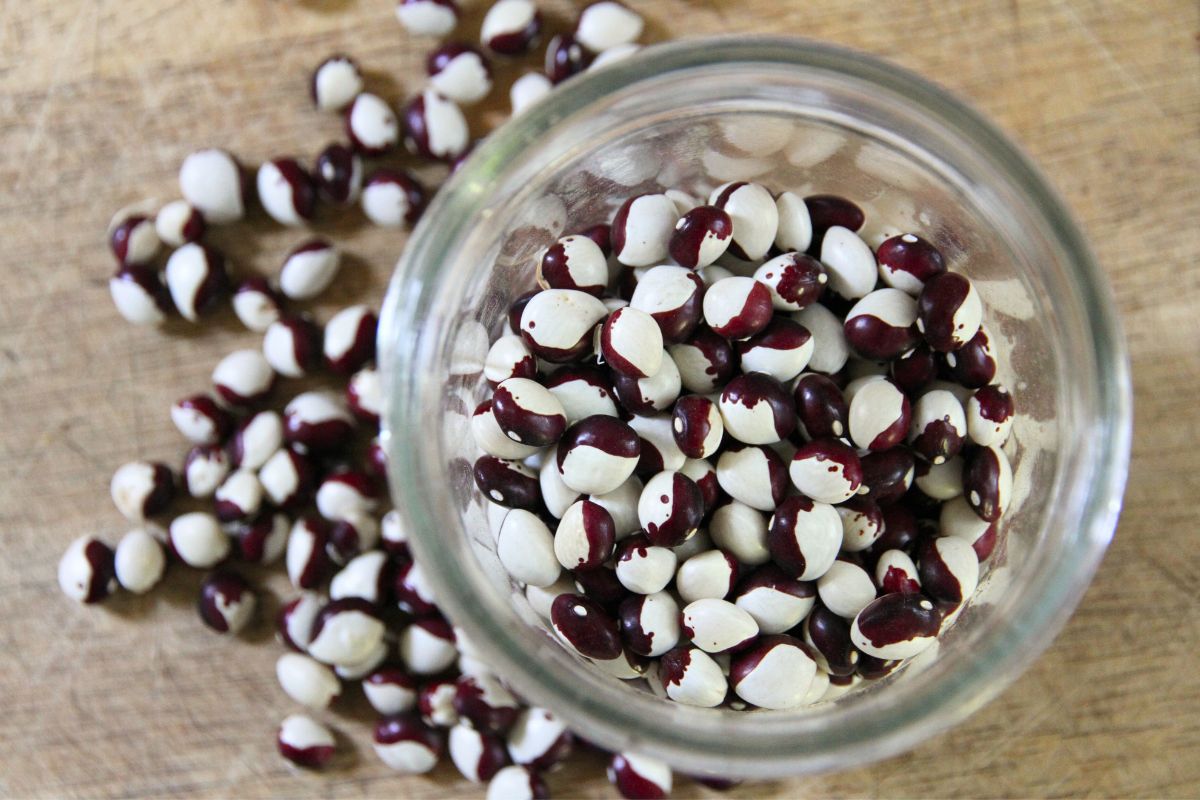
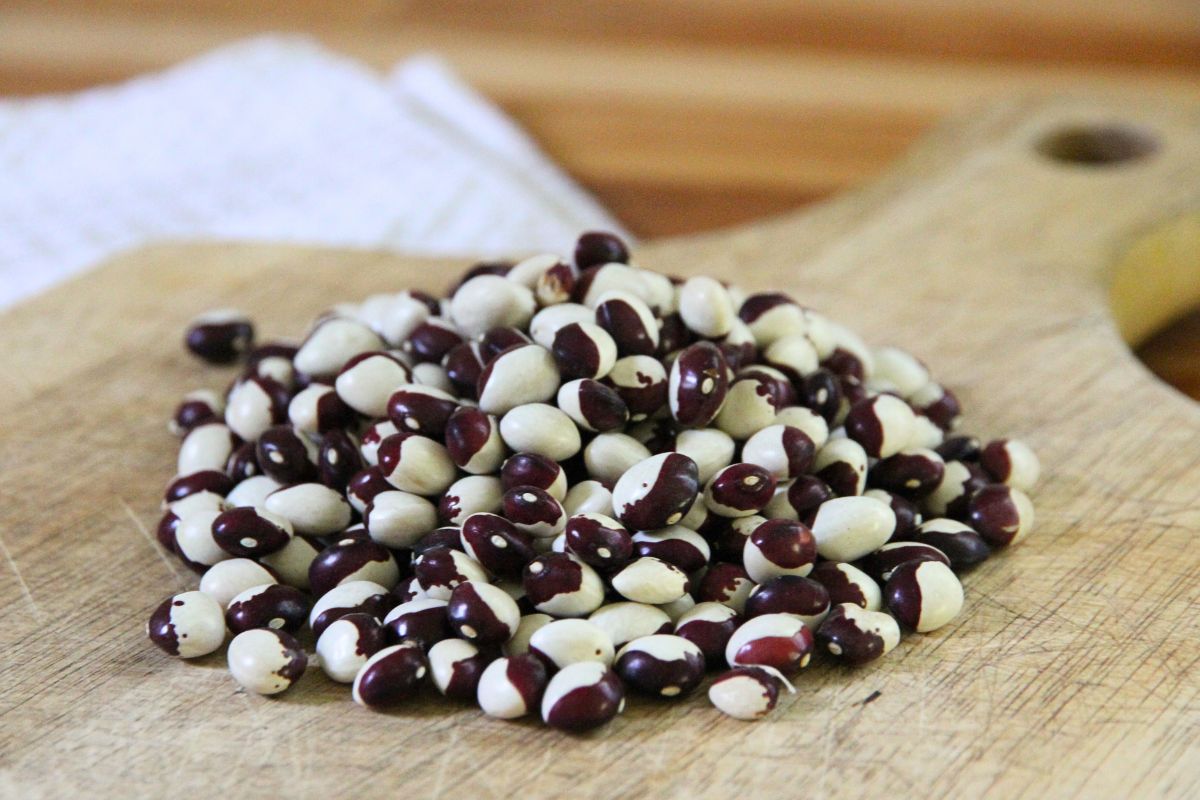
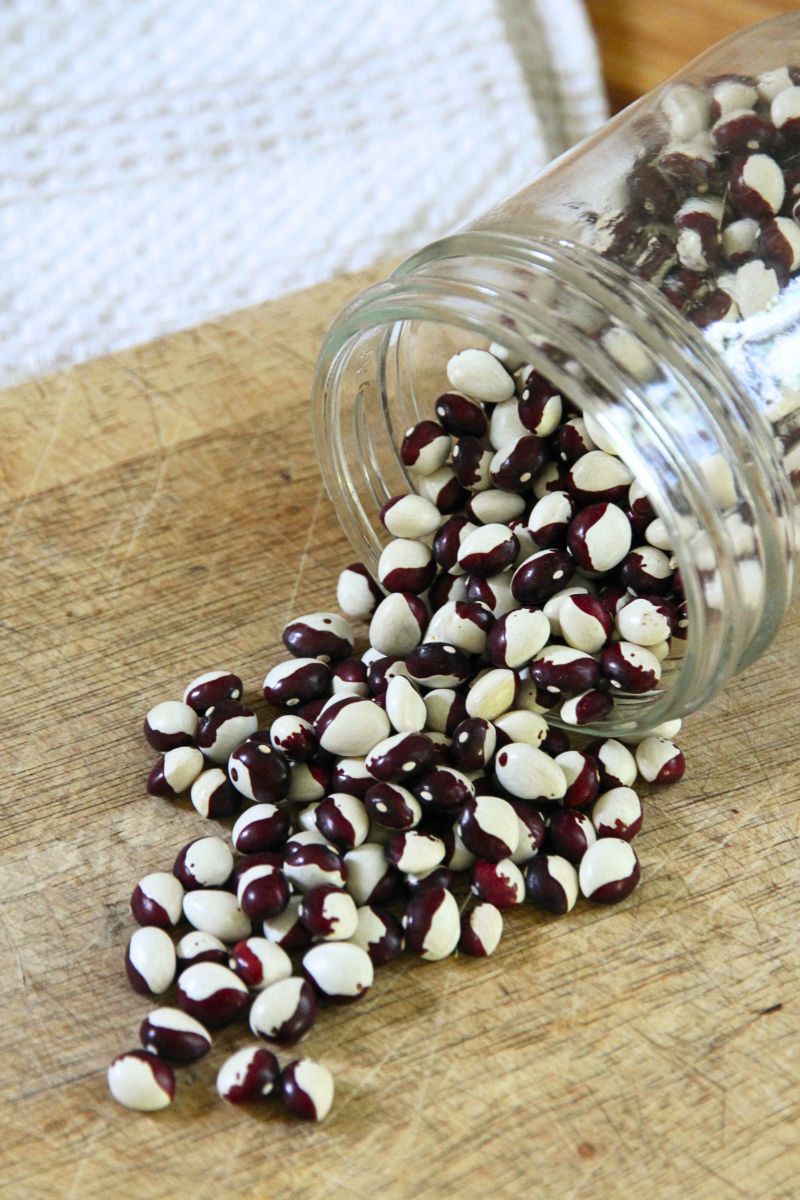
A bit of reading up on the topic, and I quickly learned that cranberry beans are noted for giving both fresh snap beans and excellent dried beans.
I tried a heirloom variety called Annie Jackson Pole Bean.
And it was everything I hoped for!
If you got at the fresh beans early enough, they were a typical green bean. After letting pods mature on the vine, the cranberry-type beans inside had the smoothest, most buttery flavor I'd ever tasted.
I think I need an entire bean patch dedicated to growing Annie Jackson pole beans, because I always use up my home dried beans far too quickly!
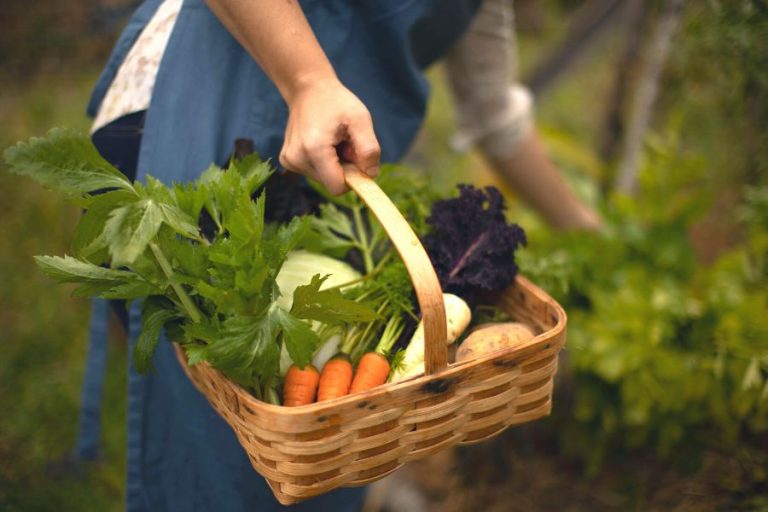
If you have the space and value homegrown food, growing your own shell beans is something you might want to consider.
Reasons to Grow Your Own Shelling Beans
- You can get both fresh beans and shelling beans from the same plant.
- Shelling beans (pole or bush) are easy to plant and easy to care for, because they quickly beat the weeds!
- Pole and bush beans are low maintenance; after planting you can leave everything alone until it matures in late summer or fall.
- Dry pods are easy to harvest at the end of the gardening year.
- Unlike most garden produce, dry bean pods can sit until you find time to shell them out during the winter months.
- If you haven't already picked up on it, homegrown dry beans taste amazing!
Why You'll Love Using Homegrown Shelling Beans in the Kitchen
- Homegrown shelling beans have superb flavor (the first time I ate plain, boiled shell beans from my garden, I thought someone adding a 1/2 cup of butter to them).
- Unlike dry beans from the grocery store that often have hard or gritty spots in them, homegrown beans are velvety smooth in texture.
- Home dried shelling beans cook up much faster than beans from the grocery stores.
- Dry beans from your garden won't cause the same tummy upset and gas that so many kids (and even adults) struggle with.
Pole Beans vs Bush Beans
You don't have to plant pole bean varieties to produce your own shelling beans. There are lots of bush beans that yield a delicious dried bean.
So if you don't like the idea of fiddling with a trellis system, be sure to check out the bush varieties I've listed below!
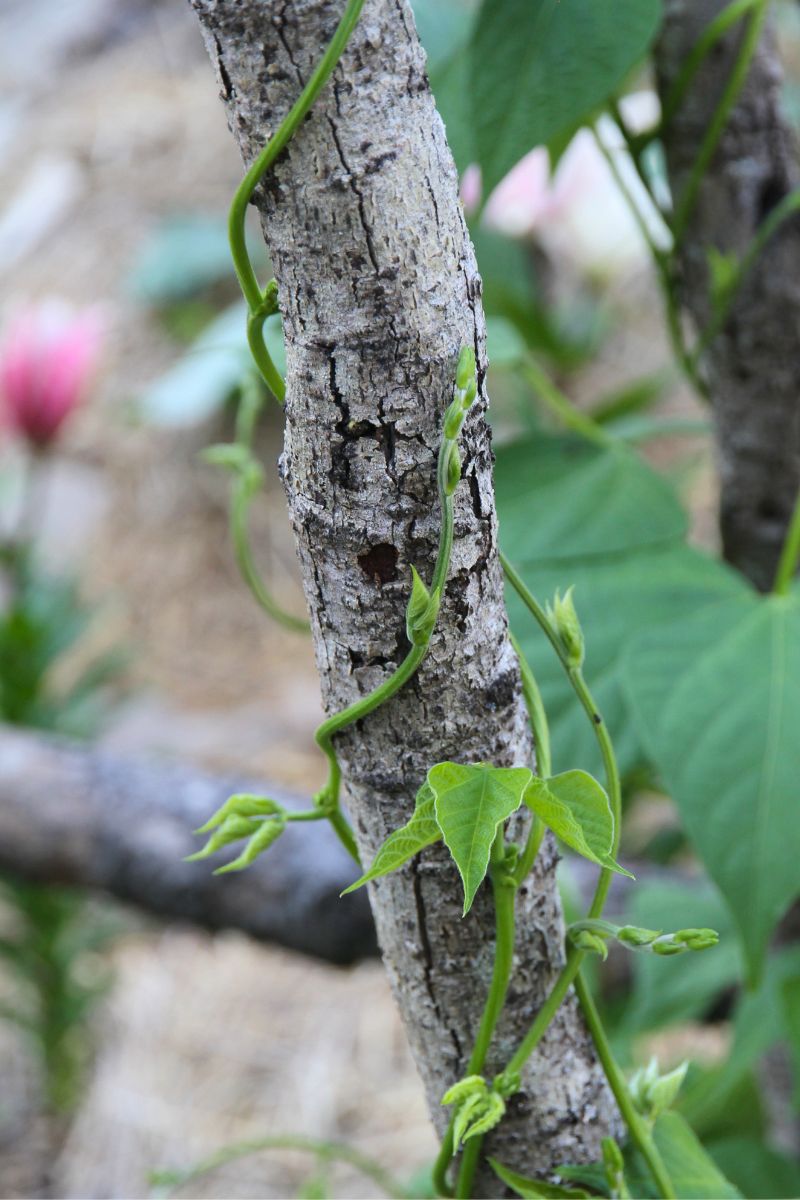
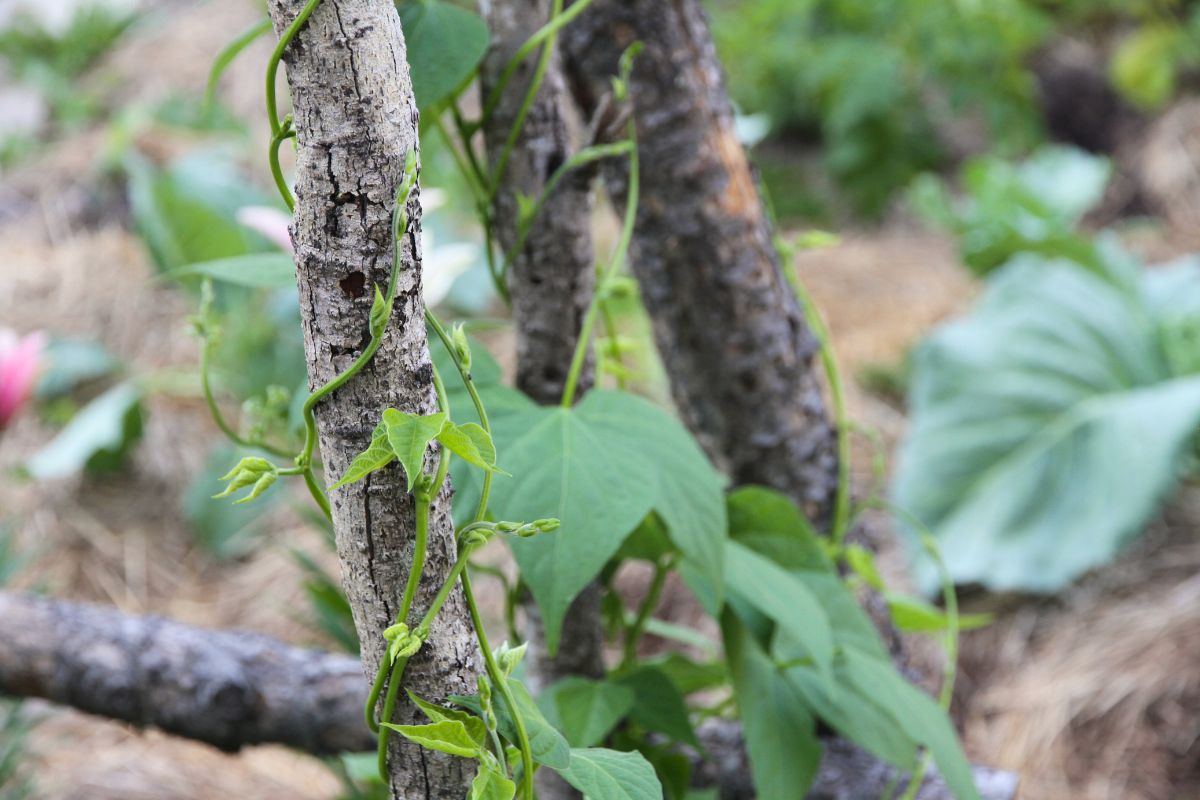
At heart of me, I delight in pole beans! The vines are beautiful to look at, and harvesting is easy. Because you have to stand to get at the beans, pole varieties can really save your back!
Another thing I love about pole beans? I grow all of my vegetables in wide beds, ranging anywhere from 24-36 inches across. I can really maximize garden space by putting a single row of pole beans down the middle of a carrot or potato bed!
Helpful hint: double planting in one row is great way to save space. But don't plant beans in a bed of beets. These two vegetables don't like each other and won't thrive if they have to share soil and root space!
I only plant pole beans in garden beds that run north/south, so both sides of the beans get good sun, and neighboring garden beds aren't shaded for too long.
Tips for Choosing a Shelling Bean Variety
- Always check days to maturity for each bean variety, so you can be sure your growing season is long enough to produce mature bean seeds (I teach you how to choose seeds for your climate here).
- Don't try growing common beans you see at the grocery store (black beans, fava beans, kidney beans, navy beans, pinto beans, etc) but try a quality cooking bean instead.
- Grow a bean that is praised for superb flavor as a dried bean (cranberry varieties are wonderful and Annie Jackson is my favorite!).
- Find and talk with a gardener in your area who grows shelling beans; they'll have some great tips for you!
Dry Bean Varieties You Can Grow
Growing and drying your own beans is an old fashioned thing to do, but it was also very, very common 100+ years ago. As a result, there are lots of dry bean varieties you can grow in your garden! Check for heirloom types in particular, so you can save your own seed for replanting.
Bush Beans
- Calypso
- Dixie Speckled Butterpea
- Fire Tongue
- Hutterite Soup Bean
- Jacob's Shelling Bean
- Taylor Horticultural
Pole Beans
- Cherokee Trail of Tears
- Coco Sophie Bean
- Good Mother Stallard
- Lazywife Bean
- Scarlet Runner Beans
- Red Cranberry Pole Bean
How to Prepare the Garden for Shelling Beans
Beans like full sun. This is especially important if you live in a northern climate (like I do!). For pole beans, I like to run my beds north/south, so climbing beans get as much sun as possible on both sides of the row.
If you have heavy clay soil, be sure to work some composted animal manure into the bed/s. The same is true for sandy soils. Beans like fertile soil, so be sure to feed them well.
Here are more tips for preparing the garden to plant beans.
- Well-drained sand or clay soil, always work the garden bed over with a broadfork or pitchfork to loosen things up.
- Pull weeds (of course!).
- If you can, it's a good idea to add 2 inches of compost or organic matter to your bean beds before planting.
- Mulch with straw, leaves or grass clippings.
- If planting pole beans, set up your trellis or support system.
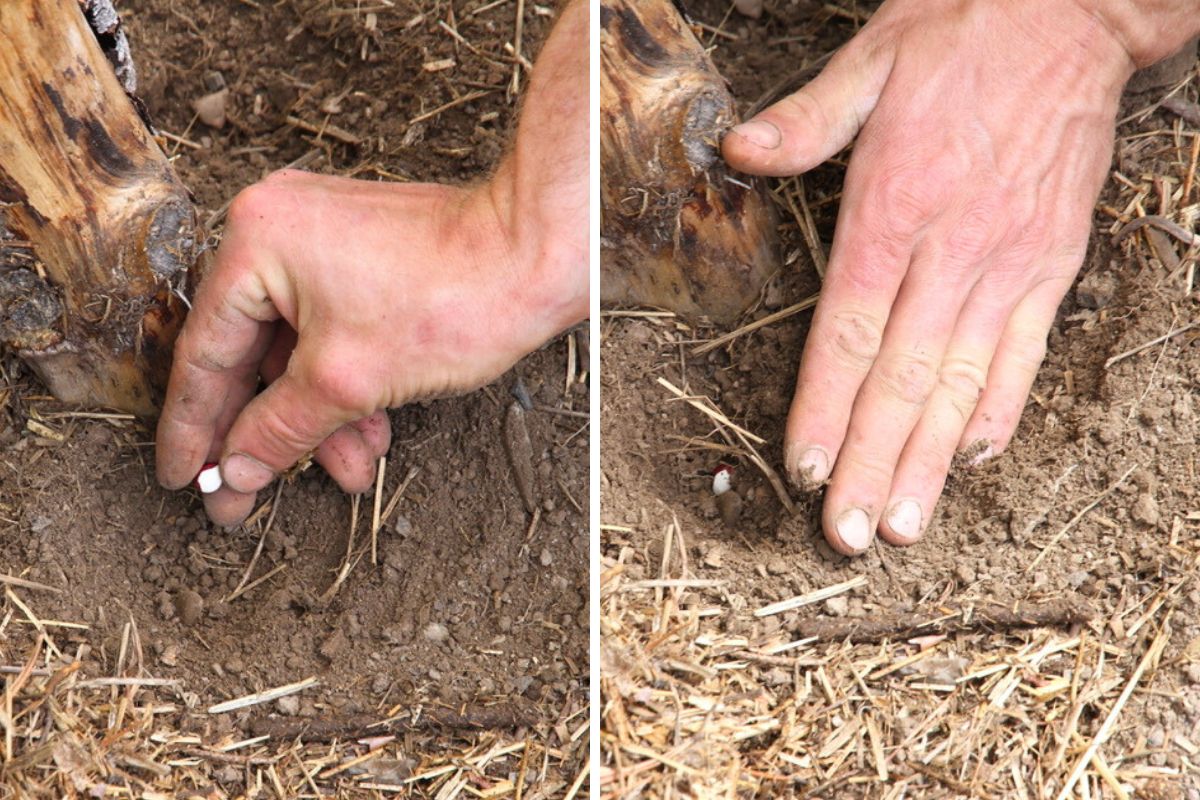
- Part the mulch wherever you want to plant, about 1 inch away from your trellis or pole system (if using).
Helpful Reminder: when planting pole beans, don't forget to put up your trellis or teepee, so you have precise places for planting and won't have to hassle with setting up supports when small plants are appearing.
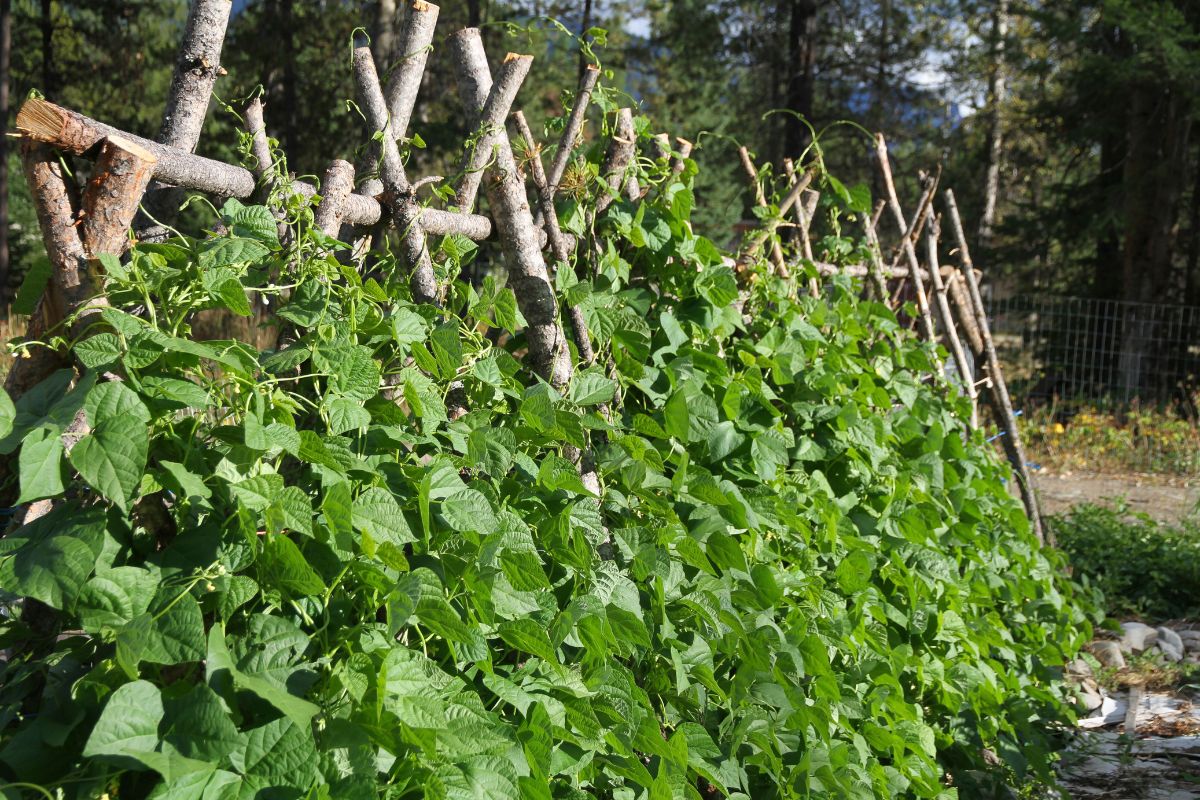
Simple Trellis Ideas for Pole Beans
Pole beans are climbers, and can reach heights of 6-10 feet. They'll cling to and make their way up a single wire or piece of twine. But they will also wrap themselves around larger things as well (like a pole). Here are some simple ideas for trellising pole beans!
- Make a pole teepee and plant on both sides of each pole.
- Lean single poles up against an A-frame, wall or overhead beam.
- Use cattle or hog panels and stake them with fence posts.
- Make a wood frame and fasten individual strands of twine or wire vertically for beans to climb.
Of course, if you're growing a bush bean you don't need to bother with a trellis!
When to Plant Shelling Beans
Shelling beans are no different than "normal" green bean plants. They like warm temperatures and are technically a warm weather crop.
Always wait until all danger of frost has passed to plant. One kiss of frost is all it takes, and bean plants (however small or large) will die.
How to Plant and Grow Shelling Beans
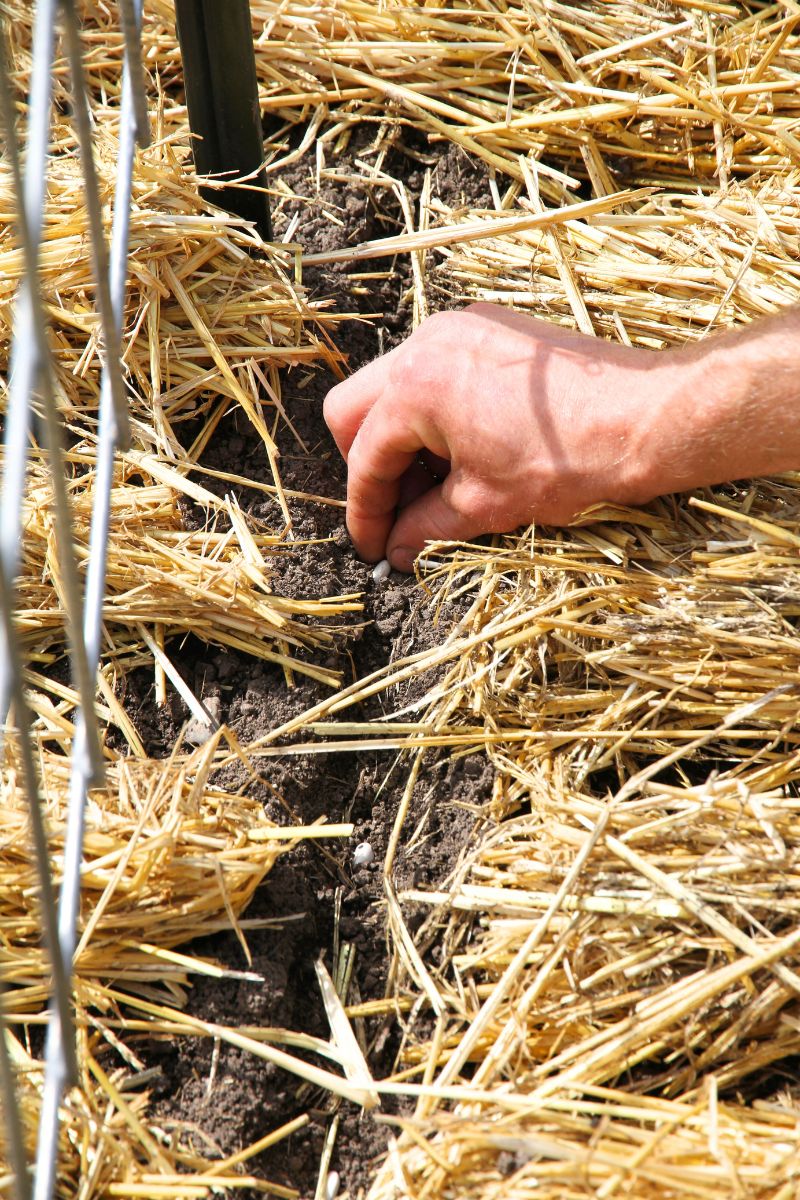
Beans are one of the easiest seeds to plant in the garden. They're large and easy to handle, which makes them perfect for including kids in the process! Here's how it works.
- Part your mulch and make a 1 inch deep trench or individual 1 inch deep holes, about 1 inch away from your trellis system.
- Drop your beans in the earth, until you've finished a row.
- Cover with earth.
- For bush beans: space your rows about 6 inches apart, unless directed otherwise for your bean variety.
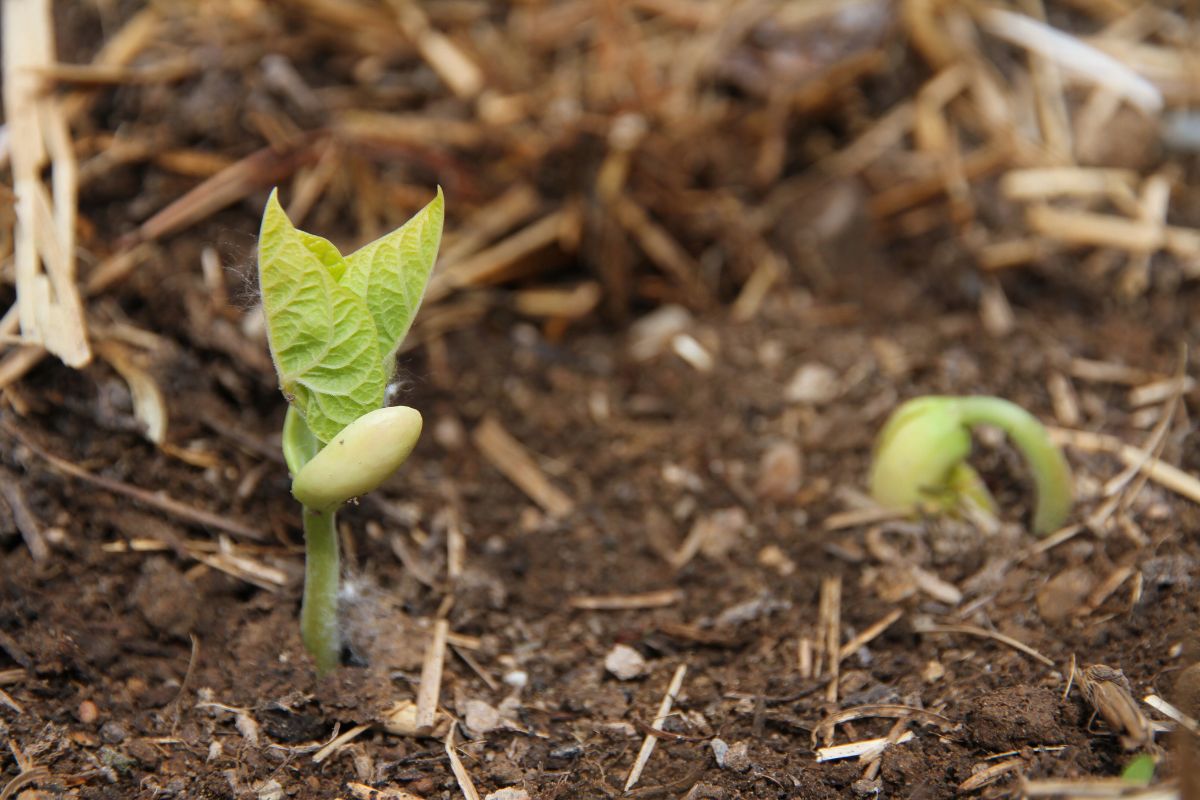
- Keep the soil moist and wait for the first bean seed to appear!
If you plant pole beans, know that they are vigorous climbers, so they should take off and climb your trellis or poles in no time!
Occasionally, you may want to look them over and guide a few stranglers in the right direction. But if you plant about 1 inch away from your trellis or pole, they should know exactly what to do...and do it with vigour!
When to Harvest Shelling Beans
As a Fresh Green Bean
You can harvest shelling beans prematurely as a snap bean. Length is a good indicator and each variety is ready at a different size. Be sure to check the back of your seed packet or seed catalogs for specific on your type.
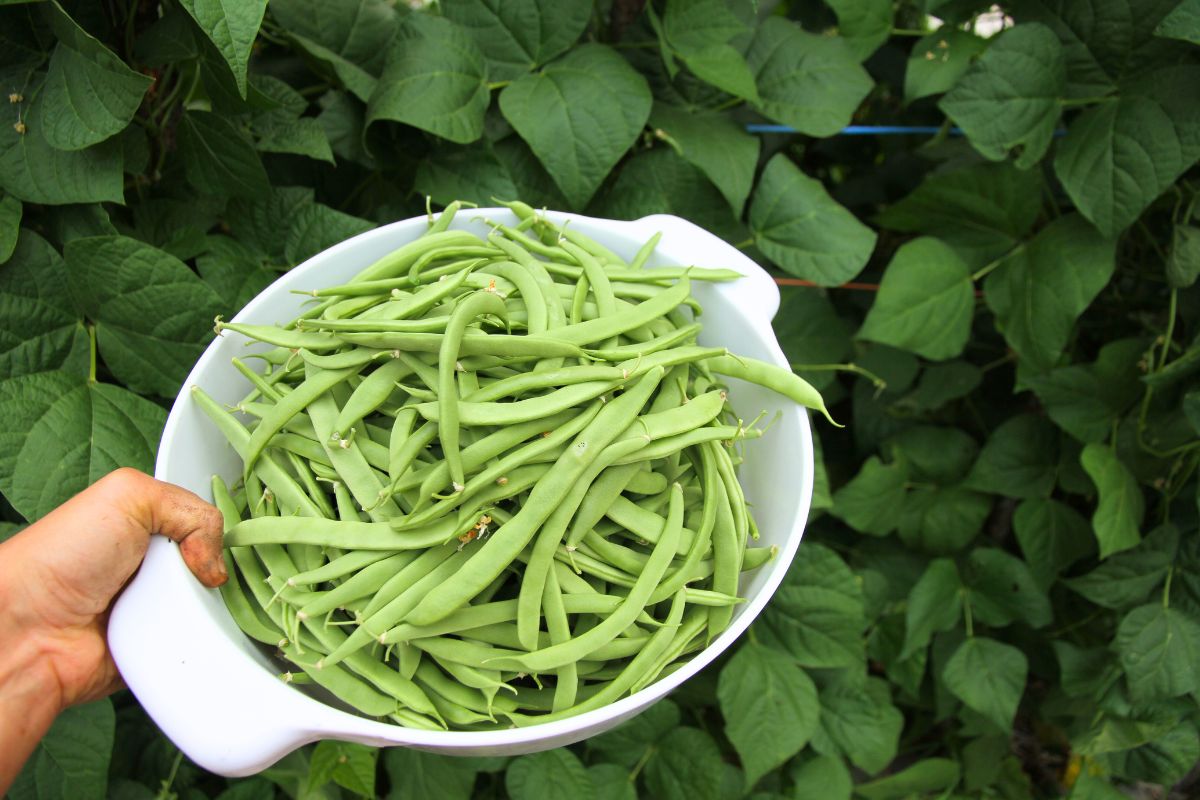
Generally speaking, when beans are about 6-8 inches long and obviously have immature seeds, they're ready for picking, cooking or preserving.
Helpful tip: beans with immature seed have smooth, round pods without bumps. Lots of exaggerated bumps indicated seeds are maturing and the pod will likely be woody and tough.
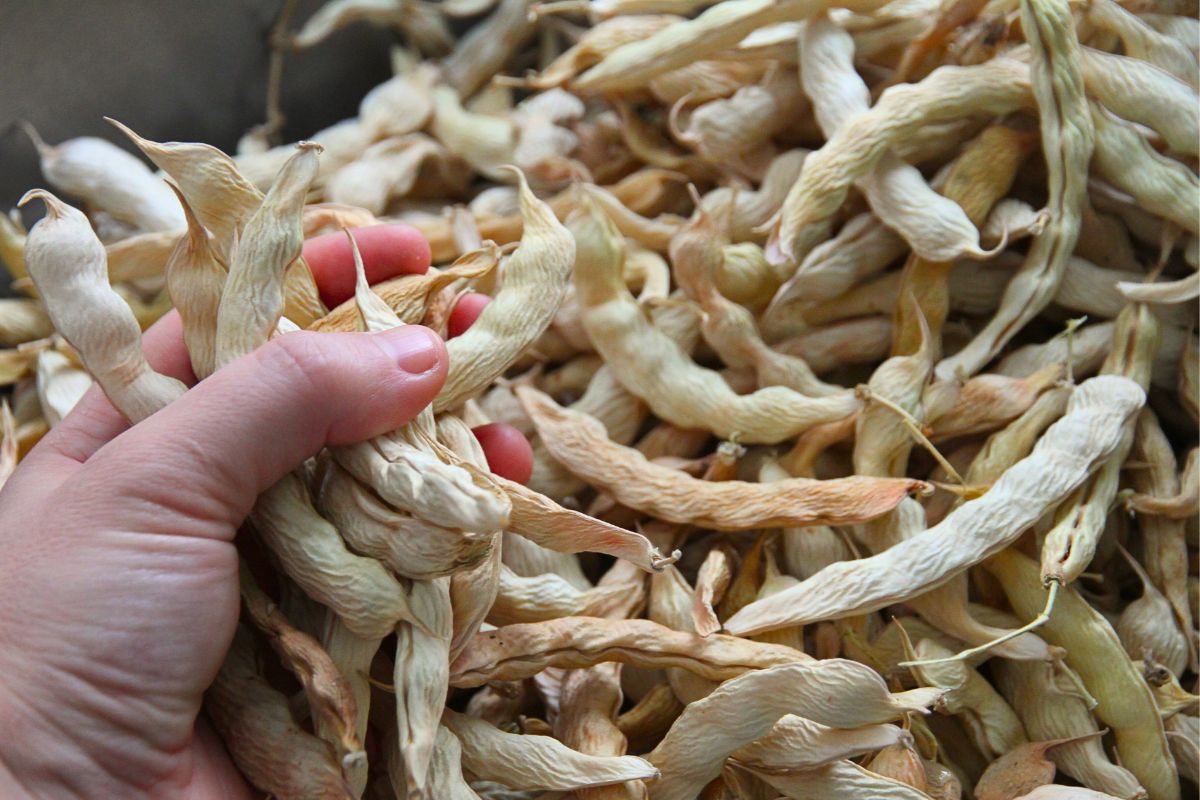
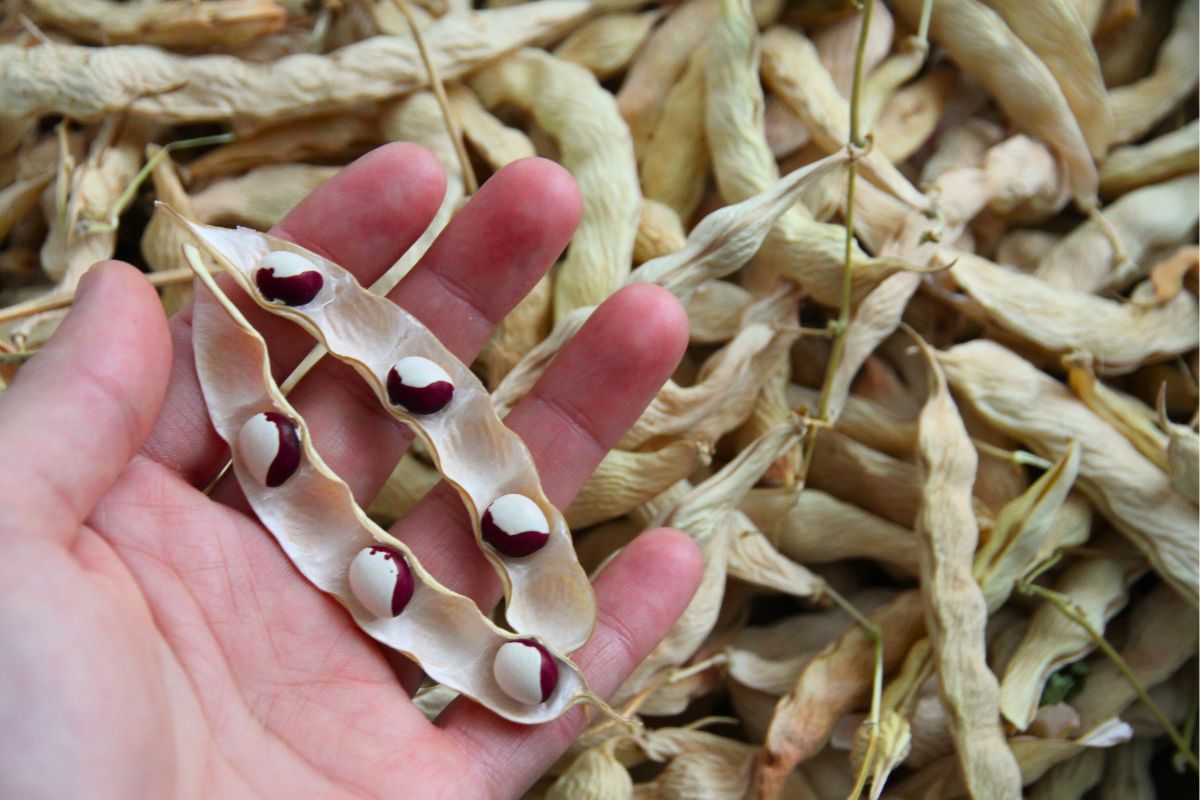
As a Dried Bean for Shelling
If you leave some (or all) of your beans on the vine, seeds will become plump and push out the walls of the pod. On average, there are about 6-8 seeds per pod.
If left on the vine, pods will grow very fat and begin to loose color. Green pods fade into a dull yellow, while colorful pods will retain some of their original color.
When the beans have matured, the outside of your pod will begin the shrivel. If left on the vine long enough, pods will grow very brittle.
This is when you would (ideally) harvest them.
How to Harvest Shelling Beans
If a sudden and early frost comes, you can harvest the pods before they are fully dry. Just spread them in a warm, dry place and the natural dehydrating process will continue!
But if you're crunched for time, you don't have to pick beans from the vine. Folks with a large barn or shed can pull the entire plant up without picking the pods, and leave plants under shelter where beans will continue to dry.
When dealing with individual pods, it's a good idea to spread them out, so they have airflow. Otherwise you do run the risk of mold.
How to Thresh Dried Bean Pods
It's easy to harvest shelling beans! And actually, you can shell them while the pods are still fresh and moist, but I find dry pods make it much, much easier!
You can shell them out by hand while sitting near a wood stove on a lazy winter day. Or you can bundle them up in a burlap sack or flour sack, and beat them to break open the pods.
At this point, I really like shelling my beans by hand. After my garden is in, the urgent canning is done and life has slowed down, I like to gather a pail of dried beans in the pod and shell them out by the fire. There's no rush, and sometimes I don't get to until after Christmas!
That's part of the beauty of shelling beans. It truly is a low maintenance crop in the garden, and equally as low maintenance in the kitchen.
I hope you'll give them a try!